background image

C9800 MFP User’s Guide> 52

G

ETTING


STARTED

This section provides information to help you get started with 
using your MFP.

T

URNING

 O

FF

/O

N

T

URNING

 O

FF

1.

Printer unit

Press and hold down the 

Shutdown/Restart

 button (1) 

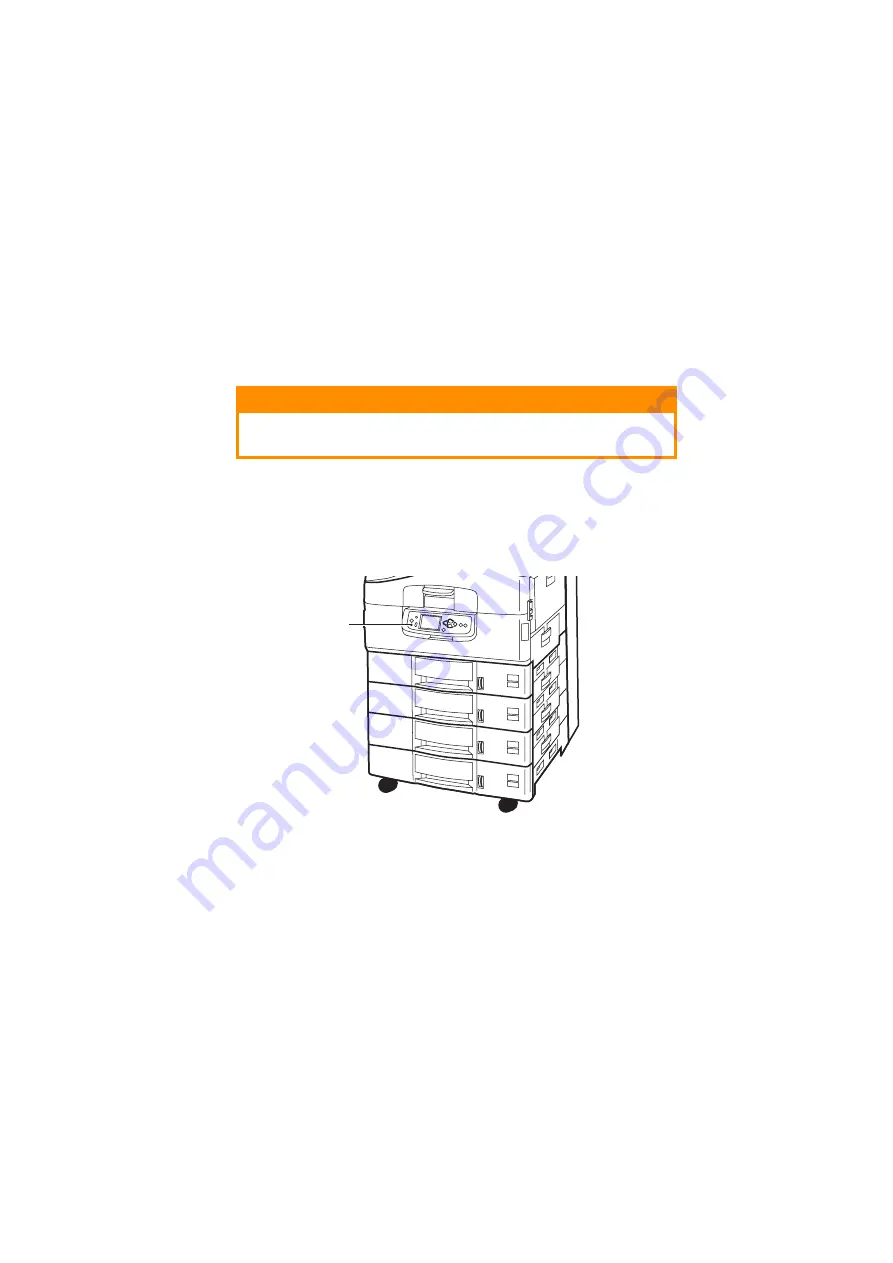
on the control panel to start the shutdown process.

CAUTION!

Do not turn off the scanner unit while scanning is in 
progress.

1

Summary of Contents for C9000 Series

Page 1: ...USER S GUIDE C9800 MFP C9800 GA MFP C9800 C9000...

Page 2: ...Printing Solutions Oki OKI Printing Solutions and Microline are registered trademarks of Oki Electric Industry Company Ltd ENERGY STAR is a trademark of the United States Environmental Protection Age...

Page 3: ...al equipment however there are a few basic precautions that should be taken to avoid injury or damage therefore please be careful to read and understand the safety warnings on the following pages befo...

Page 4: ...carefully and retained for future reference This product may be heavy Please check the weight of this product and take all necessary precautions to prevent any risk of personnel injury This product m...

Page 5: ...bel for full power rating details Ensure that you have a suitable power supply before connecting the product If in doubt contact your dealer or check with your local power provider Ensure both the pro...

Page 6: ...strip or extension cable should be used to connect to the mains wall outlet Ensure the power cable is routed so as not to be damaged or cause a trip hazard If the cable becomes frayed or damaged repla...

Page 7: ...nd electric shock do not use the power cable or power strip supplied with this product for any other electrical equipment If you do not connect the power cord or any other cables only as directed in t...

Page 8: ...liquid for example water is allowed to enter this product there is a risk of fire Unplug the mains connector and contact your dealer Do not place containers containing liquid on this product as elect...

Page 9: ...s product that are not specified in the User s Guide This may result in electric shock fire and or injury Do not touch the battery if one is fitted to the product There is a risk of explosion if the b...

Page 10: ...ent or injury Take care with toner powder If swallowed induce vomiting and seek medical attention Never attempt to induce vomiting if person is unconscious Take care with toner powder If inhaled move...

Page 11: ...n the following environmental operating conditions Temp 10 to 32 C Humidity 20 to 80 RH The acoustic noise level of this product is 70 dB A or less according to EN ISO 7779 Imported into the EU by Oki...

Page 12: ...inter unit control panel 44 Buttons and lights 45 Display Panel messages 46 Display Panel messages 48 Using the menus 48 Scanner unit control panel 49 Getting started 52 Turning Off On 52 Checking cur...

Page 13: ...x 114 Maintenance scanner unit 117 Cleaning the ADF 117 Cleaning the Touch Screen Display 118 Cleaning the document glass 118 Replacing the snap in pad module 119 Optional accessories 122 Accessory or...

Page 14: ...ection paper sizes 188 Flatbed document glass 188 ADF 189 Appendix F Scanner unit setup details 190 Setting up address books 190 Setting up mailboxes 191 Setting up machine parameters 191 Setting up c...

Page 15: ...software Graphic Arts capability with full suite of EFI utilities including Spot On and Hot Folder support C9800 GA MFP only Ask Oki a brand new user friendly function that gives a direct link from y...

Page 16: ...re that it performs at its best Additionally information is provided for adding optional accessories as your needs evolve This is an electronic document stored on CD3 Printing Guide for Windows and Ma...

Page 17: ...kmarks down the left hand side of your screen click on the topic of interest to jump to the required topic If the bookmarks are not available use the Contents on page 12 In the list of bookmarks click...

Page 18: ...ure is 1 From the toolbar select File then Print or press the Ctrl P keys 2 Choose which pages you wish to print a All pages 1 for the entire manual b Current page 2 for the page at which you are look...

Page 19: ...C9800 MFP User s Guide 19 MFP OVERVIEW IDENTIFYING SYSTEM UNITS 1 Printer unit with high capacity feeder HCF 2 Scanner stand 3 Scanner unit 4 Finisher unit optional accessory 1 2 3 4...

Page 20: ...r 1 then raise the scanner to the limit of its travel Ensure the stand is locked into position 2 To open the top cover squeeze the top cover handle 1 to release the catch and raise the cover 1 1 CAUTI...

Page 21: ...ush gently 1 until the cover stops midway and then push harder 2 to close the cover completely Ensure that the cover is securely closed 4 Operate the scanner stand lever 1 then guide the scanner to it...

Page 22: ...nts of your printer unit are identified in the representations below 1 Paper holding arm 2 Top cover face down stacker 3 MP Tray multi purpose tray 4 Tray 1 side cover 5 Paper size label 6 Paper volum...

Page 23: ...C9800 MFP User s Guide 23 10 Face down stacker 11 Power on off switch 12 Face up stacker 13 Duplex unit 10 12 11 13...

Page 24: ...it 15 Network interface connector 16 Parallel interface connector 17 USB interface connector NOTE The three connectors at 17a are for printer unit to scanner unit interconnection 18 Power connector 19...

Page 25: ...artridge Cyan 21 Image drum cartridge and toner cartridge Magenta 22 Image drum cartridge and toner cartridge Yellow 23 Image drum cartridge and toner cartridge Black 24 Toner cartridge 25 Image drum...

Page 26: ...C9800 MFP User s Guide 26 28 Belt unit 29 Drum basket handle 30 Drum basket 28 29 30...

Page 27: ...C9800 MFP User s Guide 27 31 High capacity Feeder HCF 3 trays 31...

Page 28: ...major components of your scanner unit are identified in the representations below Front view 1 Automatic document feeder ADF front cover 2 ADF paper tray 3 ADF paper support 4 Document cover 5 Contro...

Page 29: ...printer unit 5 ADF port to connect the ADF cable 6 Data port to connect to printer unit 7 Power jack to connect to a power source 8 Power switch to turn the scanner on off SOFTWARE SUPPLIED CDs CD1 Dr...

Page 30: ...can be used but the ink must not offset when exposed to the high fuser temperatures used in the printing process Envelopes should be free from twist curl or other deformations They should also be of t...

Page 31: ...r Custom W 100 328mm L 148 457 2mm 64 216g m Any Tray Face up Stacker Custom W 79 2 328mm L 90 457 2mm 64 268g m MP Tray Face up Stacker Banner W A4 width L 457 2 1200mm 128g m recommended MP Tray Fac...

Page 32: ...and special media The multi purpose tray can handle the same sizes as the standard trays but in weights up to 268g m For very heavy paper stock use the face up paper stacker This ensures that the pap...

Page 33: ...f Face Down will successfully direct prints to the Face Down stacker The face up stacker can hold up to 250 sheets of 80g m standard paper and can handle stocks up to 268g m Always use this stacker an...

Page 34: ...ng Trays 1 to 4 Tray 1 is used in the following example 1 Pull out the tray 2 Press the paper rear stopper tab 1 and adjust the tab to the required paper size 3 Fan the paper to be loaded then tap the...

Page 35: ...on the paper guide and adjust the guides 3 for a snug fit to the paper To avoid paper jams Do not leave space between the paper and the guides and rear stopper Do not overfill the paper tray Capacity...

Page 36: ...C9800 MFP User s Guide 36 5 Gently push the tray back into the printer Using the MP Tray 1 Squeeze the handle 1 and open the multi purpose tray 1...

Page 37: ...out the paper support section and swivel out the extension supports 2 3 Adjust the paper guides 3 to the size of the paper being used 4 Fan the paper to be loaded then tap the edges of the stack on a...

Page 38: ...duplex printing on letterhead load the paper with pre printed side down and top edge away from the printer unit Envelopes should be loaded face up with long edge into the printer Do not select duplex...

Page 39: ...tacker 1 on the left side of the printer is closed its normal position paper is ejected to the face down stacker on the top of the printer unit Face up stacker The face up exit path is used for heavy...

Page 40: ...C9800 MFP User s Guide 40 2 Flip out the paper support 2 3 Swivel out the paper support extension 3 2 3...

Page 41: ...other surface unevenness are less then 100mm in width or less than 180mm in length Such documents may cause feed errors or skew in the ADF Loading the ADF For documents of size A4 the following orien...

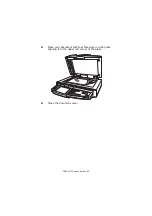
Page 42: ...ase the document gently into the ADF Loading the document glass flatbed For documents of size A4 the following orientation is recommended Copy Mode document face down top of the document toward the us...

Page 43: ...C9800 MFP User s Guide 43 2 Place your document with text face down on the glass aligning it to the upper left corner of the glass 3 Close the document cover...

Page 44: ...panels are complementary to each other and work together as component parts of the overall system For example a message on the scanner unit control panel will redirect you to the printer control panel...

Page 45: ...es ready to print Flashing indicates processing print data Off indicates unable to receive data offline 3 Attention light Off indicates normal operation Flashing indicates error s present but printing...

Page 46: ...ta 10 Cancel button Cancels current print job 11 Help button Provides additional textual or image data to supplement what is displayed on the display panel DISPLAY PANEL MESSAGES There are four types...

Page 47: ...Restart Available to administrator level users Restricts the changes that general users can make via the user menus System maintenance menu accessed by pressing the Up arrow and Down arrow buttons to...

Page 48: ...t of a selected consumable Many of these menu settings can be and often are overridden by settings in the Windows printer drivers However several of the driver settings can be left at Printer Setting...

Page 49: ...n Starts ends an LCD image adjustment feature OSD on screen display menu to adjust brightness contrast image position etc For further details refer to Appendix H Touch screen setup on page 199 2 Up ar...

Page 50: ...on Pressing this button selects copy mode on the touch screen 6 SCAN TO E MAIL button Pressing this button selects e mail send mode on the touch screen 7 SCAN TO NETWORK button Pressing this button se...

Page 51: ...ted when the scanner unit is on 15 RESET button Pressing this button returns all settings of a selected function to their default values but does not stop jobs in progress 16 STOP button Pressing this...

Page 52: ...rmation to help you get started with using your MFP TURNING OFF ON TURNING OFF 1 Printer unit Press and hold down the Shutdown Restart button 1 on the control panel to start the shutdown process CAUTI...

Page 53: ...Scanner unit When the scanner unit display shows that shut down has been completed turn off the scanner unit at the power switch 1 3 Use the On Off switch to turn off the printer unit Please wait as t...

Page 54: ...s that you can either turn off or restart the printer press Shutdown Restart to turn on the printer 2 If the printer is turned off no power use the On Off switch to turn on the printer Please wait as...

Page 55: ...te the command and a Configuration document is printed 8 After printing the configuration document the printer unit returns to the ready to print status 9 You can use this document to check your print...

Page 56: ...of connecting or turning on each printer unit Ethernet For network cable connection NOTE Interface cables are not supplied with your printer unit CONNECTING THE PARALLEL INTERFACE 1 Turn off the print...

Page 57: ...you are connecting your printer unit directly to a stand alone computer proceed to the section entitled Using the Drivers CD CONNECTING THE NETWORK INTERFACE 1 Turn off the printer unit and the compu...

Page 58: ...he printer interface 4 Turn on the printer unit and then the computer If your printer unit is to be installed as a network printer please refer to the relevant section in the Configuration Guide for f...

Page 59: ...and follow the on screen instructions You are prompted to follow a set of basic steps to configure the display panel language for both printer unit and scanner unit install drivers and other software...

Page 60: ...C9800 MFP User s Guide 60 PRINTING For full details of how to use the printer unit and any optional accessories to print jobs efficiently and effectively please refer to the Printing Guide...

Page 61: ...ntil you have provided a valid PIN and logged in After using it you will be expected to log out leaving the scanner unit in access control mode unable to be used by unauthorised users NOTE The PIN is...

Page 62: ...s the Login button 1 and the default Copy Mode screen appears the scanner unit now being available to use LOGGING OUT 1 When you have finished using the scanner unit press the Logout button 1 to retur...

Page 63: ...on page 181 The Status button 1 changes colour depending on the status of the MFP Blue ready status Orange warning status Red Alarm status 1 For detailed status information press the Status button to...

Page 64: ...a topic and then press the Go To button 1 2 Navigate and read the help information you need 3 At any time you can press the Maintenance button 1 to show the Dealer s Information screen for dealer cont...

Page 65: ...your request has been cancelled referring you to this guide To avoid an incompatibility such as the above make sure that your chosen image size fits on the media size in the selected printer unit tray...

Page 66: ...t Carry out the following steps 1 Copy Mode is the default function of the MFP If required press the COPY button on the scanner unit control panel to show the Copy Mode screen 2 Place the document to...

Page 67: ...o 5 5x8 5 5 5x8 5R 8 5x11 8 5x11R 8 5x13 8 5x14 11x17 A5 A5R A4 A4R A3 B5 B5R B4 Custom Allows you to select the paper size to match the document size 3 Tray Selection Auto Tray 1 Tray 2 Tray 3 Tray 4...

Page 68: ...djust the brightness levels for scanning and printing This is not applied disabled if Auto Exposure is set to ON 6 Colour Mode Color B W Allows you to select the colour mode of the output If Color is...

Page 69: ...c pre set optimization of image quality settings 2 N up OFF 2 Up 4 Up 8 Up Allows you to print multiple pages of the document to a single sheet of paper Layout orientation and image order is fixed If...

Page 70: ...e document cover open such as with books and magazines or for other purposes Center Metric 0 50mm in 1mm increments Inch 0 2 0 in 0 1 increments Allows you to block out a centred rectangular area of t...

Page 71: ...hen printing 2 Background Removal OFF 1 to 10 by 1 Allows you to block out the colour background of the image assuming document has a colour background such that the background colour is not printed 3...

Page 72: ...s is set to Vivid 5 Resolution Normal High Quality Allows you to select an appropriate balance between speed normal and quality high quality 6 Color Presets Normal Vivid Warm Cool Allows you to select...

Page 73: ...ion Right Position Allows you to select the punching options and sub options that will be applied to the document 3 Face up down Face up Face down Allows you to select the output placement and stackin...

Page 74: ...ocument is scanned and the data is saved in the hold queue NOTE Additional features involving for example the Fiery Remote Scan tool or Web Scan Tool for accessing files in the mailbox are described i...

Page 75: ...START These steps are expanded below 1 Press the SCAN TO E MAIL button to display the E mail Send Mode screen at the Address tab 2 Press the To button 1 and enter an e mail address via one of the foll...

Page 76: ...Touch on an e mail address to select it b Press the Add button 1 to add this address to the list c Repeat a and b as required to create the address list d Press the OK button 2 to place the list of a...

Page 77: ...a Press the User ID button 1 and enter your user ID via the soft keyboard then press the OK button b Press the Password button 2 and enter your password via the soft keyboard then press the OK button...

Page 78: ...rd then press the OK button e Press the Next button 3 f Select an address from the list displayed and press the Add button 4 to add this address to your destination list g Repeat f as required to crea...

Page 79: ...a Enter an address via the soft keyboard b Press the Add button 1 to add this address to the list c Repeat a and b as required to create the address list d Press the OK button 2 to place the list of a...

Page 80: ...ess the Recipient Name button 2 enter a recipient name via the soft keyboard then press the OK button c Press the OK button 3 3 Repeat Step 2 as required with the cc and Bcc buttons on the Address tab...

Page 81: ...C9800 MFP User s Guide 81 5 Touch the Message Text tab press the Edit Message button 1 enter your e mail message via the soft keyboard and press the OK button 1...

Page 82: ...0 200 300 400 600dpi Color Mode 3 Color Grayscale B W File Format 4 JPEG PDF TIFF Sides 5 Single Top Top Top Bottom Allows you to define simplex or duplex and the duplex orientation of front and back...

Page 83: ...B5R B4 Allows you to select the scanned document size 2 Original Type Mixed Text Photo Allows you to specify the type of images on the document This allows automatic pre set optimization of image qua...

Page 84: ...to block out the peripheral areas of the document where spurious shadows and borders may arise when scanning with the document cover open such as with books and magazines or for other purposes Center...

Page 85: ...d On the Attachments tab define your attachment properties using the Advanced Settings features as required e Set your document on the scanner unit and press START These steps are expanded below 1 Pr...

Page 86: ...C9800 MFP User s Guide 86 Server List a Touch on an FTP server name to select it b Press the OK button 1 to place the name in the FTP Server Name box on the FTP Server tab 1...

Page 87: ...oard Use the soft keyboard and respective buttons to enter the following host information a Basic Information tab Server name 1 Path 2 User Name 3 Password 4 b Extensions tab Port Number 1 Timeout 2 R...

Page 88: ...User s Guide 88 c Proxy Information tab Server Name 1 User Name 2 Password 3 Port Number 4 d Press the OK button 5 to enter the data and place the name in the FTP Server Name box on the FTP Server tab...

Page 89: ...ton b Use the following features as required Resolution 2 150 200 300 400 600dpi Color Mode 3 Color Grayscale B W File Format 4 JPEG PDF TIFF Sides 5 Single Top Top Top Bottom Allows you to define sim...

Page 90: ...you to select the scanned document size 2 Original Type Mixed Text Photo Allows you to specify the type of images on the document This allows automatic pre set optimization of image quality settings 3...

Page 91: ...ut the peripheral areas of the document where spurious shadows and borders may arise when scanning with the document cover open such as with books and magazines or for other purposes Center Metric 0 5...

Page 92: ...automatically These steps are expanded below 1 Press the SCAN TO NETWORK button to display the Network Send Mode screen 2 Press the Remote Tool button 1 to enter PC Remote Scan mode in the Off Line s...

Page 93: ...ument on the scanner unit f Press the START button on the Scanner Unit control panel PROPERTY MAILBOX HOLD QUEUE Description Simple file server in the printer unit hard disk drive A print queue in the...

Page 94: ...low 1 Press the SCAN TO MAILBOX button to display the Mailbox Send Mode screen 2 Press the Mailbox button 1 set by default 3 On the Mailbox tab enter the Mailbox name via one of the following buttons...

Page 95: ...ct it c Press the OK button 1 to begin to enter the name in the Mailbox Name box on the mailbox tab d To see a list of the files in the selected mailbox press the File List button 2 e Enter the passwo...

Page 96: ...96 Direct Search a Press the Direct Search button b Use the soft keyboard to enter a mailbox name then press the OK button 1 c Use the soft keyboard to enter the associated mailbox password button the...

Page 97: ...ia the soft keyboard then press the OK button c Press the Password button 2 enter a password for the new mailbox via the soft keyboard then press the OK button d Press the OK button 3 4 If you wish to...

Page 98: ...ress the OK button b Use the following features as required Resolution 2 150 200 300 400 600dpi Color Mode 3 Color Grayscale B W Sides 4 Single Top Top Top Bottom Allows you to define simplex or duple...

Page 99: ...you to select the scanned document size 2 Original Type Mixed Text Photo Allows you to specify the type of images on the document This allows automatic pre set optimization of image quality settings 3...

Page 100: ...ral areas of the document where spurious shadows and borders may arise when scanning with the document cover open such as with books and magazines or for other purposes Center Metric 0 50mm in 1mm inc...

Page 101: ...on the Scanner Unit control panel These steps are expanded below 1 Press the SCAN TO MAILBOX button to display the Mailbox Send Mode screen 2 Press the Hold Queue button 1 3 On the Hold Queue tab 2 ch...

Page 102: ...ress the OK button b Use the following features as required Resolution 2 150 200 300 400 600dpi Color Mode 3 Color Grayscale B W Sides 4 Single Top Top Top Bottom Allows you to define simplex or duple...

Page 103: ...you to select the scanned document size 2 Original Type Mixed Text Photo Allows you to specify the type of images on the document This allows automatic pre set optimization of image quality settings...

Page 104: ...azines or for other purposes Center Metric 0 50mm in 1mm increments Inch 0 2 0 in 0 1 increments Allows you to block out a centred rectangular area of the document where spurious shadows and borders m...

Page 105: ...maintenance item is left by using the appropriate menus For example enter the menu system and follow the path Configuration Supplies Life Cyan Toner The percentage of Cyan Toner remaining is displayed...

Page 106: ...K toner 15 000 A4 pages 5 43112702 Image drum Black 30 000 A4 pages avg 42918108 Image drum Cyan 30 000 A4 pages avg 42918107 Image drum Magenta 30 000 A4 pages avg 42918106 Image drum Yellow 30 000 A...

Page 107: ...osed with each replacement toner cartridge if printing is showing signs of faded images white stripes or blurred letters You can use a LED lens cleaner or dry soft cloth for cleaning the LED heads 1 R...

Page 108: ...ens cleaner or soft cloth gently wipe each of the four heads 1 Move the cleaner as shown using a clean section of the cleaner with each pass Be careful not to damage the guards 2 3 Close the printer u...

Page 109: ...ANING THE PAPER FEED ROLLERS Clean the paper feed rollers if paper jams frequently occur 1 Remove items like a wrist watch or bracelet then use the Shutdown Restart button followed by the On Off switc...

Page 110: ...C9800 MFP User s Guide 110 2 Open Tray 1 side cover and pull out the paper guide plate 1 3 Remove Tray 1 completely from the printer unit 1...

Page 111: ...C9800 MFP User s Guide 111 4 Gaining access through the gap left by Tray 1 wipe the 3 paper feed rollers 2 with a soft cloth lightly moistened with water 5 Replace Tray 1 2...

Page 112: ...C9800 MFP User s Guide 112 6 Return the paper guide plate to its original position and close Tray 1 side cover 7 Turn on the printer unit...

Page 113: ...ING 1 Turn the printer unit off by using the Shutdown Restart button followed by the On Off switch 2 Wipe the printer unit surface with a soft cloth moistened sparingly with water or neutral detergent...

Page 114: ...printer unit EMPTYING THE PUNCH CHIP BOX Punch unit optional accessory When the display panel indicates that the punch chip box is full empty the box as follows 1 Operate the Finisher lever and move...

Page 115: ...User s Guide 115 2 Pull out the punch chip box being careful to keep it level so as not to spill any chips 3 Discard the chips in an appropriate place 4 Replace the punch chip box carefully into the...

Page 116: ...C9800 MFP User s Guide 116 5 Check that the punch chip box has been replaced correctly then move the Finisher back into position being careful not to trap your fingers...

Page 117: ...re below 1 Moisten a cotton swab with isopropyl alcohol 95 2 Press down the ADF release button 1 and open the ADF front cover 2 3 Wipe the feed rollers 3 by moving the swab from side to side 4 Rotate...

Page 118: ...E DOCUMENT GLASS The document glass needs to be cleaned occasionally to ensure optimum image quality and performance Clean the glass as follows 1 Open the document cover 1 2 Moisten a soft clean cloth...

Page 119: ...ng approximately 100 000 pages through the ADF the pad may become worn and you may experience problems with document feeding In this case you are recommended to replace the pad module by a new one Rep...

Page 120: ...the ADF snap in pad module inward with your fingers and pull out the ADF snap in pad module INSERTING A NEW SNAP IN PAD MODULE 1 Remove the new snap in pad module from its box 2 Press both arms of th...

Page 121: ...C9800 MFP User s Guide 121 3 Push the snap in pad module into the hole until it snaps into place...

Page 122: ...sher functionality ACCESSORY ORDER INFORMATION INSTALLING ACCESSORIES NOTE The Finisher and Punch unit must be installed by an authorized engineer For the following accessories you have to make the ap...

Page 123: ...e following paragraphs describe actions to take in the event of a paper jam and how to deal with unsatisfactory print results Display panel messages about paper jams and relevant actions are given in...

Page 124: ...C9800 MFP User s Guide 124 1 Squeeze the catch 1 on Tray 1 side cover and open the cover 2 Holding it by the tab 2 turn the paper guide outward 3 Carefully remove the jammed paper 1 2...

Page 125: ...C9800 MFP User s Guide 125 4 Put the paper guide back into position and close Tray 1 side cover OPEN COVER PAPER JAM SIDE COVER 1 If the MP Tray is open close it so that the side cover 1 is visible 1...

Page 126: ...C9800 MFP User s Guide 126 2 Pull the release lever 2 and pull open the side cover 3 Carefully remove the jammed paper 2...

Page 127: ...7 4 Close the side cover OPEN COVER PAPER JAM TOP COVER 1 Raise the scanner unit squeeze the printer unit top cover handle 1 and open the top cover 1 WARNING Be careful not to touch the fuser unit whi...

Page 128: ...ove any paper on the belt 4 If paper is jammed in the fuser unit push the lock lever 3 in the direction shown to release the unit WARNING Be careful not to touch the fuser unit which may be hot after...

Page 129: ...C9800 MFP User s Guide 129 Holding the fuser unit 4 by the handle lift it out of the printer unit and place it on a flat surface 5 Pull up the jam release levers 5 and remove the jammed paper 4 3 5...

Page 130: ...s Guide 130 6 Carefully replace the fuser unit into the printer unit and turn the lock lever 6 in the direction shown to lock the fuser unit 7 If paper is jammed near the paper exit open the face up...

Page 131: ...C9800 MFP User s Guide 131 8 Open the side cover paper exit 8 and remove the jammed paper 9 Close the side cover paper exit and then the face up stacker 8...

Page 132: ...C9800 MFP User s Guide 132 10 Return the image drum basket 9 into position and check it is locked 11 Close the printer unit top cover and ensure it is latched then lower the scanner unit 9...

Page 133: ...P User s Guide 133 PAPER JAMS DUPLEX UNIT CHECK DUPLEX UNIT PAPER JAM 1 If a Finisher unit is attached to your printer unit operate the lever 1 of the Inverter unit to separate the Inverter from the p...

Page 134: ...C9800 MFP User s Guide 134 2 Operate the duplex cover release button 2 and open the cover 3 Carefully remove any jammed paper then close the cover 2...

Page 135: ...C9800 MFP User s Guide 135 4 Operate the levers 3 and pull out the duplex unit 5 Holding the front top cover by the grip 4 push it gently inwards and raise it 3 3 4...

Page 136: ...C9800 MFP User s Guide 136 6 Remove any jammed paper 7 In similar manner check for and clear any paper jammed under the rear top cover...

Page 137: ...C9800 MFP User s Guide 137 8 Replace the two top covers 9 Push the duplex unit back into position...

Page 138: ...C9800 MFP User s Guide 138 10 If you detached a Finisher unit to gain access to the duplex unit replace the Finisher unit...

Page 139: ...ol panel to check the number displayed You will need this to be able to clear the paper jam The following paragraphs explain what to do for each of the indicated numeric codes 591 592 593 599 643 645...

Page 140: ...C9800 MFP User s Guide 140 3 Open the Finisher top cover 4 Carefully remove any jammed paper 5 Close the Finisher top cover...

Page 141: ...P User s Guide 141 6 Move the Finisher back into position and connect it to the Inverter 594 597 598 644 646 PAPER JAM IN FINISHER 1 Operate the Finisher lever 1 and move the Finisher away from the In...

Page 142: ...C9800 MFP User s Guide 142 2 Open the Finisher front cover 2 3 Continue to turn the lower knob 3 clockwise until any jammed paper is completely ejected 4 Remove the ejected paper 2 3...

Page 143: ...C9800 MFP User s Guide 143 5 Close the Finisher front cover 6 Open the Finisher right side cover 7 Carefully remove any jammed paper...

Page 144: ...C9800 MFP User s Guide 144 8 Close the Finisher right side cover 9 Move the Finisher back into position and connect it to the Inverter...

Page 145: ...590 PAPER JAM IN FINISHER PUNCH UNIT 1 Operate the Finisher lever 1 and move the Finisher away from the Inverter 2 Move the tab 2 on the right side of the Finisher to align it with the mark 3 3 Open t...

Page 146: ...C9800 MFP User s Guide 146 4 Carefully remove any jammed paper 5 Close the Finisher top cover 6 Move the Finisher back into position and connect it to the Inverter...

Page 147: ...0 MFP User s Guide 147 CHECK INVERTER PAPER JAM 1 Operate the Finisher lever 1 and move the Finisher away from the Inverter 2 Squeeze the recessed handle 2 and open the left side cover of the Inverter...

Page 148: ...C9800 MFP User s Guide 148 3 Carefully remove any jammed paper 4 Close the Inverter left side cover 5 Move the Finisher back into position and connect it to the Inverter...

Page 149: ...C9800 MFP User s Guide 149 6 Operate the Inverter lever 3 and separate the Inverter from the printer 7 Open the right side door 4 of the Inverter 3 4...

Page 150: ...C9800 MFP User s Guide 150 8 Remove any jammed paper 9 Close the right side door 10 Move the Finisher and Inverter back into position and connect to the printer unit...

Page 151: ...opriate media Decurled media can be used Your print media sheets are not aligned with each other Remove the sheets jog them into alignment and reload them Your print media is not aligned properly in t...

Page 152: ...loth The toner is low Replace the toner cartridge The paper is not suitable for the printer unit Use recommended paper Printing is light The toner cartridge is not properly seated Reinstall the toner...

Page 153: ...artridge if the problem is not resolved White area of paper is lightly stained Paper contains static Use paper stored in proper temperature and humidity conditions Too thick paper is used Use thinner...

Page 154: ...over at 3 and carefully pull out the jammed paper Close the document cover 5 Close the ADF front cover 6 Ensure that all jammed paper has been totally removed before proceeding NOTE In the event of an...

Page 155: ...OPTIONAL ACCESSORY CHECK FINISHER STAPLE JAM When the printer unit display indicates a staple jam has occurred clear the jam as follows 1 Open the Finisher front cover 2 Turn the knob in the direction...

Page 156: ...C9800 MFP User s Guide 156 3 Remove any paper that awaits stapling in the paper ejection area 4 Pull out the staple unit...

Page 157: ...800 MFP User s Guide 157 5 Turn the knob in the direction indicated to move the stapler to the front 6 Grip both sides of the staple cartridge pull it up and remove it 7 Raise the staple cartridge gat...

Page 158: ...C9800 MFP User s Guide 158 8 Remove all staples that are emerging from the staple case 9 Return the staple cartridge gate to its original position 10 Replace the staple cartridge...

Page 159: ...User s Guide 159 11 Ensure that the staple cartridge is securely installed back into the staple unit then push the staple unit fully home 12 Close the Finisher front cover being careful not to trap yo...

Page 160: ...Paper output Face down stacker 500 sheets Face up stacker 250 sheets Interfaces Parallel USB 2 0 10Base T and 100Base TX Duty cycle 150 000 pages month maximum Toner life 15 000 A4 pages 5 coverage I...

Page 161: ...ter Input 100 240V 50 60Hz Output 24V DC 2 09A Operating environment Operating 10 35 C 20 80 RH Off 20 70 C 0 90 RH Scanning speed ADF 35ppm 48ipm 300dpi greyscale A4 LEF Scanning area ADF 10 2x12 8cm...

Page 162: ...accessory Invalid Data Press ONLINE Button Invalid data has been received by the printer Press the ONLINE button to clear this warning Change Paper in tttttt mmmmmm pppppp Press ONLINE button Please s...

Page 163: ...a paper jam has been cleared Open tttttt side cover to check for additional paper You can access help details by pressing the HELP button Check Image Drum cccccc Please see HELP for details Check that...

Page 164: ...es provided or a command that can be executed to display or print a status or setting value Emboldened values followed by an A denote default values associated with locations where A4 is default paper...

Page 165: ...Page nnnnnn Displays number of monochrome printed pages converted to A4 equivalent Traym nnnnnn Displays total printed pages from Traym where m is in range 1 to 4 MP Tray nnnnnn Displays total printe...

Page 166: ...he xxxx drum as a percentage where xxxx can be Cyan Magenta Yellow Black Belt Remaining nnn Displays the remaining life span of the belt unit as a percentage Fuser Remaining nnn Displays the remaining...

Page 167: ...om Displays detected paper size of Traym MP Tray Similar to values for Traym Displays detected paper size of the MP Tray ITEM VALUE DESCRIPTION Serial Number xxxxxxxxxxxxxxx Displays serial no of the...

Page 168: ...ton to select this menu 4 Press the Up arrow or Down arrow buttons repeatedly until Print Page Count is highlighted 5 Press the Enter button to select this Item 6 Press the Up arrow or Down arrow butt...

Page 169: ...og details Color Charts disk only Execute Prints colour charts PS Font List Execute Prints PostScript font list PCL Font List Execute Prints PCL emulation font list Demo Page Execute Prints a demo pag...

Page 170: ...s PRINT SECURE JOB ITEM VALUE DESCRIPTION Enter Password nnnn Enter a password to use secure printing Not Found Use a secure printing job Secure Job or a job Stored to HDD when printing When you print...

Page 171: ...ilar arrangement for all trays Paper Size Tray Size Custom Sets paper in Traym X Dimension 3 9 8 3 A 8 5 L 12 9 inch 100 210 A 216 L 328 mm Sets Custom paper width for Traym Sets for the direction per...

Page 172: ...er detects A3 Nobi A3 Wide and Tabloid Extra sizes as the same Use this setting to tell the printer which of the three sizes is loaded in Traym Legal 14 Paper Legal 14 Legal 13 5 Sets the length of th...

Page 173: ...nvelope Com 10 Envelope Monarch Envelope DL Envelope C5 C4 Index Card Sets paper size for MP Tray X Dimension 3 8 3 A 8 5 L 12 9 inch 76 210 A 216 L 328 mm Sets Custom paper width for the MP Tray Sets...

Page 174: ...ght Medium Light Medium Medium Heavy Heavy Ultra Heavy 1 Ultra Heavy 2 Ultra Heavy 3 Sets the media weight for MP Tray Tray Usage Normal Tray Tray selection switching uses this tray as the normal tray...

Page 175: ...tically clear when a new print job is received Auto Continue ON OFF Sets whether the printer is automatically recovered when Memory Overflow or Tray Request occurs Manual Timeout OFF 30 sec 60 sec If...

Page 176: ...has been cleared OFF Cancels a job including the page currently jammed Print Position Adjust X Adjust 0 00 0 25 2 00 2 00 0 25 mm 0 00 0 01 0 08 0 08 0 01 in Adjusts the position of the whole printin...

Page 177: ...ip side printing of duplex printing adjusts the location of the whole printing image 0 25 mm 0 01 in interval parallel to the direction of paper movement i e vertically xxxx Darkness 0 1 3 4 1 Adjusts...

Page 178: ...print results or light specks or streaks result when printing in Plain Paper Color setting Decrease the value if light specks or streaks or snow flake like printing results in high density print areas...

Page 179: ...ration is highlighted 5 Press the Enter button to select this Item 6 Press the Up arrow or Down arrow buttons repeatedly until Tray1 Config is highlighted 7 Press the Enter button to select this Item...

Page 180: ...ighted 5 Press the Enter button to select this Item 6 Press the Up arrow or Down arrow buttons repeatedly until MP Tray Config is highlighted 7 Press the Enter button to select this Item 8 Press the U...

Page 181: ...t A scanner image is also provided to help indicate where a scanner unit problem has occurred In the case of a printer unit problem you are redirected to the printer unit control panel for more detail...

Page 182: ...sided printing Booklet N N up printing F Fit to page Paper input locations A Auto T1 to T4 Trays 1 to 4 MPT Multi purpose Tray Paper output locations FUS Face up stacker FDS Face down stacker FFUS Fin...

Page 183: ...ejection possible but no print guarantee Y2 Short Edge Feed SEF only Y3 Media output route is limited by size and an error message may result Y4 Feed direction is determined by the print orientation P...

Page 184: ...Y Y Y Y Legal 13 5in Y Y Y Y Y Y Y Y Y Legal 13in Y Y Y Y Y Y Y Y Y Executive Y Y Y Y Y Y Y Y Y Tabloid Y Y Y Y Y Y Y Y Y Tabloid Extra Y Y Y Y Y Y Y Y Y A3 Nobi Y Y Y Y Y Y Y Y Y A3 Wide Y Y Y Y Y Y...

Page 185: ...Y Letter LEF Y Y Y Y Y Y Y Y Y Letter SEF Y Y Y Y Y Y Y Y Y MEDIA SIZE B N F A T1 T2 T3 T4 M MEDIA SIZE FUS FDS A3 Y Y A4 Y Y A5 Y Y A6 Y Y B4 Y Y B5 Y Y Letter Y Y Legal 14in Y Y Legal 13 5in Y Y Le...

Page 186: ...Y Letter SEF Y Y MEDIA SIZE FUS FDS MEDIA SIZE F F U S F F D S 2 H T 4 H T 2 H L R 4 H L R T L T R T 2 L 2 R 2 S S A3 Y Y Y Y Y Y Y Y Y Y Y Y A4 Y Y Y4 Y5 Y4 Y5 Y4 Y4 Y4 Y4 Y4 Y2 A5 Y Y N N N N N N N...

Page 187: ...N N N N N N N N N N C4 N N N N N N N N N N N N C5 Y1 N N N N N N N N N N N Com 10 N N N N N N N N N N N N Com 9 N N N N N N N N N N N N Monarch N N N N N N N N N N N N Custom Y3 Y 3 N N N N N N N N N...

Page 188: ...ed out by the user FLATBED DOCUMENT GLASS PAPER TYPE PAPER SIZE MM PAPER SIZE INCH A3 290 x 420 11 69 x 16 54 A4 SEF 210 x 297 8 27 x 11 69 A4 LEF 297 x 210 11 69 x 8 27 A5 SEF a 148 x 210 5 83 x 8 27...

Page 189: ...11 69 A4 LEF 297 x 210 11 69 x 8 27 A5 SEF a 148 x 210 5 83 x 8 27 B4 SEF 257 x 364 10 12 x 14 33 B5 SEF 182 x 257 7 17 x 10 12 B5 LEF 257 x 182 10 12 x 7 17 b 140 x 216 5 5 x 8 5 Letter SEF b 216 x 2...

Page 190: ...OOKS Press the Address Book button 1 to gain access to the following E Mail Address Book Add Edit Delete Search e mail addresses up to 500 entries Import from LDAP Server Search for e mail addresses f...

Page 191: ...t the time after which power save mode will operate 5 15 30 60 240min Sound Control Key Touch Tone Volume Set to OFF Low High Buzzer Volume Set to OFF Low High Press the Save Return button to return t...

Page 192: ...SETTING UP SCAN PROPERTIES Press the Scan Properties Setup button 5 to gain access to the following Original Settings Original Size Define default paper size of original data for SCAN TO EMail SCAN TO...

Page 193: ...digits of ID for Job Accounting The PIN is provided by the Job Accounting Utility Scan to E Mail Enable disable SCAN TO E MAIL Scan to FTP Enable disable SCAN TO FTP Proxy Settings Server Name Set FT...

Page 194: ...ed out Secure Protocol Authentication method for MS Active Directory User ID Password and Domain can be set here in advance or left blank If they are not set here user should set them when E Mail addr...

Page 195: ...urity If ON is selected and the administrator password is set the password authentication is carried out before all operations to access LDAP server If OFF is selected the password authentication is n...

Page 196: ...PAD counter Total number of pages handled by the document feeder Document Feeder Simplex The number of pages scanned as single sided Document Feeder Duplex The number of pages scanned as double sided...

Page 197: ...erver check that the following are configured correctly CATEGORY ITEM COMMENT Printer unit Admin Setup Network Setup Service Setup E mail Setup Enable E mail Services Must be Yes Outgoing server Must...

Page 198: ...T Printer unit Admin Setup Network Setup TCP IP Setup DNS Setup Must be specified correctly to access DNS server Admin Setup Server Setup System Date Must be adjusted to LDAP server s date System Time...

Page 199: ...unit On the scanner unit control panel press the Menu button 1 to display the OSD then press the Up arrow 2 or Down arrow 3 buttons to reach the required function Press the Menu button use the Up arro...

Page 200: ...ally Up arrow button moves image to right Down arrow button moves image to left 7 Vertical Position Moves the display image vertically Up arrow button moves image upwards Down arrow button moves image...

Page 201: ...Ethernet 56 57 parallel 55 56 USB 55 57 M maintenance items order details 106 replacing 105 menu Admin Setup 164 Calibration 164 Configuration 164 165 Menus 164 171 Print Information 169 Print Pages...

Page 202: ...n to mailbox 93 scanner unit copy settings 66 help 64 log in 61 log out 62 scanning 74 status 63 shutdown restart button 45 software 29 specifications 160 T troubleshooting 123 turning off 52 on 54 U...

Page 203: ...poration 4 11 22 Shibaura Minato ku Tokyo 108 8551 Japan Tel 81 3 5445 6158 Fax 81 3 5445 6189 http www okidata co jp Oki Data Singapore Pte Ltd 78 Shenton Way 09 01 Singapore 079120 Tel 65 221 3722 F...

Page 204: ...Oki Europe Limited Central House Balfour Road Hounslow TW3 1HY United Kingdom Tel 44 0 208 219 2190 Fax 44 0 208 219 2199 www okiprintingsolutions com 07062601 iss 2...

Reviews: