


An overlay is a group of forms. You can register three IDs (form files) to an overlay.
The forms, or overlay, are overlaid in the order of registration.
6.
For [Print on Pages], select the pages to which the overlay is applied. To apply an overlay by specifying
the pages, select [CUSTOM], and then enter the pages to which to apply the overlay in [Custom
Pages].
7.
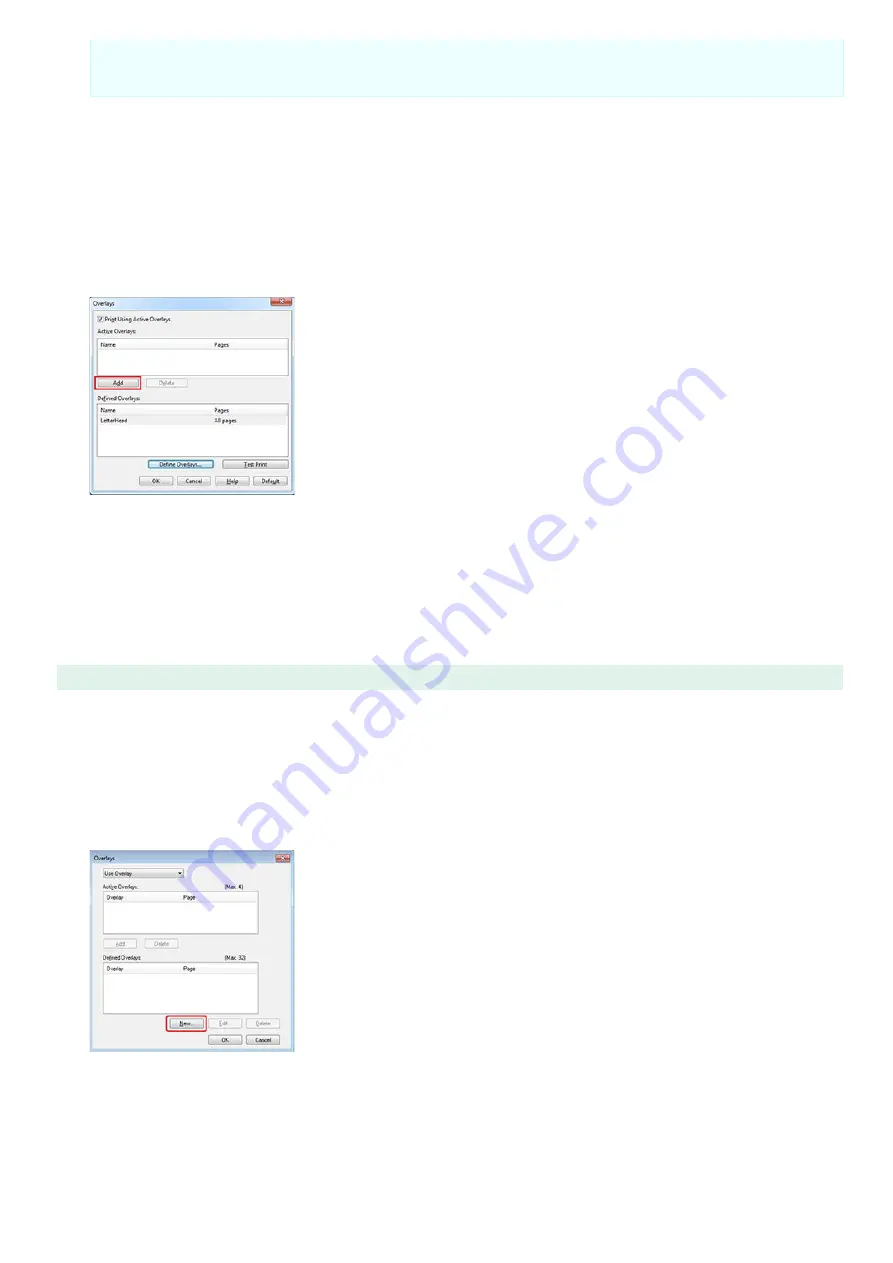
Click [Add].
8.
Click [Close].
9.
Select an overlay to use from the defined overlays, and then click [Add].
10.
Click [OK].
11.
Change other settings if necessary, and then click [OK].
The [Printing Preferences] screen closes.
12.
Click [Print] on the [Print] screen.
Printing starts.
For Windows PS Printer Driver
1.
Click [Start], and then select [Devices and Printers].
2.
Right-click the [OKI B432(PS)] icon, and then select [Printing Preferences].
3.
Click [Overlays] on the [Job Options] tab, and then select [Use Overlay].
4.
Click [New].
5.
Enter the form name that you registered with the Storage Manager plug-in in [Form Name], and then
click [Add].
6.
Enter a name in [Overlay Name], and then select from [Print on Pages] the pages to which the overlay
is applied. To apply an overlay by specifying the pages, select [Custom], and then enter the pages to
which the overlay is applied in [Custom Pages].
75
Summary of Contents for B412dn
Page 1: ...User s Manual B412dn B432dn B512dn ES4132dn ES5112dn 2015 03 45822052EE03 ...
Page 83: ...82 ...
Page 85: ...4 Change other settings if necessary and then click Print Printing starts 84 ...
Page 92: ...91 ...
Page 95: ...94 ...
Page 97: ...Printing starts 96 ...
Page 102: ...101 ...
Page 147: ...4 Change settings 146 ...
Page 150: ...149 ...
Page 157: ...4 Set options 5 Click Print 156 ...
Page 169: ...168 ...
Page 179: ...178 ...
Page 225: ...224 ...
Page 230: ...229 ...
Page 298: ...Advanced Boot Menu About Administrator Menu Items and Functions in the Printer BOOT MENU 297 ...
Page 300: ...PRINT SECURE JOB PRINT SECURE JOB STORED JOB 299 ...
Page 309: ...AirPrint AirPrint 308 ...
Page 312: ...ENABLING WIRED ENABLING WIRED 311 ...
Page 326: ...Memo You can check the details of recorded logs in Log details 325 ...
Page 331: ...330 ...
Page 368: ...367 ...
Page 371: ...The printer network card restarts 370 ...
Page 377: ...376 ...
Page 380: ...The printer restarts 14 When a setting completion message is displayed click OK 379 ...
Page 396: ...395 ...
Page 399: ...398 ...
Page 416: ...5 Close the top cover 415 ...
Page 423: ...422 ...
Page 431: ...430 ...
Page 441: ...440 ...
Page 457: ...5 Insert the other end of the LAN cable into the hub 6 Turn the printer on 456 ...
Page 497: ...2 Click Print Scan 3 Click 4 Click IP 5 Select Line Printer Daemon LPD for Protocol 496 ...
Page 502: ...For Your Safety Cautions related to safety General cautions 501 ...
Page 524: ...12 Click Submit The settings are saved to the printer and the network function restarts 523 ...
Page 527: ...12 Click Submit The settings are saved to the printer and the network function restarts 526 ...
Page 630: ... At the Letter paper A4 423mm Legal14 481mm 629 ...
Page 634: ...633 ...
Page 637: ......