

X-Series
Quick Install Guide
For full installation guide and
warranty information, go to
www.oceanled.com/XSeries
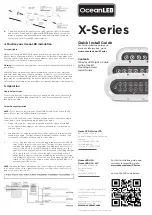
Contents
X-Series LED Light & Cable
In-line fuse kit
Mounting Screws
Install Guide
© 2017 Ocean LED Marine LTD
All Rights Reserved
Specifications are subject to change
without notice.
Trademarks are the property of
Ocean LED Marine LTD
www.oceanled.com
Ocean LED Marine LTD
Unit 1 Jacknell Road
Dodwells Bridge Industrial Estate
Hinckley,
Leicestershire LE10 3BS
United Kingdom
Tel: +44 (0) 1455 637505
[email protected]
OceanLED USA
OceanLED USA LLC
778 South Military Trail
Deerfield Beach
Florida
Tel: +1 954.523.2250
[email protected]
For full installation guide and
warranty information, go to
www.oceanled.com/XSeries
or scan the QR code below:
OceanLED INSTALL GUIDE / X Series / 050117 / v7.0
4.
Cable tie up wire ensuring where the cable exits the light it is not under
undue stress. Finish and test light units BEFORE the boat goes into the
water. If you have any issues and need troubleshooting advice, please
contact your local OceanLED representative.
4. Finalize your OceanLED installation
Test your lights
Always test the lights BEFORE the boat goes back into the water. Failure to test
prior to launch may require boat to re hauled out. At this final stage make sure
all of the system is operational (see online manual). If you have any issues, please
contact your local OceanLED representative.
Warning:
Never install a new light and leave the boat in the water unchecked for
several days.
When the boat is placed in the water, immediately check for leaks. Note that
very small leaks may not be readily observed. It is best not to leave the boat in
the water for more than 3 hours before checking it again. If there is a small leak,
there may be considerable bilge water accumulation after 24 hours. If a leak is
observed you must take action immediately to prevent damage to the property.
5. Operation
Single Colour Strobe
To enter strobe mode, toggle the power on and off quickly twice. They should
now strobe in a pseudo-random pattern. To reset from strobe mode, turn off
then back on again.
Colour Change Operation
NOTE:
For Colours control using the OceanDMX Xtreme Series Controller Kit,
please refer to the OceanDMX Installation Manual.
The X-Series DC switched colour change has three modes of operation, single
colour mode, cycle / programing mode, and strobe mode:
1.
Single colour mode – this mode is entered when the light is first turned
on. The light will be a single colour, either a default blue, or a previously
selected colour.
2.
Strobe mode – to enter this mode, turn off the light for less than 1 second,
then back on again. The light will flash in a pseudo-random pattern - the
colour will be the same as that in single colour mode.
3.
Cycle / Program mode, to enter this toggle the power to the unit off
twice for less than 1 second each time. The light will then slowly cycle
and fade through the colour spectrum (see diagram below for cycle
order). It can be left in cycling if required, or alternatively, once the
light shows the desired colour this can be stored by switching the light
off for more than 2 seconds. When the light is switched back on it
will be back in single colour mode, displaying the previously selected
colour.Single colour mode – this mode is entered when the light is first
turned on. The light will be a single colour, either a default blue, or a
previously selected colour.
NOTE:
If during the above operations, one or more lights connected go out of
sync, simply switch off the lights for more than 2 seconds, then re-enter cycle
mode to re-select the colour.


