


Perform a media registration for standard-size media - Adjust the
X-position of side 2
Procedure
1.
Take the first test sheet.
2.
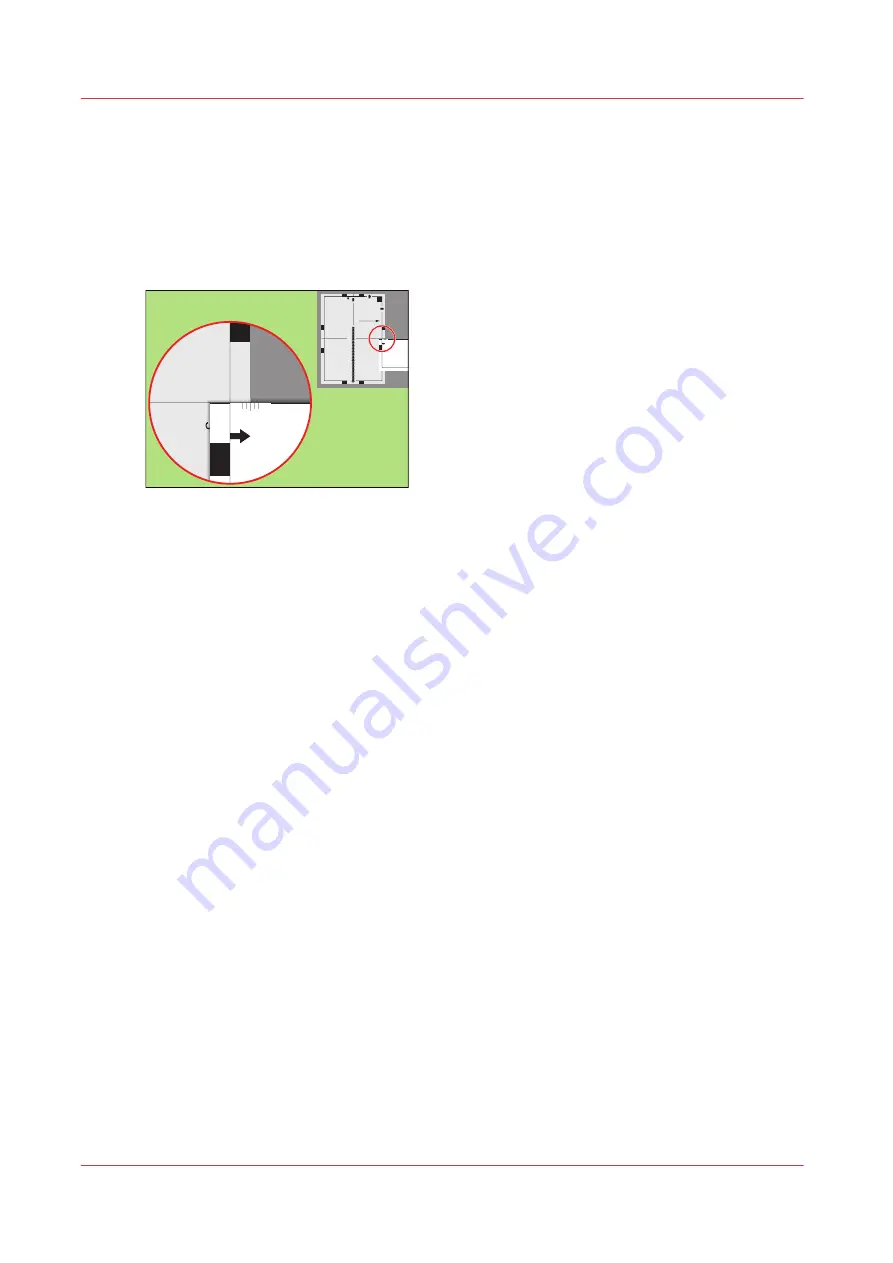
Align the start of the ruler with point 'N' of the test sheet.
Test bitmap: REGISTRATION
Size: 210 x 297 mm
2006-10-09 / 14:08:36
Page 2
2
Secondary image
0
5-
0
0
5
+
2
e
p
a
h
S
d
n
o
m
ai
D
yr
a
d
n
o
c
e
S
2
0
5-
0
0
5
+
1
e
p
a
h
S
d
n
o
m
ai
D
yr
a
d
n
o
c
e
S
1
0
5-
0
0
5
+
n
oi
ti
s
o
p
e
g
a
mi
X
yr
a
d
n
o
c
e
S
5
-50
0
+50
Secondary Z im
age position
4
-50
0
+50
Prim
ary X im
age position
Prim
ary Z im
age position
1000
1050
1100
1150
1200
1250
1300
1350
1400
1450
1500
1550
1600
1650
1700
1750
1800
1850
1900
1950
2000
2050
2100
2150
2200
2250
2300
2350
2400
2450
2500
2550
260
0
265
0
2700
2750
2800
Prim
ary diam
ond shape
X length
K
N
L
P
-50
0
+50
Prima
ry X
imag
e po
sitio
n
Prima
ry Z i
mag
e po
sitio
n
0
5-
0
0
5
+
ti
s
o
p
e
g
a
mi
X
yr
a
d
n
o
c
e
S
5
N
-50
0
+50
[57] Align the ruler with 'N'
3.
Read the value at the edge of the test sheet.
4.
Enter the value.
5.
Take the second test sheet.
6.
Repeat the steps 2 - 4.
7.
Take the third test sheet.
8.
Repeat the steps 2 - 4.
Result
A pop-up message appears. The message asks you whether you want to print an extra test sheet
to verify the result of the registration. You can do one of the following.
• Press [Yes] if you want to print an extra test sheet to verify the result.
Wait for the sheet and check the result. Another pop-up message appears. Press [Yes] if the
registration is correct. Press [No] if the registration is not correct. Then the registration
procedure will start again.
• Press [No] if you do not want to print an extra test sheet. The registration procedure will be
finished.
Perform a media registration for standard-size media - Adjust the X-position of side 2
228
Chapter 11 - Media handling
Océ VarioPrint 6000 line
Summary of Contents for VarioPrint 6180
Page 1: ...User guide Océ VarioPrint 6000 line VarioPrint 6180 6220 6270 6330 ...
Page 8: ...Contents 8 Océ VarioPrint 6000 line ...
Page 9: ...Chapter 1 Introduction ...
Page 15: ...Chapter 2 Explore the print system ...
Page 31: ...Chapter 3 Explore the ease of operation ...
Page 43: ...Chapter 4 Start the print system ...
Page 49: ...Chapter 5 Prepare the print system ...
Page 81: ...Chapter 6 Prepare the print jobs ...
Page 89: ...Chapter 7 Plan the workload remotely ...
Page 93: ...Chapter 8 Plan the jobs ...
Page 129: ...Chapter 9 Carry out print jobs ...
Page 193: ...Chapter 10 Keep the system printing ...
Page 202: ...The operator attention light 202 Chapter 10 Keep the system printing Océ VarioPrint 6000 line ...
Page 203: ...Chapter 11 Media handling ...
Page 245: ...Chapter 12 Maintain the print system ...
Page 275: ...Chapter 13 PRISMAlytics Dashboard ...
Page 277: ...Chapter 14 Troubleshooting ...
Page 287: ...Chapter 15 Specifications ...
Page 305: ......


