Turn the Océ PlotWave 900 on and off
Introduction
The Océ PlotWave 900 printer, the Océ PlotWave 900 scanner or the Océ TDS600
scanner and the Océ PlotWave 900 controller must be turned on and off separately.
The components do not have to be turned on and off in a specific order.
Use the key switch on the printer and scanner to turn the printer and scanner on and off.
Use the On/Off button on the Océ PlotWave 900 controller to turn the controller on
and off.
Turn the Océ PlotWave 900 printer on and off
1.
Turn the main power switch to the On position (l) at the lower left-hand side of the
printer.
2.
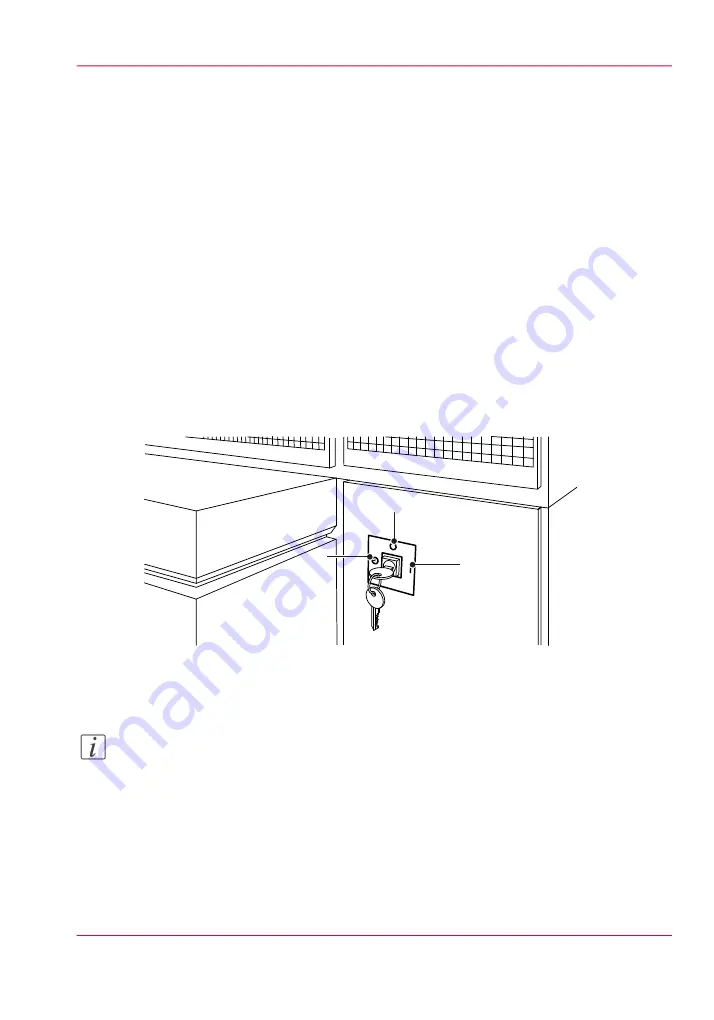
Turn the key to the ‘On’ position (1).
The printer takes about 20 minutes to warm up. When the system is warmed up, the
message ‘Ready to print’ appears on the printer operator panel.
2
1
3
[11] Power switch with key in the timer position on the printer. (1 = 'On' position, 2 = 'Off' position,
3 = 'timer' position)
3.
Turn the key to the ‘Off’ position (2). The printer is turned 'Off'.
Note:
Before you turn off the printer, make sure that the printer is not printing a job.
Turn the Océ PlotWave 900 scanner on and off
1.
Turn the key to the ‘On’ position.
Chapter 1 - Introduction
21
Turn the Océ PlotWave 900 on and off
Summary of Contents for PlotWave 900
Page 1: ...o Oc PlotWave 900 Serious Power User manual Operating information...
Page 11: ...Chapter 1 Introduction...
Page 28: ...Chapter 1 Introduction 28 Working area...
Page 29: ...Chapter 2 Get to know the Oc Plot Wave 900 system...
Page 44: ...Chapter 2 Get to know the Oc PlotWave 900 system 44 Online Offline button...
Page 45: ...Chapter 3 Define your workflow with Oc Express WebTools...
Page 128: ...Chapter 3 Define your workflow with Oc Express WebTools 128 Delete a Smart Inbox...
Page 129: ...Chapter 4 Use the Oc PlotWave 900 to print...
Page 142: ...Chapter 4 Use the Oc PlotWave 900 to print 142 Print a job from the Smart Inbox...
Page 143: ...Chapter 5 Use the Oc PlotWave 900 scanner to copy...
Page 169: ...Chapter 6 Use the Oc TDS600 scanner to copy...
Page 197: ...Chapter 7 Use Oc Mobile Printing and Scanning...
Page 211: ...Chapter 8 Special copy and scan jobs...
Page 241: ...Chapter 9 The Folder Reinforcement unit and Belt unit...
Page 255: ...Chapter 10 Oc Double Decker Pro...
Page 262: ...Chapter 10 Oc Double Decker Pro 262 How to set the media separation method...
Page 263: ...Chapter 11 System maintenance...
Page 291: ...Chapter 12 Solve problems...
Page 328: ...Chapter 12 Solve problems 328 Other problems...
Page 329: ...Chapter 13 Support...
Page 335: ...Chapter 14 License management...
Page 347: ...Chapter 15 Account management...
Page 356: ...Chapter 15 Account management 356 Enable account management in the Oc Express WebTools...
Page 357: ...Chapter 16 Software options...
Page 359: ...Chapter 17 Network and Security set tings...
Page 361: ...Appendix A System specifications...
Page 379: ...Appendix B Reader s comment sheet...
Page 393: ...Working area printing system 27 Z Zoom Setting 162 Zoom factor Zoom factor 185 393 Index...
Page 394: ...2...
Page 395: ...2...


