DOC-24000 Rev. C
7–29
Objet30 User Guide
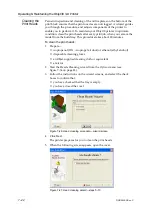
3. When
the
following
screen
appears,
open
the
cover.
Figure 7-41: Wizard screen that appears when you can begin the procedure
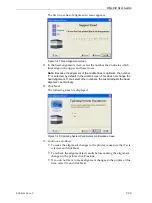
4. Loosen
the
two
side
screws
securing
the
UV
lamp
assembly,
and
remove
the
assembly.
Figure 7-42: UV-lamp-assembly securing screws
5. Move
the
block
all
the
way
to
the
front
of
the
printer,
exposing
the
roller
‐
waste
‐
collector
locking
pin.
Figure 7-43: Roller-waste-collector locking pin
WARNING:
The print head orifice plates (bottom surface) may be hot.
Do not touch them with your bare hands, and proceed with caution.
Securing
screws


