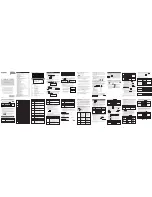
Tech Board
™
Operating Instructions
Time/Calendar Functions
How to enter time/calendar mode
1. Press the MODE button until the display scrolls to the time/calendar
mode (upper display will show one nonflashing day of the week).
2. To see the date, press the START/STOP button.
3. To see the alarm set time, press the LAP/RESET button.
NOTE: Unless the alarm indicator is on (upper right corner of the
display), the alarm will not sound at the shown time.
How to set time and calendar
1. Scroll to time/calendar set mode (upper display will flash “TUE”).
2. Press the LAP/RESET button to scroll between clock parameters.
The display scrolls through seconds, minutes, hours, day, month, day
of week, then back to seconds.
Alarm Functions
You can set alarm to sound for one minute at a specific time, and/or for a
brief time once every hour. If the alarm set for a specific time is turned on,
you will see the alarm indicator in the upper right corner of the display.
How to set alarm to sound at a specific time
1. Press the MODE button until the display scrolls to alarm set mode
(upper display flashes “MON”).
2. Press the LAP/RESET button to select hours or minutes.
3. When you have selected the parameter you want to change, hold
START/STOP button to adjust the clock.
4. When you have selected the correct alarm time, push the MODE but-
ton to return to time display. The alarm indicator should now be on.
How to turn off alarm set for a specific time
1. Scroll to time/calendar mode (upper display shows 1 nonflashing day).
2. Press the LAP/RESET button to see the alarm set time.
3. While holding the LAP/RESET button, press the START/STOP button.
4. The alarm indicator will turn off.
NOTE: If the alarm was already off, this same action will turn alarm on.
How to turn on and turn off hourly alarm
1. Scroll to time/calendar mode (upper display shows 1 nonflashing day).
2. Press the LAP/RESET button.
3. While holding the LAP/RESET button, press the MODE button.
4. If the hourly alarm was on, the entire upper display disappears briefly,
and the hourly alarm is now off. If the hourly alarm was off, the entire
upper display flashes briefly, and the hourly alarm is now on.
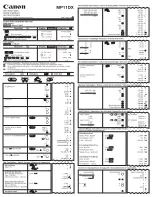
Thank you for purchasing a
Tech Board
™
—the ultimate
technical organizer!
It features:
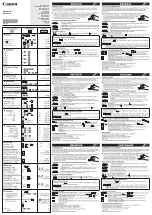
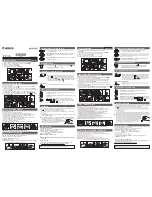
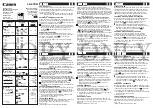
Main Function Button Descriptions
The TECH BOARD features three main function buttons:
1. the MODE button
2. the START/STOP button
3. the LAP/RESET button
The MODE button lets you scroll through 4 modes:
1. Time/calendar mode
View time, date and alarm set time
you see:
Upper display shows current day
2. Stopwatch mode
Perform all stopwatch functions
you see:
Upper display flashes “SUN FRI SAT”
3. Alarm set mode
Set or deactivate alarm
you see:
Upper display flashes “MON”
4. Time/calendar set mode
Set time and date
you see:
Upper display flashes “TUE”
The START/STOP button lets you:
1. In time/calendar mode:
view the current date
2. In stopwatch mode:
start and stop the stopwatch
3. In alarm set mode:
change the alarm set time
4. In time/calendar set mode:
change the time and date
The LAP/RESET button lets you:
1. In time/calendar mode:
view the alarm set time
2. In stopwatch mode:
time split laps and reset stopwatch
3. In alarm set mode:
scroll through alarm set parameters
4. In time/calendar set mode:
scroll through time/date parameters
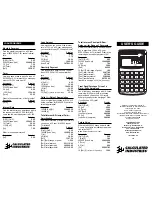
ON/C
MODE
CE
MRC
+/–
M+
M–
7
4
1
0
8
9
5
2
.
6
3
%
÷
x
–
+
=/COUNTUP
S/S
L/R
START/STOP button
LAP/RESET button
SUN MON TUE WED THU FRI SAT
alarm indicator
upper display
MODE button
• A 24 hour count-up stopwatch
• Calculator with full memory and % key
• Real-time clock with time of day and calendar
• Selectable audible alarm clock
• Common conversion tables and a Periodic
Table of the Elements for quick reference
• Sturdy clipboard that tightly holds your papers
• Solar power cell—no batteries required
3. When you have selected the parameter you want to change, hold
START/STOP button to adjust the clock or calendar.
4. Repeat step 3 until you have selected the correct time and date.
NOTE: You can also select a 12-hour clock (a.m. and p.m.)
or a 24-hour clock. To select 12 or 24 hour time:
a. Scroll to the hours parameter.
b. Hold the START/STOP button until you reach the appropri-
ate time scale. The a.m./p.m. clock will display “A” or “P”
in the seconds place; the 24 hour clock will display “H” in
the seconds place.
5. When you have selected the correct time and date, press MODE to
scroll to the time/calendar display.