Oakton T100WL Instruction Manual Download Page 8


- 8 - 

3.5  Power supply 


The instrument adopts 3.7V rechargeable lithium battery. 

a)  Charging mode 

·

  Charge via Power adaptor: connect instrument and power adaptor with a USB cable. Adaptor 

specification: AC110 to 240V, 50/60Hz, output: 5V/1A.   

·

  Charge via Computer: connect instrument and a computer with a USB cable.   

Under normal circumstances, it is recommended to use the power adapter to charge the lithium 

battery to ensure its performance. When the lithium battery voltage is lower than 3V, the instrument 

will shut down, and 

it’s time to recharge it. 

b)  Battery capacity indication 

·

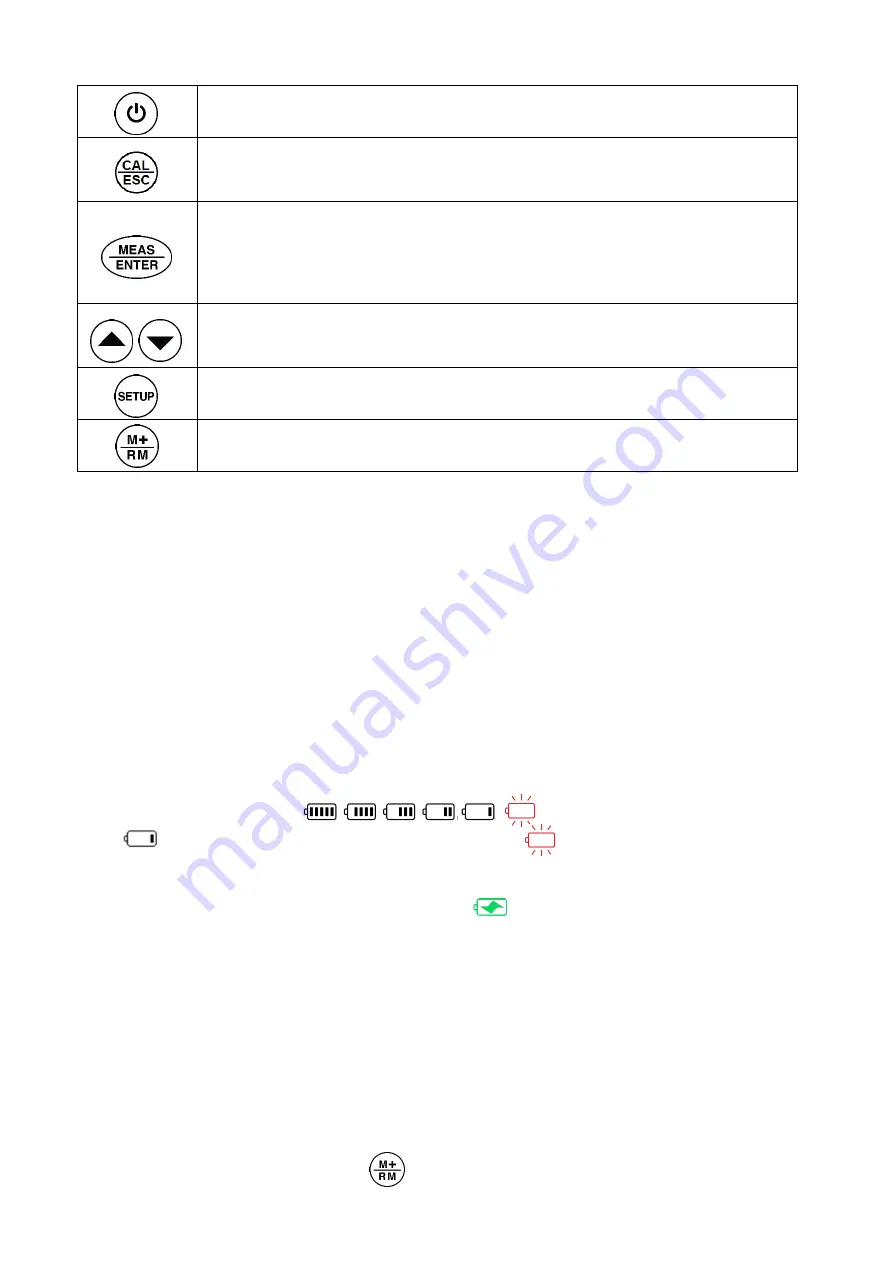
  Battery capacity icon:                                                              , please recharge the battery when   

          icon displays to ensure measuring accuracy; when            icon displays, the battery must be 

recharged, otherwise the instrument can't work properly. 

·

  If charging the instrument when it is turned on,            icon will be displayed. Users can continue 

to use the instrument while it is being charged. 

·

  If charging the instrument when it is turned off, "Charging

......

" will be displayed, and "Charging is 

completed" will be displayed after a full charge. 


3.6  Data Log, Recall, and Deletion 

  a)    Manual date logging and Automatic data logging


  In parameter setup P4, users can select manual or automatic data logging mode. In the manual mode, 

after  measurement  is  finished,  press            to  save  the  data  (also  the  measurement  interface);  In 


  Power on/off 


  In measurement mode, press to enter or exit calibration mode 

  In parameter setup and data recall mode, press to return to measurement mode 


  In measurement mode, short press to perform single measurement; long press 

(>3s) to perform continuous measurement. 

  In calibration mode, press to confirm calibration. 

  In parameter setup mode, press to confirm change. 


  In calibration mode, press to select which standard to calibrate. 

  In parameter setup mode, press to scroll on the menu options. 

  In recall mode, press to view store number 


  Press to enter parameter setup mode 


  Short press to save measured data; long press (>3s) to enter data recall mode 

Summary of Contents for T100WL

Page 1: ...1 T100WL Portable Turbidity Meter 35635 10 Instruction Manual...

Page 2: ...eparation for Calibration 10 4 2 Calibration Procedure Take 0 NTU and 20 NTU as an example 11 4 3 Notes for Calibration 12 5 Turbidity Measurement 13 5 1 Sample Vial Handling 13 5 2 Measurement Prepar...

Page 3: ...parameter setting TruRead measurement mode automatically takes multiple consecutive readings and calculate their average minimum and maximum value as well as displaying each set of data in a brief te...

Page 4: ...rmazin Solution 0 20 100 400 and 800 NTU FNU Detector Silicon photovoltaic Measuring Mode Normal measurement and TruRead measurement Data Storage 200 groups Data Output USB to PC Calibration Record Ca...

Page 5: ...er when measuring Dust proof plug Take off the plug when measuring Housing Sample vial holder Display Calibration vials or sample vials Keypad Positioning mark Align the mark with the mark on the cali...

Page 6: ...ofiber cloth Power adaptor 5V 1A Software flash drive Silicone oil 10 ml Sample vials 6 USB Cable under the meter User Manual Diagram 2 Measurement Mode Measurements and unit Operation Guide Battery i...

Page 7: ...iagram 3 Calibration Mode Standard values Operation guide Finished calibration indicator Parameter Setup Menu Operation guide Data Recall Saved data numberings Saved data Operation guide Calibration M...

Page 8: ...nt while it is being charged If charging the instrument when it is turned off Charging will be displayed and Charging is completed will be displayed after a full charge 3 6 Data Log Recall and Deletio...

Page 9: ...surement mode Measurement Mode Storage Capacity Normal 200 sets TruRead 5 times measurement 100 sets TruRead 10 times measurement 61 sets TruRead 15 times measurement 44 sets TruRead 20 times measurem...

Page 10: ...0 NTU calibration solution and close the vial cap Replace laboratory distilled water open the vial cap pour out the original solution add 1 2 distilled water cover the cap and shake the vial to rinse...

Page 11: ...ake the solution even But sediment can still occur during tests and make the measurement unstable Users need to have rich experience with Formazin calibration solutions 4 2 Calibration Procedure Take...

Page 12: ...n The calibration point can be verified after the calibration is completed If the calibration point has a large error enter the calibration mode and repeat the calibration For calibration point accura...

Page 13: ...e replace the 0 0 NTU solution in time according to the requirements in Section 4 1b e High turbidity calibration requirement For turbidity measurement greater than 2 NTU it is recommended to calibrat...

Page 14: ...number of continuous measurements is set to 20 times in parameter setting P2 a measured value will be displayed every 20 seconds Diagram 9 2 is the third measurement Diagram 9 3 is the display interf...

Page 15: ...c for details c Mixing and Degassing Samples should not be vigorously shaken or vibrated It is recommended that users gently shake the sample vial to make solution evenly distributed Air bubbles in s...

Page 16: ...lect in how soon the instrument will turn off automatically if there is no operation 10 minutes 20 minutes 30 minutes or off when selecting off the instrument can only be turned off by pressing the po...

Page 17: ...er setting information Function buttons 7 2 Operation Key in Software Interface Refresh Port reset key When the instrument and computer are not connected click to connect SyncTime Sync time key click...

Page 18: ...ed in the USB drive 7 4 Run Software Click Download key all data in the instrument memory will be sent to the computer When the program is running all measurement information will be sent to the compu...

Page 19: ...are as in Diagram 13 Diagram 14 shows you how to replace the lamp Unscrew the lamp cover with a coin Use a tweezer to unplug the socket Use a tweezer to unscrew the lamp cover Take out the old tungste...

Page 20: ...limited warranty Within the warranty period repair parts or product replacement will be made without charge due to malfunctions caused by manufacturing defects 9 2 The above limited warranty shall not...

Reviews: