background image

FRENCH

DURE EN HEURES PAR JOUR

8 6 4 3 2 1

INIVEAU SONORE CONTINU EN dB

90 93 95 97 100 103

Danger
L‘exposition a des niveaux eleves de bruit peut provoquer une perte
permanente de l

audition, Chaque organisme humain reagit

differemment quant a la perte de l

audition, mais quasiment tout le

monde subit une diminution de I

acuite auditive lors d

une exposition

suffisamment longue au bruit intense. Les autorites competentes en
reglementation de bruit ont defini les expositions tolerees aux niveaux
de bruits:

Selon les autorites, toute exposition dans les limites citees ci-dessus,
peuvent provoquer certaines pertes d

audition. Des bouchons ou

protections dans l

appareil auditif ou sur l

oreille doivent etre portes lors

de l

utilisation de ce systeme d

amplification afin de prevenir le risque

de perte permanente de l

audition, Dans le cas d

expositions

superieures aux limites precitees il est recommande, afin de se
premunir contre les expositions aux pressions acoustiquese I evees
potentielIement dangeure u ses, aux personnes exposees aux
equipements capables de delivrer de telles puissances, tels ce
systeme d

amplification en fonctionnement, de proteger l

appareil

auditif.

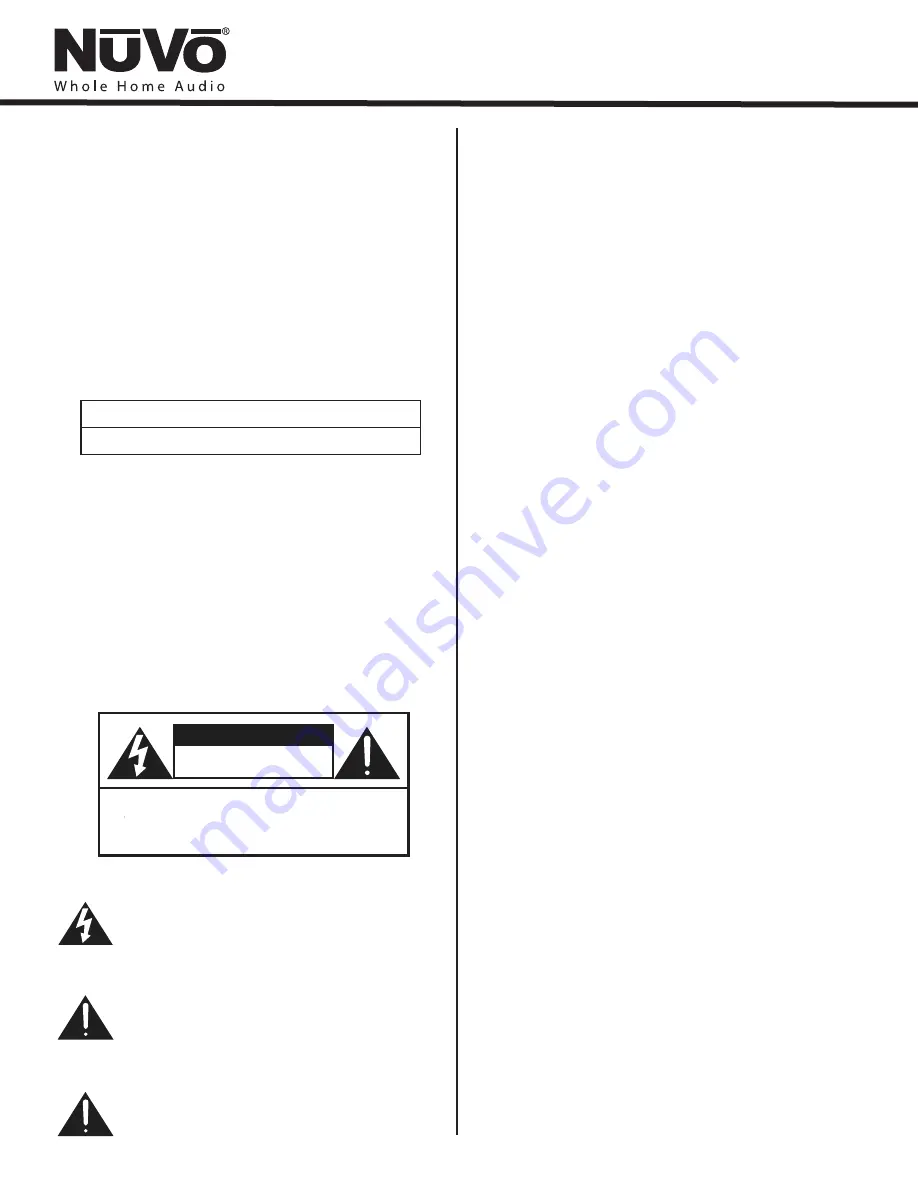
ATTENTION:

AFIN DE LlMlTER LE RISQUE DE CHO ELECTR/QUE, NE

PAS ENLEVER LE CHASSIS. NE CONTIENT PAS DE

PIECES POUVANT ETRE REPAREE PAR L’UTILISATEUR.

CONFER LE SERVICE APRES-VENTE AUX

REPARATEURS

ATTENTION

RISQUE DE CHOC ELECTRIQUE

NE PAS OUVRIR.

CE SYMBOLE A POUR BUT D'AVERTIR L'UTILISATEUR DE LA PRESENCE
DE VOLTAGE DANGEREUX NON-ISOLE A L'INTERIEUR DE CE PRODUIT
QUI PEUT ETRE DE PUISSANCE SUFFISAMMENT IMPORTANTE POUR
PROVOQUER UN CHOC ELECTRIQUE AUX PERSONNES.

CE SYMBOLE A POUR BUT D'AVERTIR L'UTILISATEUR DE LA PRESENCE
D'INSTRUCTIONS D'UTILISATION ET DE MAINTENANCE DANS LES
DOCUMENTS FOURNIS AVEC CE PRODUIT.

IMPORTANTES INSTRUCTIONS DE SECURITE

1. Lire avec attention toutes les recommandations et précautions

d'emploi avant d'utiliser ce produit.

2. Toutes les recommandations et précautions d'emploi doivent être

conservées afin de pouvoir s'y reporter si nécessaire.

3. Lire et comprendre tous les avertissements énumérés dans les

précautions d'emploi.

4. Suivre toutes les précautions d'emploi pour utiliser ce produit.
5. Ce produit ne doit pas être utilisé près d'eau, comme par exemple

baignoires, éviers, piscine, sous-sol humides ... Etc.

ée, cela

Protéger
pincement, particulièrement au niveau des fiches, des
réceptacles utilisés et à l'endroit de sortie de l'appareil. Ne pas
casser la fiche de terre du cordon d'alimentation.

11. Utiliser uniquement les accessoires spécifiés par le constructeur.
12. Utiliser uniquement avec le chariot de transport, le support, le

trépied, la console ou la table spécifiés par le constructeur ou
vendus avec l'appareil. Lors de l'utilisation d'un chariot, bouger
avec précaution l'ensemble chariotlappareil afin d'éviter les
dommages d'un renversement.

13 Débrancher cet appareil lors d'orages ou s'il n'est pas utilisé

pendant une longue période.

14. Des précautions doivent être prises afin qu'aucun objet ne tombe

et qu'aucun liquide ne se répande à l'intérieur de l'appareil par
les orifics de ventilation ou n'importe quelle autre ouverture.

15. Pour toutes interventions techniques s'adresser à un technicien

qualifié.L'intervention technique est nécessaire lorsque l'appareil
a été endommagé de n'importe quelle façon, comme par
exemple si le cordon secteur ou sa fiche sont détériorés,si du
liquide a coulé ou si des objets sont tombés à l'intérieur de
l'apparei1,si l'appareil a été exposé à la pluie ou à l'humidité, s'il
ne fonctionne pas normalement ou s'il est tombé.

16. ATTENTI0N:Pour réduire le risque d'incendie ou de choc

electrique ne pas exposer l'appareil à la pluie ou à l'humidité.

6. Utiliser exclusivement un chiffon sec pour nettoyer ce produit.
7. Ne bloquér aucune ouverture de ventilation. Ne pas placer le

produit tout contre un mur ou dans une enceinte fern
gênerait le flux d'air nécessaire au refroidissement.

8. Ne pas placer le produit près de toute source de chaeur telle que

radiateurs, arrivées d'air chaud, fourneaux ou autres appareils
générant de la chaleur (incluant les amplificateurs producteurs
de chaleur) .

9. Ne pas négliger la sécurité que procure un branchement polarisé

ou avec raccordement à la terre, Un branchement polarisé
comprend deux fiches dont l'une est plus large que l'autre. Un
branchement à la terre comprend deux fiches plus une troisième
reliée à la terre. Si la fiche secteur fournie ne s'insert pas dans
votre prise de courant. consulter un 'électricien afin de remplacer
votre prise obsolète.

10.

le cordon d'alimentation de tout écrasement ou

AFIN DE REDUIRE LES RISQUÉ D'INCENDIE ET DE DECHARGE
ELECTRIQUE, NE PAS EXPOSER CET APPAREIL A LA PLUIE OU A
L'HUMIDITE.

Summary of Contents for Essentia NV-E6GMS-UK

Page 1: ...Installation Guide Essentia NV E6GMS DC NV E6GMS UK...

Page 2: ......

Page 3: ...closure that will impede the flow of cooling air 8 Do not install this product near any heat sources such as radiators heat registers stove or other apparatus including heat producing amplifiers that...

Page 4: ...r s d eau comme par exemple baignoires viers piscine sous sol humides Etc e cela Prot ger pincement particuli rement au niveau des fiches des r ceptacles utilis s et l endroit de sortie de l appareil...

Page 5: ...15 IX Using the NV I8G NV E6G Configurator Software 1 Start Page 16 2 IR Libraries Page 17 Page 20 4 Macros Page 21 5 Zones Page 23 6 System Settings Page 25 7 Download Update Page 27 X Control Pad Se...

Page 6: ...g less than 1 watt of power when used with the single gang OLED Control Pads Even with all the zones turned on and in full operation the efficient design results in low power consumption Essentia trul...

Page 7: ...device It is also used for configuration programming download 8 This is a constant 5 volt output for triggering external equipment There is no voltage output when the zones are off 9 This RJ45 connect...

Page 8: ...ific zone and system setting parameters 8 This IR programmable button toggles between the play and pause functions of the chosen source When using the T2 Tuners this button toggles through the Tuner s...

Page 9: ...gles through the Tuner s receive modes A third press and hold function can also be assigned to this button for additional functionality 9 The OK button serves a dual function In normal play mode it sc...

Page 10: ...ss to music browsing presets and favorites as well as specific zone setting parameters 8 9 The OK button also serves a dual function In normal play mode it scrolls through the available audio sources...

Page 11: ...features 8 This icon indicates that the zone is set for Do Not Disturb There are three Do Not Disturb choices exclude the zone from Party Mode Page Mode and or System Mute 9 This icon will light when...

Page 12: ...nes is listed on the display The user can change zone control by moving the highlight to the desired zone and pressing the OK button 9 The OK button serves a dual function In normal play mode it seque...

Page 13: ...tes buttons 6 This button allows access to the Display menu available at each Control Pad 7 This LED Light Emitting Diode lights to indicate a button push 8 The GRC1 remote provides a discrete mute fu...

Page 14: ...r and trim them evenly across the top Most crimp tools have a wire trimmer built in It is best to trim the wires to about in length 4 While holding the wires flat between your thumb and forefinger ins...

Page 15: ...llport can be installed Section VIII Expanding Essentia to 12 Zones Section II Terminating the Speaker Wire Fig 2 III Installing the Essentia Amplifier System setup works best when the amplifier is pl...

Page 16: ...at allows the attached amplifier to be triggered from a voltage presented when the zone Control Pad is turned on The voltage trigger is removed when the zone is turned off Using the Fixed and Variable...

Page 17: ...red NuVoDocks could be used as individual sources through NuVoNet The NuVoDocks consist of a dock for iPod playback and recharging as well as a receiver component designed to communicate with NuVoNet...

Page 18: ...nd the additional zone speakers A second Allport cable must be attached from the expander Allport to the expander amplifier and a short CAT5 jumper cable included with the expander system is used on t...

Page 19: ...et you continue beyond Start without either creating a new file or opening an existing file It will also prevent moving forward through any of the tabs until the necessary information is completed in...

Page 20: ...the IR Learning Station Package Capturing function codes and adding them to the component IR Library is an easy process The Interface box is connected to your computer using one of the RS232 connectio...

Page 21: ...cessary to record the IR codes associated with each function To do this connect the Learning Station Interface as described above Double click on the desired component from the IR Library page This wi...

Page 22: ...ond appropriately to the command if it has been stored correctly A test result box will open where you can record yes or no to the test Three successful test results are required before the Passed cou...

Page 23: ...between sources relative volume levels remain constant When the appropriate information is complete click OK This will add the updated source information to the Source window When all the desired sou...

Page 24: ...he macro on the right side of the screen Double clicking on a key in either display will allow you to change the default assignment or create a new one in the Edit Macro Definitions window Fig 21 4 Ma...

Page 25: ...drop down menu directly below the Display Name window defaults to Forever This is the desired choice for a preset and will keep the preset name on the Control Pad while that selection is currently pla...

Page 26: ...speakers or simply to prevent a certain room from being turned up too high e g a teenager s bedroom This controls the reset volume level for each zone when the All On Party Mode is initiated from any...

Page 27: ...rol s commands from being received by the Control Pad and passed through to the source equipment Volume Reset at Zone ON Loudness Compensation ON Exclusive Source Control A zone specific feature is th...

Page 28: ...ontrol Pads This is a useful feature for large rooms where more than one Control Pad is desired If slave Control Pads are used we suggest that you disable the IR pass through on those to prevent cross...

Page 29: ...elay Fig 29 In this mode a single tap of the power button turns the zone off and holding the power button causes a second menu that gives the option to turn off that zone s group or turn all the zones...

Page 30: ...re version If they are at a lesser version number an upgrade notice will appear on the display It is important to allow this process to complete When the Control Pad is finished upgrading itself it wi...

Page 31: ...e grayed out That specific zone will have a check mark displayed Any available addresses will be accessible Scrolling to will erase the current address XI Using the Control Pad s MENU Button MAIN MENU...

Page 32: ...ll Off command is issued from a Control Pad Fig 37 Party Mode Do Not Disturb Sleep Mode This setting is turned on and off with the OK button When selected all the configured zones in the system will t...

Page 33: ...are defined in the next section Fig 40 Favorites 1 12 Twelve global favorites can be defined for easy access from within the Main Menu or from the twelve numeric favorites from the Essentia remote co...

Page 34: ...l on function is initiated Balance Bass Treble Loudness Compensation Volume Settings Volume Reset Initial Volume Maximum Volume Page Volume Party Volume Fig 43 Fig 44 Fig 45 Advanced Zone Settings The...

Page 35: ...by scrolling to the desired zone and selecting it All used zone addresses will be grayed out If you have defined zones in the Configurator Software the actual zone names assigned in the Zone tab of t...

Page 36: ...o output for paging that is plugged into source input 6 on the Essentia note that this feature eliminates the use of Source 6 as an audio source for the system To use the Page function you must select...

Page 37: ...D 4 IR EMITTER 5 IR BLASTER A standard 12 volt power supply is included in the Learning Station Package This will supply the necessary AC power for IR learning and testing Using one of the supplied R...

Page 38: ...new equipment codes the Learning Station Interface box must be connected to your computer at the RS232 port Connect the male end of the RS232 cable to the back of the Interface box into the CONNECT TO...

Page 39: ...back of the MI1 The voltage from the phone ringer will trigger the NuVo System to mute 36 NV MI1 Mute Interface Adaptor Fig 51 The Mute Interface is used in conjunction with System Mute input on the b...

Page 40: ...own Stripe pair as a voltage trigger When the Control Pad is on NuVo audio is allowed to pass to the speakers in the zone When the Control Pad is off the amplified local source is passed to the speake...

Page 41: ...ine level audio signal When connected to the Control Pad the Essentia speaker output and the LSA40 share a common pair of speakers in a zone The LSA40 s internal A B switch allows NuVo audio when the...

Page 42: ...stribution Hub Fig 54 The LSA40PDS Power Distribution Hub provides a compact method for distributing the necessary power for up to four LSA40 Local Source Amplifiers from one central location The LSA4...

Page 43: ...entia is Zone Specific Triggers that will trigger the D2120 and D460 only when that zone is turned on Utilizing the voltage trigger requires a mono 1 8 3 5mm patch cable from either the System ON outp...

Page 44: ...Input Sensitivity for rated power 300mV RMS Input Overload 2 4V RMS Source Outputs 6 Sum Outputs 1 Output Drive Current 20mA Output Drive Voltage 5V Compatible with single and dual emitters System On...

Page 45: ...NuVo With the Control Pads plugged in the POWER LED on the front of the amplifier will not turn on One or more improperly wired CAT5 cables Make sure the amplifier is turned on Test that the POWER LE...

Page 46: ...Passthrough Remote Controls When downloading a Configuration to the Essentia Main amplifier a board not found error message appears on the computer screen This occurs when the Essentia is not plugged...

Page 47: ......

Page 48: ...www nuvotechnologies com NuVo Technologies LLC Hebron Kentucky USA E6G DCUK 1123...

Reviews: