


10
3.2
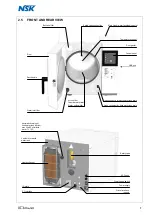
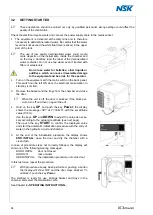
GETTING STARTED
These operations should be carried out only by qualified personnel, wrong settings could affect the
quality of the sterilization
.
Check the electrical requirements and connect the power supply cable to the mains socket.
1. The equipment is delivered with empty tank and is therefore
necessary to add demineralized water. Be careful that the water
level does not exceed the white float (lever sensor) in the upper
part of the tank.
The use of low quality demineralized water could create
scale deposits on the instruments, inside the chamber and
on the trays. Carefully read the label of the demineralized
water container. Do not use tap water even if treated with
filters or sweeteners
.
Do not use water for batteries, other liquids or
additives
which can cause irreversible damage
to the equipment and be a risk for the operator
.
2.
Turn on the equipment with the main switch on the back panel.
This switch can be left ON since the electrical consumption in
stand-by is limited.
3.
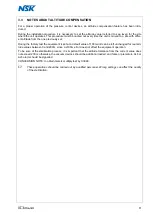
Remove the basket and the trays from the chamber and close
the door.
When the unit is off, the door is blocked; if the block per-
sists, turn off and then on again the unit.
4.
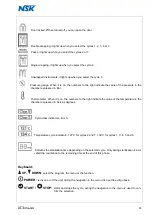
Hold on the key
UP
and push the key
Power
; the display
shows the message <
SET ALT 100 MT
> with the set altitude
value (100 m).
Use the keys
UP
and
DOWN
to adjust the value as neces-
sary according to the actual site altitude (see next page).
Then push the key
START
to confirm the displayed value
and start the automatic initialization procedure with the entry of
water in the hydraulic circuit and chamber.
5.
At the end of the initialization procedure the display shows
END INSTALL
; open the door and dry the chamber with a
clean cloth.
In case of procedure steps not correctly followed, the display will
show one of the following warning messages:
DOOR OPEN
:
door not closed
ADD H2O
:
lack of water
NEED INSTALL
: the initialization procedure not carried out
In this last case, repeat the procedure.
With procedure already been performed, pushing a button
the display will show OFF and the door stays blocked. To
unblock it, push the key
Power
.
The sterilizer is ready for use. Arrange basket and trays in the
chamber and select the sterilization cycle.
See Chapter
4
«
OPERATING INSTRUCTIONS».