1
USER INSTRUCTIONS
STANDARD FLOOR-FIXED FOLDING
SUPPORT RAIL
General Safety Warning
This Product must be
fi
tted be a suitably quali
fi
ed
person. Please make sure that you read and
follow these instructions carefully. Failure to do
so can result in injury. Keep these instructions in
a safe place for future reference.
M11260
Long Support Rail - 760mm (30”)
M20108
Short Rail - 550mm (21½”)
Maximum User Weight
16st
100kg
1.0 INTENDED USE
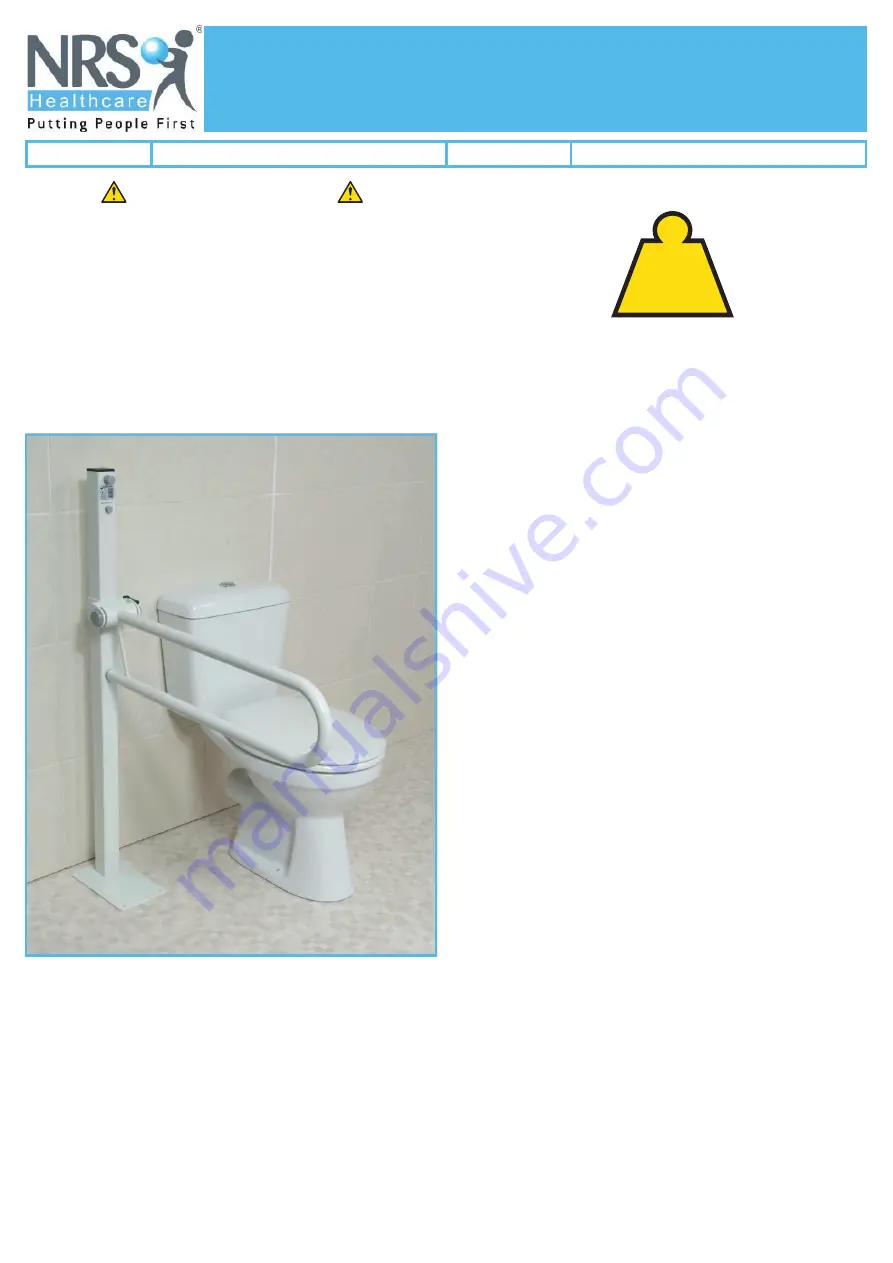
This Folding Support Rail is a high-quality steel rail, it is
fl
oor
fi
xed and provides stable support to assist
the user raise and lower themselves for toileting. The rail can be raised back to the wall when not in use or
when transferring from the side
Figure 1: Folding Support Rail
2.0 SAFETY
• This support rail should only be secured to sound
wooden
fl
oors on timber joists or concrete
fl
oors,
using
fi
xings appropriate to the
fl
oor type.
• This product must be installed by a suitably
quali
fi
ed, competent, person.
• Always check for concealed electrical cables
and water pipes when installing; also check your
legal requirements relating to earth bonding of
extraneous metal parts.
• Do not exceed the maximum load - Note this is
based on the product being
fi
tted to a suitable
surface using appropriate
fi
xings
• Check
fl
oor
fi
xings regularly, ensure all
fi
xings
are secure, and there is no movement on the
fl
oor stand
3.0 UNPACKING
Remove the packaging and check all parts carefully.
Contact your supplier immediately if parts are
missing or damaged and do not try and assemble.
4.0 INSTALLATION
1. Place stand in the required position.
2. Make sure the rail can be raised and lowered
without interference from other
fi
xtures and
furniture and that transfers can be carried out
safely.
4.1 Floor board
fi
xing:
1. Mark through all holes in the base plate.
2. Remove stand and drill pilot holes suitable for
the
fi
xings.
3. Screw down using appropriate
fi
xings.
4. Make sure screws go through
fl
oorboards and
into the
fl
oor joists.
4.2 Concrete
fl
oor
fi
xing:
1. Mark through all holes in the base plate.
2. Remove the stand, then drill all holes using a
suitable masonry drill.
3. Remove dust and insert plugs. Replace stand
and secure using suitable
fi
xings.
1. Using the black hand-wheel on the side of the
support rail, release the rail and slide up/down
the
fl
oor stand. Re-clamp the rail securely at the
appropriate height using the black hand-wheel.


