background image

08

09

Engli

sh

Română

Installation

4

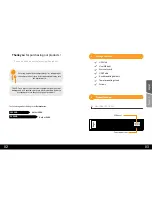
The UPS can protect your equipment from all power problems such as 

surges, spikes, blackouts, brownouts and line noise. When AC power 

is present and the ON/ Mute switch is turned ON, the UPS will provide 

pure and stable AC power to the output. The UPS will also charge the 

battery in the on-line mode. 

The UPS is simple to install and operate. Please read the following 

steps before connecting any equipments to this UPS:

NOTE:


Before installation, please inspect the unit. Be sure that nothing 

inside the package is damaged. Please keep the original package in a safe 

place for future use. 

Connecting your equipment and first usage

4.1

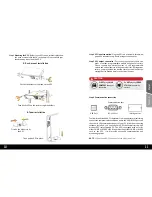
Step 1.


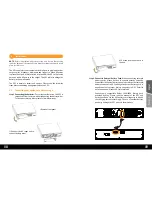
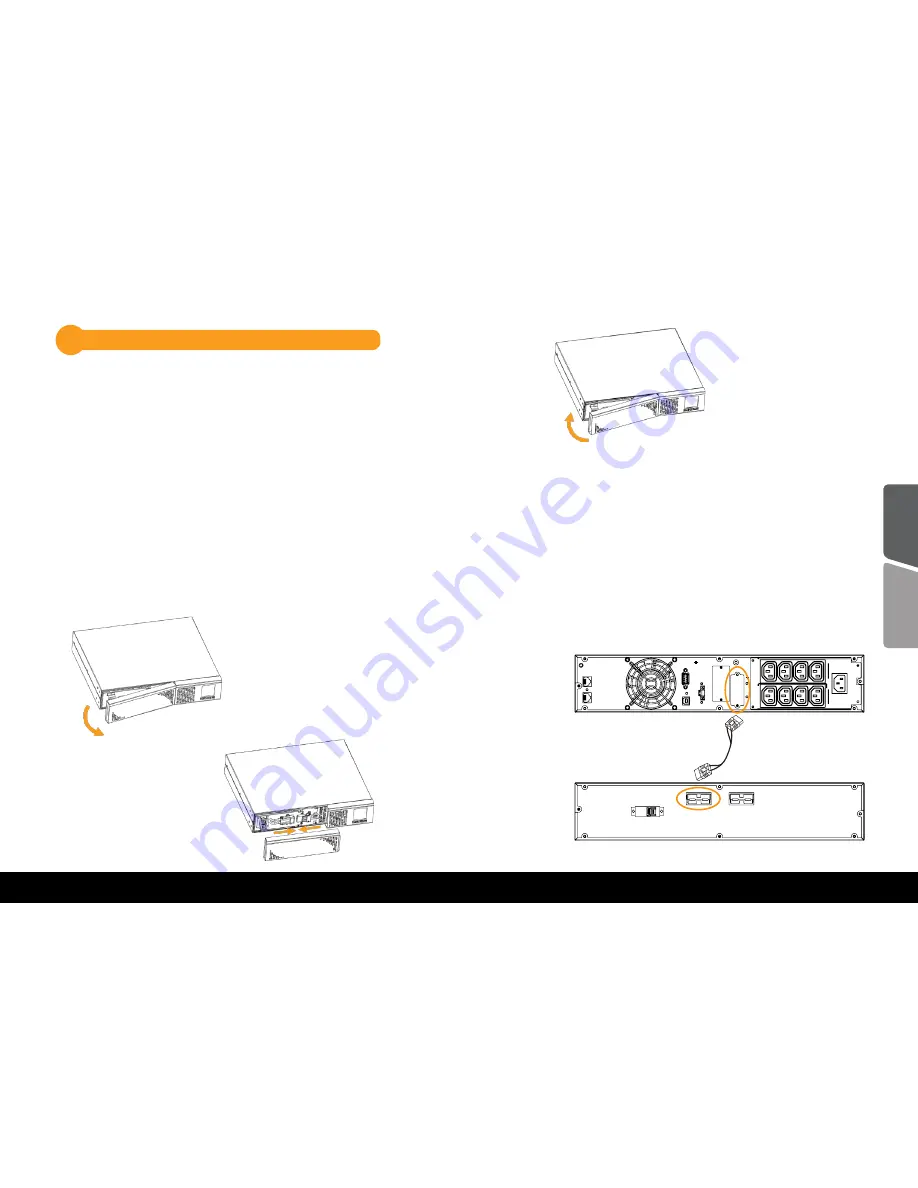
Connecting the batteries:

 For safety consideration, the UPS is 

shipped out from factory without connecting the battery wires. 

To re-connect battery wires please follow below steps:

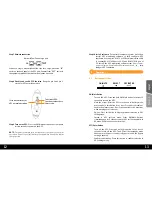
Step 2.


Connect to External Battery Pack:

 When connecting external 

battery packs, please be sure to connect polarity correctly. 

Connect positive pole of battery pack to positive pole of external 

battery connector in UPS and negative pole of battery pack to 

negative pole of external battery connector in UPS. Polarity 

mis-connection will cause UPS internal fault.


Connect only compatible Balder 1500/3000 Battery pack 

provided by nJoy. Please read the manual of the UPS and 

battery pack and set the UPS battery total capacity in Ah and 

the charging current accordingly. The use of another battery 

pack may damage the UPS and void the warranty.

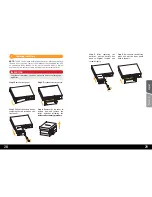
I. Remove front panel

II. Connect the AC input and re-

connect battery wires.

III. Put the front panel back to 

the unit. 

US
B

EPO

OU
T

RS232

IN

NETWORK/F

AX/MODEM

INTELLIGENT

 SLOT

PROGRAMMABLE     OUTLETS (P1)

OUTPU

T

INPU

T

10

max.

BA

TET

RY 

BREAKER

Max, 50

A

Summary of Contents for Balder 1500

Page 1: ...Balder Series User Manual Manual de utilizare PWUP OL150BA AZ01B PWUP OL300BA AZ01B v 1 Before using this product carefully read all product documentation and retain it for future reference...

Page 2: ...alderSeries Balder 1500 Balder 3000 1500VA 3000VA Thank you for purchasing our products Please read this manual before using the product Focusing on quality at competitive prices nJoy designs consumer...

Page 3: ...r 3000 U S B E P O O U T R S 2 3 2 I N N E T W O R K F A X M O D E M I N T E L L I G E N T S L O T P R O G R A M M A B L E O U T L E T S P 1 O U T P U T I N P U T 1 0 A m a x English Rom n USB EPO OUT...

Page 4: ...luids or other foreign objects from entering the inside of the UPS system Maintenance service and faults The UPS system operates with hazardous voltages Repairs may be carried out only by qualified ma...

Page 5: ...ect battery wires please follow below steps Step 2 Connect to External Battery Pack When connecting external battery packs please be sure to connect polarity correctly Connect positive pole of battery...

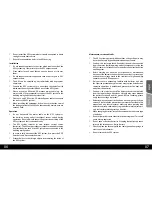
Page 6: ...ical devices to the general outlets During power failure you may extend the backup time to critical devices by setting shorter backup time for non critical devices DoNOTplugLASER PRINTERSintoanyof the...

Page 7: ...o connect RS 232 USB port of UPS and RS 232 USB port of PC Install the UPS monitoring software from https www power software download com viewpower html to fully configure UPS shutdown Operations 5 Bu...

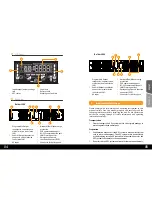
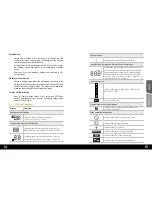
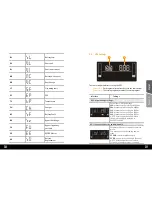
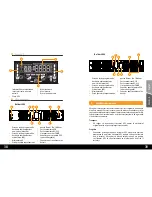
Page 8: ...nute S second Configuration and fault information 88 SET Indicates the configuration items and the con figuration items are listed in details in section 5 5 88 FAULT CODE Indicates the warning and fau...

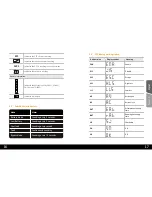
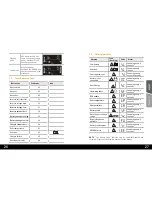
Page 9: ...Indicators 5 3 LCD display wordings index 5 4 Mode Alarm Battery Mode Sounding every 5 seconds Low Battery Sounding every 2 seconds Overload Sounding every second Fault Continuously sounding Bypass Mo...

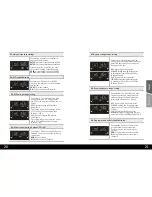
Page 10: ...e settings options or values for each program Interface Settings 01 Output voltage settings Parameter 2 Output voltage 200 presents output voltage is 200Vac 208 present output voltage is 208Vac 220 pr...

Page 11: ...le or disable Bypass function You may choose the following two options ENA Bypass enable DIS Bypass disable Default 07 Bypass voltage range setting Parameter2 Set theacceptable high voltagepoint andac...

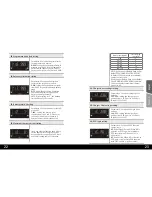
Page 12: ...ng current based on battery capacity used Please use the following table as reference Battery capacity AH Total charging current A 7 20 2 20 40 4 40 60 6 60 80 8 80 100 10 100 150 12 NOTE If you conne...

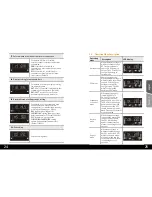
Page 13: ...in parameter 2 Default 110Vac 00 Exit setting Exit the setting mode Operating Mode Description 5 6 Operating mode Description LCD display Online mode When the input voltage is within acceptable range...

Page 14: ...ashing Code Alarm Low Battery bL Sounding every 2 seconds Overload OL Sounding every second Over input current OI Sounding 2 beep every 10 seconds Battery is not connected NC Sounding every 2 seconds...

Page 15: ...gs cautions and notes before replacing the batteries CAUTION Step 1 Remove front panel Step 2 Disconnect battery wires Step3 Pull out the battery box by removing the two screws on the front panel Step...

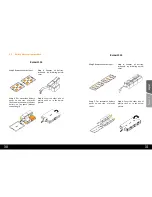
Page 16: ...battery terminals by following below chart Battery kit assemly procedure 6 1 Balder 1500 Step 1 Remove adhesive tapes Step 2 Connect all battery terminals by following below chart Step 3 Put assemble...

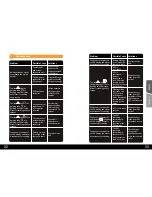
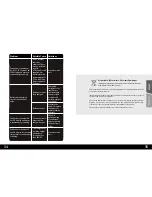
Page 17: ...service unit Problem Possible Cause Solutions Fault code is shown as 28 on LCD display and alarm is continuously sounding Battery voltage is too low or the charger is fault Contact service unit The ic...

Page 18: ...12 13 and 41 on LCD display and alarm is continuously sounding A UPS internal fault has occurred There are two possible results 1 The load is still supplied but directly from AC power via bypass 2 Th...

Page 19: ...00 3000 Mul umim pentru c a i ales produsele noastre V rug m citi i cu aten ie manualul de utilizare nainte de a pune n func iune acest produs Concetr ndu ne pe calitate la pre uri competitive constru...

Page 20: ...e urgen 9 Conector pentru cabinetul de baterii Balder 1500 U S B E P O O U T R S 2 3 2 I N N E T W O R K F A X M O D E M I N T E L L I G E N T S L O T P R O G R A M M A B L E O U T L E T S P 1 O U T P...

Page 21: ...ntru a deconecta sursa de alimentare Nu l sa i s ajung n interiorul unit ii UPS niciun obiect str in sau lichide ntre inere Service i Defecte Sistemul UPS func ioneaz cu tensiuni periculoase Repara ii...

Page 22: ...ta aceste cabluri v rug m s urma i pa i de mai jos Pasul 2 Conectare cabinet de baterii extern Atunci c nd conecta i UPS ul la un cabinet de baterii extern asigura i v c polaritatea este corect polul...

Page 23: ...i de curent pute i extinde timpul de backup la dispozitivele critice set nduntimpmaiscurtdebackuppentrudispozitivele non critice NU conecta i imprimante laser la nici una din prizele UPS ului NU conec...

Page 24: ...utoane 5 1 Butonul ON Mute Pornirea UPS ului Ap sa i i ine i ap sat butonul ON Mute pentru cel pu in 2 secunde pentru a porni UPS ul Oprirea alarmei C nd UPS ul este n modul de baterie ine i ap sat ac...

Page 25: ...Indic baterie func ional Indic faptul c UPS ul se ncarc de la re ea BYPASS Indic faptul c circuitul bypass func ioneaz ECO Indic faptul c Modul ECO e activat Indic faptul c circuitul AC DC func ioneaz...

Page 26: ...at DIS d15 Dezactivat ESC ESC Renun HLS HLS Prag superior LLS LLS Prag inferior AO AO Deschidere activ AC AC nchidere activ EAT EAt Autonomie r mas estimativ RAT rAt Autonomie acumulat SD Sd nchidere...

Page 27: ...nstabil EE EE Eroare EEPROM BR bR nlocuie te bateriile Interfa Set ri 01 Set ri tensiune la ie ire Parametrul 2 Tensiune la ie ire 200 tensiunea de ie ire este 200Vac 208 tensiunea de ie ire este 208V...

Page 28: ...az sau deactiveaz func ia de bypass Pute i alege una din urm toarele op iuni ENA Activare bypass DIS Dezactivare bypass implicit 07 Set rile plajei tensiunii de bypass Parametrul2 Stabili i valoareama...

Page 29: ...u valoarea maxim a curentului de nc rcare Dac folosi i cabinete de baterii externe v rug m s seta i valoarea maxim a curentului de nc rcare conform cu tabelul de mai jos Capacitate baterie AH Curent d...

Page 30: ...itele acceptate dar UPS ul este supra nc rcat va intra in Modul Bypass automat Alarma va suna o dat la fiecare 10 secunde 17 Conectarea unui transformator de izolare extern Parametru 2 Permite sau nu...

Page 31: ...re 2 secunde Frecven de bypass instabil FU Sun la fiecare 2 secunde nlocuire baterie br Sun la fiecare 2 secunde Eroare EEPROM EE Sun la fiecare 2 secunde Eroare Cod Icoan Eroare pornire BUS 01 Suprat...

Page 32: ...e nainte de nlocuirea bateriilor ATEN IE Pasul 1 nl tura i panoul frontal Pasul2 Deconecta icablurilebateriei Pasul 3 Scoate i cutia bateriei prin eliminarea celor 2 uruburi de pe panoul frontal Pasul...

Page 33: ...ta i toate bornele bateriei urm rind grafica de mai jos Procedura de asamblare a kit ului de baterii 6 1 Balder 1500 Pasul 1 ndep rta i benzile adezive Pasul 2 Conecta i toate bornele bateriei urm rin...

Page 34: ...Cauz posibil Solu ie Codul de eroare 28 p lp ie pe ecranul LCD i alarma sun continuu Tensiunea bateriei este prea mic sau nc rc torul este defect Contacta i unitatea de service Icoanele i iar codul d...

Page 35: ...blem Cauz posibil Solu ie Codul de eroare este afi at ca 01 02 03 04 11 12 13 sau 41 pe panoul LCD i alarma sun continuu O eroare intern a avut loc Exist dou posible rezultate 1 Sarcina este nc furniz...

Page 36: ...oned product was found in compliance with 2004 108 EC EMC Directive Also tested with the listed standards the above mentioned product was found in compliance with 2006 95 EC LVD Directive EN 62040 2 2...

Page 37: ......

Reviews: