Need Help?
877.716.8550
Starlight.org/gaming/support
23
4
Servicing
Caution:
These servicing instructions are for use by qualified service personnel only. To
reduce the risk of electric shock do not perform any servicing other than that contained in
the operating instructions unless you are qualified to do so.
4.1
Replacing the Joy-Con Controller or Pro Controller Assemblies
1.
Make sure the Gaming station’s main power cord is disconnected from power.
2.
Use the key provided with the Gaming station to unlock both locks on the underside of the
main cabinet.
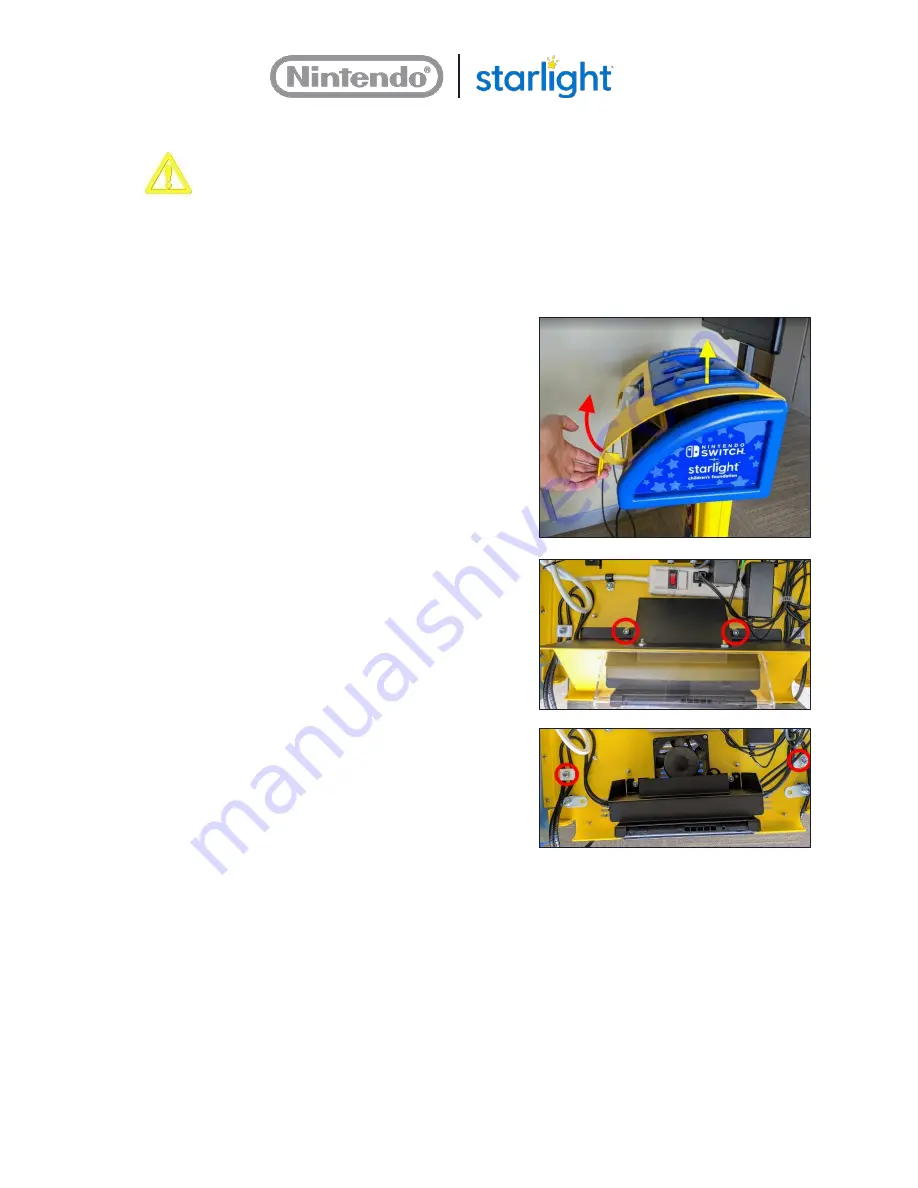
3.
The entire top of the cabinet can be removed
from the Gaming station.
To remove, lift the front of the cabinet up to
slightly tilt the cabinet cover and to get a solid
two-hand grip on the cabinet cover.
Then lift the cabinet cover straight up until the
two tabs on the back of the cover exit the
bottom cabinet.
4.
Use a 7/16” socket driver to remove the two
nuts that attach the console cover assembly to
the cabinet. Once the nuts are removed, lift the
console cover assembly away from the cabinet
and set aside for reinstallation later.
5.
Identify the defective controller, then use a
7/16” socket driver to loosen the nut holding
that controller’s cable in place. Loosen the nut
until the cable clamp is no longer pinching the
cable and the cable can slide out.
6.
Disconnect the controller USB connector from the dock.


