27
Step 1 Turn the Camera On and Select
A
(Auto) Mode
Bas
ic Ph
otography an
d Pl
ayba
ck
:
A
(Auto)
M
o
de
Indicators Displayed in
A
(Auto) Mode
When the monitor has turned off in standby mode to save power (the power on
lamp is blinking) (
158), press the following buttons to turn it back on:
- Power switch, shutter-release button,
A
button or
b
(
e
movie-record)
button
B
Note on Touch Shutter
At the default setting, the shutter can be released by simply tapping a subject in the monitor
(
45). Take care that you do not release the shutter accidently.
D
Functions Available in
A
(Auto) Mode
•
When the camera is pointed at a human face, the face detection function, with which the camera
automatically detects that face and focuses on it, activates (
30, 41).
•
Shooting settings (
34, 42) can be changed by tapping the left or bottom tab to display the
setting controls.
D
Motion Detection
See
Motion detection
(
155) in the setup menu (
146) for more information.
D
Electronic Vibration Reduction
When the flash mode (
34) is set to
c
(off) or
d
(slow sync) with
Electronic VR
154) in the
setup menu set to
Auto
, the
R
icon may be displayed in the monitor. When
R
is displayed, the
effects of camera shake may be pronounced under the current shooting conditions. In these
situations, the camera reduces the effects of camera shake in pictures before recording them.
3
33
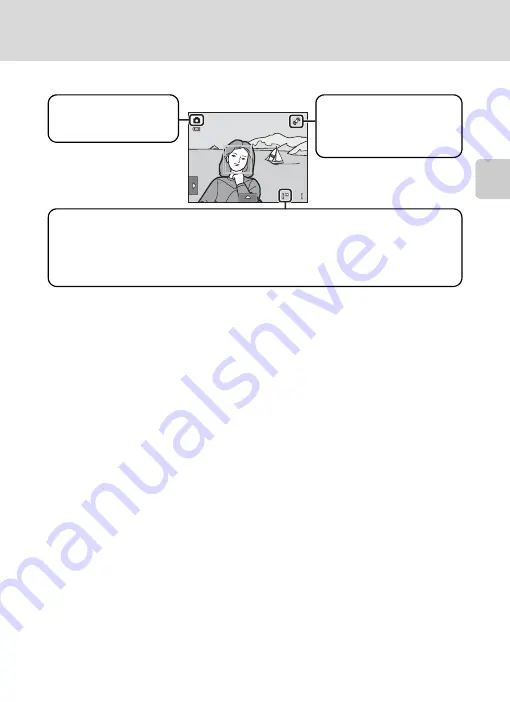
Shooting mode
A
displayed in
A
(auto)
mode.
Internal memory indicator
Indicates that images will be stored in the camera’s internal memory (approximately
20 MB).
When a memory card is inserted in the camera,
C
does not appear and images will be
stored on the memory card.
Motion detection icon
The effects of subject
movement and camera
shake are reduced.
Summary of Contents for 26260
Page 207: ......


