149
Wi
re
le
ss
Se
rv
ic
es
Using Picture Bank
Uploading Selected Pictures
1
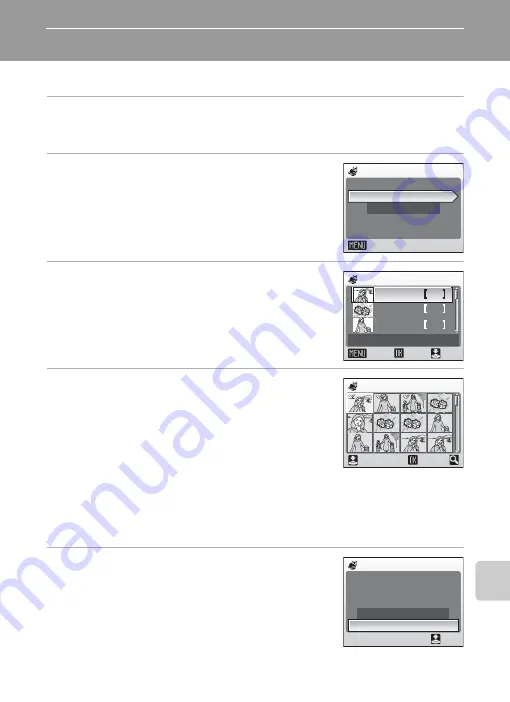
Display the picture selection screen.
Refer to steps 1 to 3 of “Using COOLPIX CONNECT Services” (
144) to display
the picture selection screen.
2
Choose [All images] or [List by date] and
press
d
.
[All images]: proceed to step 4
[List by date]: proceed to step 3
3
Select a date.
Press
d
to select a date in the list by date screen
(
y
). Press
d
again to cancel the selection.
Multiple dates can be selected.
Press the shutter-release button to finalize date selec-
tion.
4
Choose pictures.
If [All images] is selected in step 2, all pictures will be
displayed. If [List by date] is selected, only pictures
taken on the date selected in step 3 will be displayed.
Use the rotary multi selector to choose pictures and
press
d
to choose a desired picture (up to 30). A
check mark (
y
) will be applied to selected pictures.
Press
d
again to cancel a selection.
Press
v
(
k
) to switch to full-frame playback; press
t
(
j
) to return to thumbnail
display.
Press the shutter-release button to finalize picture selection.
5
Upload pictures.
Choose [Yes] and press the shutter-release button.
Pressing
d
, instead of the shutter-release button,
also initiates picture upload.
When the upload is complete, the message, [Transfer
complete. Connection terminated.], will be displayed.
Select SSID
All images
List by date
Picture selection
Confirm
ON/OFF
Back
List by date
2 0 0 7 / 1 0 / 1 0
3
2
5
2 0 0 7 / 1 0 / 0 9
2 0 0 7 / 1 0 / 0 8
images total [ 5]
Confirm
ON/OFF
Select image
5
Send pictures?
Yes
No
Send mail
Confirm


