


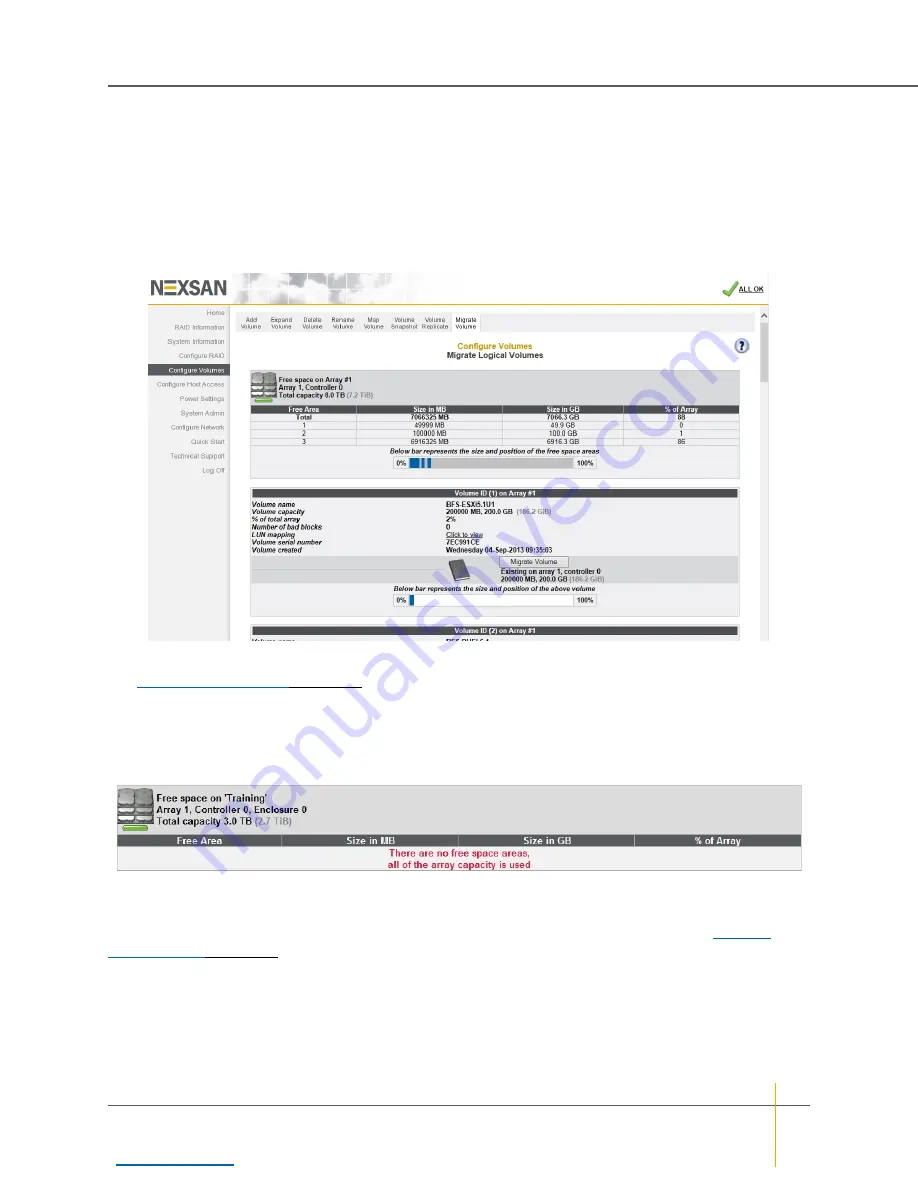
Migrate Logical Volumes
Clicking
Configure Volumes > Migrate Volume
takes you to the
Migrate Logical Volumes
page. This page
lets you move a live volume from one RAID array to another. It lists each array in the system and all volumes
in each array. Scroll down to see all arrays and volumes.
Note
The volume migration feature
moves
a volume from one array to another. It does NOT make a
copy
of
the volume.
Figure 3-106: Migrate Logical Volumes page
The array information section lists the array name, array number, array owner, enclosure, and total capacity.
See
on page 63 for more information. If there is free space on the array, this section
displays the total amount of space taken up by existing volumes, plus the percentage of the array’s total
capacity used.
Note
If there is no space on the array, the array information section looks like this:
Figure 3-107: Message indicating no free space on array
Each volume’s information section lists the volume ID, array name, volume name, volume capacity, the
percentage of the array that the volume uses, the number of bad blocks, a link to the logical unit number (LUN)
mapping information, the volume serial number, and the date that the volume was created (see
The darker area below the listed items displays the
Migrate Volume
button, the name of the array that the
volume belongs to, the controller number, and the volume capacity.
The bottom area contains a bar which represents the percentage of the array’s capacity that the volume uses,
as well as the volume’s relative position within the array.
Chapter 3: The Graphical User Interface — Configure Volumes
Nexsan High-Density Storage
User Guide
158