


Adding disk drives
CAUTION
: Computer components and disk drives are sensitive to electrostatic discharge (ESD).
Always ground any electrostatic charge from your person before touching components with your
hands or with any tools. Always use an anti-static wrist strap (one ships with each Nexsan Storage
System) while installing or performing maintenance on any Nexsan Storage System. See
on the previous page for detailed instructions.
Systems that are not fully populated with disk drives can have disk drives added to them at a later time.
Note
The Spare Mode that the Nexsan Storage System is set to determines whether or not newly-inserted
disks are automatically assigned as pool spares. To check or set the spare mode, go to
Configure RAID >
Spare Mode
in the graphical user interface (GUI). See the
Nexsan High-Density Storage User Guide
for
more information.
►
To add disk drives to the Nexsan Storage System:
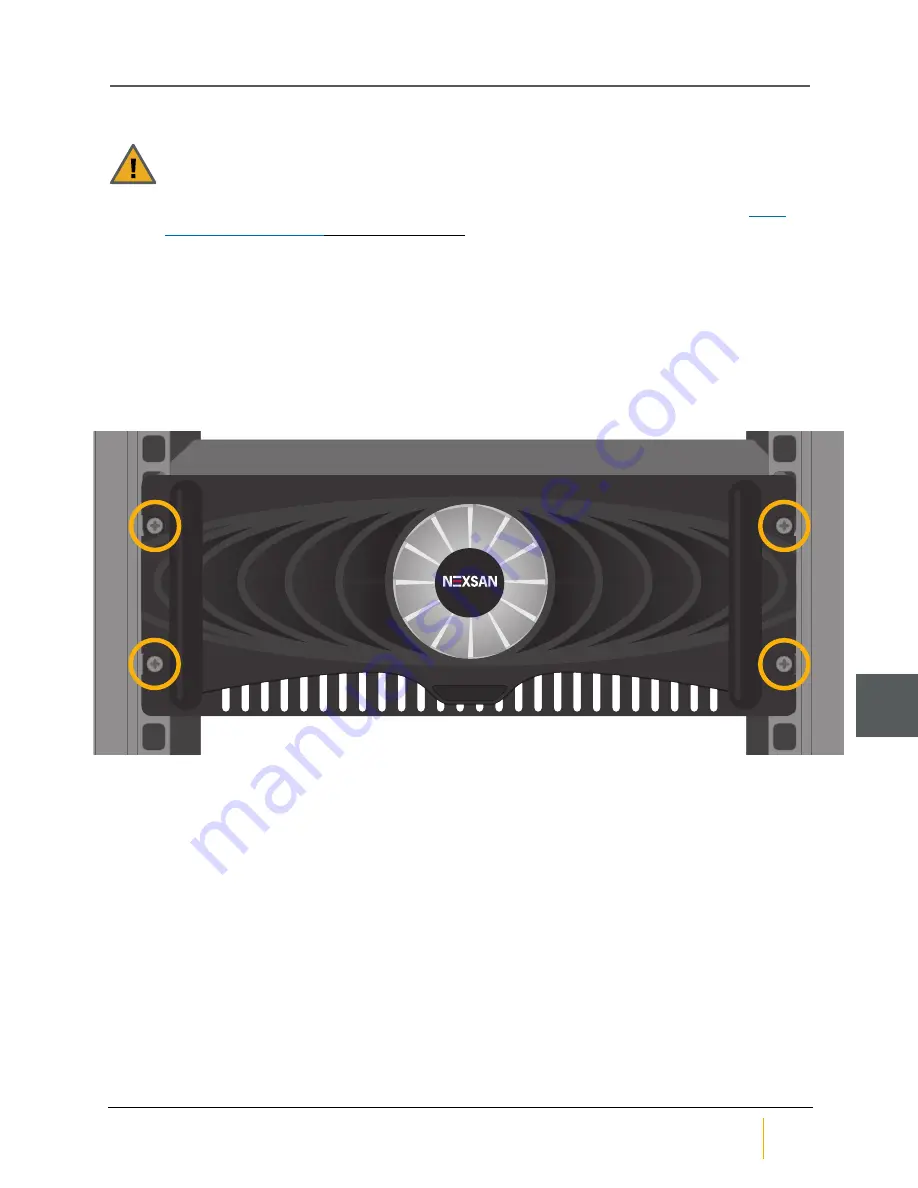
1. Unbolt the front of the Nexsan Storage System from the rack.
Figure 2-2: Front face bolt locations
PWR
ENV
DSK
STAT
Chapter 2: Adding Modules
Nexsan BEAST BT60 and BT60X
FRU Removal and Replacement Guide
Nexsan
24
2