33
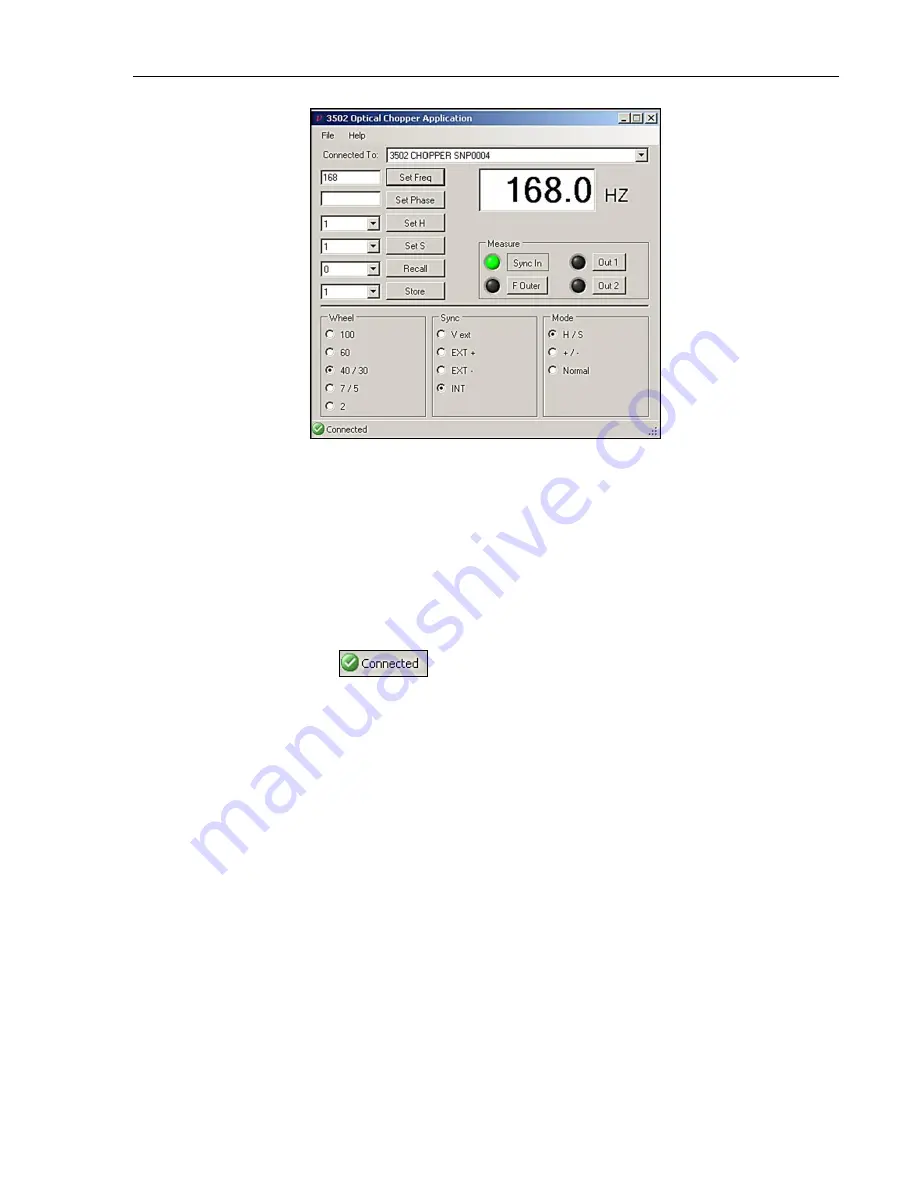
Figure 16:
Model 3502 Optical Chopper Application window.
4.2.1
A Quick Start: How to Use the ‘New Focus Chopper
Application’
1.
Turn the Model 3502 Optical Chopper Controller on using the power
button on the front panel of the Controller.
2.
Open the New Focus Chopper Application. If you turn on the Chopper
after opening the application you may need to select the
Connect
menu
item from the
File
menu.
3.
The
icon at the lower left corner of the window indicates
that the GUI has successfully established a connection to the Chopper
Controller.
4.
Operating parameters can now be set from the application window: radio
buttons are used to select the
Wheel
,
Sync
mode, and
Mode
of operation.
5.
The desired chopping frequency is set by entering the value in Hz in the
topmost text entry field and pressing the
Set Freq
button. Similarly, the
chopping phase, H, and S can all be changed. Note that although you can
set values for the chopping frequency, phase, H, and S via the GUI, the
present values of these setpoints can only be read through the front panel
of the Chopper Controller.
6.
Up to nine setup states can be stored using the
Store
button on the left.
This is done by first assigning the setup state a number (1-9) from the
dropdown menu next to the
Store
button, then clicking the button.
Similarly, a setup state can be recalled using the
Recall
button.
7.
The frequency of
Sync In
,
F
outer
,
OUT 1
, and
OUT 2
can be measured by
clicking their respective button in the
Measure
field. The magnitude of the
frequency measured (in Hz) will be shown in the numeric display field.
8.
To exit the
application, either close the window or select ‘
Exit’
from the
‘
File’
menu.


