background image


OPERATING INSTRUCTIONS 


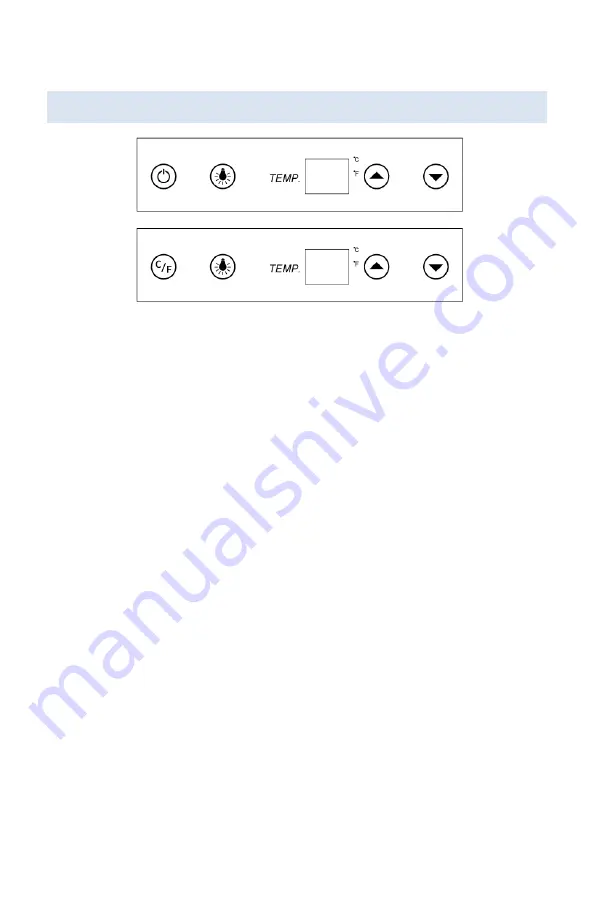
Press the power button to turn the fridge on and off, even while the unit is 
plugged in. The fridge will be on by default but pressing and holding the power 
button for 5 seconds will shut it off. This feature is handy if you want to shut 
the unit off but are unable to reach the plug. Press and hold for 5 seconds to 
turn the fridge back on. 

Press the light buttons to 

switch between “auto” lighting and “always on” 

lighting. Auto lighting is the default setting, which keeps the lights off when the 
door is closed. Lights will only turn on when a door is opened. Press the button 
once to keep the lights on even when the doors are closed.  

Press the up and down arrows to adjust the temperature for each zone in one 
degree increments. The left zone temperature can be set between 36°and 
72

, and the right zone temperature can be set between 40°and 72

. To view 

the current set temperature, press the up or down arrow once.  

Press the C/F button to change between Celsius and Fahrenheit for the 
temperature display. 

LEFT 

ZONE 

RIGHT 

ZONE 

Summary of Contents for 810028280663

Page 1: ...Manual v1 1 24 French Door Dual Zone Wine and Beverage Fridge SKU NWB080SS00 OWNER S MANUAL Read and save these instructions...

Page 2: ...ing Maintenance 9 Troubleshooting 10 Limited Manufacturer s Warranty 11 SPECIFICATIONS MODEL NO NWB080SS00 VOLTAGE 110 120V CURRENT 0 9 Amps REFRIGERANT R600a FREQUENCY 60Hz PRODUCT DIMENSIONS 24 10 D...

Page 3: ...Registering your product information online is safe secure and takes less than 2 minutes to complete Alternatively we recommend you attach a copy of your sales receipt below and record the following...

Page 4: ...t located at the bottom of the unit Do not use this fridge in applications for which it is not intended Damage that occurs from improper use or from unauthorized repairs will void the warranty For pro...

Page 5: ...low 90 This fridge is designed for built in recessed or freestanding installation For built in installation leave a 1 4 6 35mm space on each side and at the top of the fridge to ensure proper air circ...

Page 6: ...lle at the bottom of the front of the unit HANDLE INSTALLATION Pull away the door gasket in the area where the handle is to be installed The gasket is easily removed by hand no tools are necessary It...

Page 7: ...nd always on lighting Auto lighting is the default setting which keeps the lights off when the door is closed Lights will only turn on when a door is opened Press the button once to keep the lights on...

Page 8: ...and turn it counter clockwise to unlock the door To lock the door do the reverse and make sure the metal pin is engaged completely Remove the key and store in a secure location you don t want to get l...

Page 9: ...ace the unit in direct sunlight Do not place heated beverages in your fridge Do not store perishable food in your fridge The unit s interior temperature may not be low enough to prevent spoilage Do no...

Page 10: ...unlight or other heat sources There is insufficient ventilation Place the unit in an area with proper ventilation and clearances The door is not completely closed or the door seal is not working prope...

Page 11: ...y Terms During the first year any components of this appliance found to be defective due to materials or workmanship will be repaired or replaced at the manufacturer s discretion at no charge to the o...

Page 12: ...ith purchase date available Once confirmed that your appliance is eligible for warranty service all repairs will be performed by a NewAir authorized repair facility The purchaser will be responsible f...

Reviews: