background image

INTRODUCTION

Safety rules - Personal Safety

Carefully study these precautions, and those included in the external attachment operators
manual, and insist that they be followed by those working with and for you.

1.

Thoroughly read and understand this manual and the attachment operators manual before operating this or any
other equipment.

2.

Be sure everyone is clear of the machine before starting. Blow the horn, if equipped, three times before starting
engine.

3.

Only the operator should be on the machine when in operation. Never allow anyone to climb on to the machine
while it is in motion. If the machine is equipped with an Instructors Seat, this must only be used for training
purposes. Passengers must not be allowed to use the Instructors Seat.

4.

Keep all shields in place. Never work around the machine or any of the attachments while wearing loose clothing
that might catch on moving parts.

5.

Observe the following precautions whenever lubricating the machine or making adjustments.

Disengage all clutching levers or switches.

Lower the attachment, if equipped, to the ground or raise the attachment completely and engage
the cylinder safety locks . Completing these actions will prevent the attachment from lowering un-
expectedly.

Engage the parking brake.

Shut off the engine and remove the key.

6.

Always keep the machine in gear while going downhill.

7.

The machine should always be equipped with sufficient front or rear axle weight for safe operation.

8.

Under some field conditions, more weight may be required at the front or rear axle for adequate stability. This
is especially important when operating in hilly conditions or/when using heavy attachments.

9.

Always lower the attachment, shut off the engine, set the parking brake, engage the transmission gears and
remove the key before leaving the operators platform.

10.

If the attachment or machine should become obstructed or plugged; set the parking brake, shut off the engine
and remove the key, engage the transmission gears, wait for all machine or attachment motion to come to a
stop, before leaving the operators platform to removing the obstruction or plug.

11.

Never disconnect or make any adjustments to the hydraulic system unless the machine and/or the attachment
is lowered to the ground or the safety lock(s) is in the engaged position.

12.

Use of the flashing lights is highly recommended when operating on a public road.

13.

When transporting on a road or highway, use accessory lights and devices for adequate warning to the operators
of other vehicles. In this regard, check local government regulations. Various safety lights and devices are
available from your NEW HOLLAND CONSTRUCTION dealer.

14.

Practice safety 365 days a year.

15.

Keep all your equipment in safe operating condition.

16.

Keep all guards and safety devices in place.

17.

Always set the parking brake, shut off the engine and remove the key, engage the transmission gears, wait for all
machine or attachment motion to come to a stop, before leaving the operators platform to service the machine
and attachment.

18.

Remember: A careful operator is the best insurance against an accident.

19.

Extreme care should be taken in keeping hands and clothing away from moving parts.

84522361 15/06/2011

5

Summary of Contents for C227

Page 1: ...SERVICE MANUAL C227 C232 C238 L213 L215 L218 L220 L223 L225 L230 84522361 15 06 2011 EN...

Page 2: ...LT CODES A 50 A ENGINE AND PTO IN B ENGINE B 10 A FUEL AND INJECTION SYSTEM B 20 A AIR INTAKE SYSTEM B 30 A ENGINE COOLANT SYSTEM B 50 A STARTING SYSTEM B 80 A TRANSMISSION DRIVE AND PTO OUT C TRANSMI...

Page 3: ...OOL POSITIONING G LIFTING G 10 A TILTING G 20 A LEVELLING G 30 A SECONDARY FUNCTIONS Hydraulic G 90 C HITCH AND WORKING TOOL H BOOM Lift H 20 B ARM TOOL ATTACHMENT Tilt H 30 C SINGLE ARM Lift H 40 B S...

Page 4: ...INTRODUCTION 84522361 15 06 2011 1...

Page 5: ...fety rules 4 2 Series Safety rules Personal Safety 5 Safety rules 6 Basic instructions Important notice regarding equipment servicing 7 Torque Minimum tightening torques for normal assembly 8 2 Series...

Page 6: ...tain substances which may be harmful to your health Modern oils contain additives Do not burn contaminated fuels and or waste oils in ordinary heating systems Avoid spillage when draining off used eng...

Page 7: ...ARNING is ORANGE CAUTION used with the safety alert symbol indicates a hazardous situation which if not avoided could result in minor or moderate injury The color associated with CAUTION is YELLOW FAI...

Page 8: ...ired at the front or rear axle for adequate stability This is especially important when operating in hilly conditions or when using heavy attachments 9 Always lower the attachment shut off the engine...

Page 9: ...bility for damages caused by parts and or components not approved by the manu facturer including those used for the servicing or repair of the product manufactured or marketed by the manufacturer In a...

Page 10: ...lb in 25 N m 217 lb in 26 N m 234 lb in 35 N m 311 lb in 17 N m 151 lb in 24 N m 212 lb in M10 37 N m 27 lb ft 49 N m 36 lb ft 52 N m 38 lb ft 70 N m 51 lb ft 33 N m 25 lb ft 48 N m 35 lb ft M12 64 N...

Page 11: ...N m 343 lb in 18 N m 163 lb in 27 N m 240 lb in M10 40 N m 30 lb ft 54 N m 40 lb ft 57 N m 42 lb ft 77 N m 56 lb ft 37 N m 27 lb ft 53 N m 39 lb ft M12 70 N m 52 lb ft 93 N m 69 lb ft 100 N m 74 lb f...

Page 12: ...t 7 16 48 N m 36 lb ft 65 N m 48 lb ft 68 N m 50 lb ft 91 N m 67 lb ft 50 N m 37 lb ft 71 N m 53 lb ft 1 2 74 N m 54 lb ft 98 N m 73 lb ft 104 N m 77 lb ft 139 N m 103 lb ft 76 N m 56 lb ft 108 N m 80...

Page 13: ...5 lb ft 153 N m 113 lb ft 74 N m 55 lb ft 104 N m 77 lb ft 9 16 117 N m 86 lb ft 156 N m 115 lb ft 165 N m 122 lb ft 221 N m 163 lb ft 106 N m 78 lb ft 157 N m 116 lb ft 5 8 162 N m 119 lb ft 216 N m...

Page 14: ...4 Grade Identification Grade Corner Marking Method 1 Flats Marking Method 2 Clock Marking Method 3 Grade A No Notches No Mark No Marks Grade B One Circumferential Notch Letter B Three Marks Grade C T...

Page 15: ...1 welding rod or wire that meets the following American Welding Society AWS specifications ER80S D2 ER70S 6 or E70C M6 H4 NOTICE ALWAYS disconnect the battery both terminals before welding on any part...

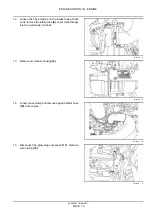
Page 16: ...t 1 from hood 931001682 1 2 Remove hood mounting hardware 2 from left and right hand side 931002025 2 3 Remove the hood 3 931002026 3 4 Remove the rear access door refer to Engine hood Remove E 20 A 5...

Page 17: ...2027 4 9 Remove the five mounting bolts 5 retaining the muf fler inlet pipe mounting flange to the turbocharger and remove muffler 931002028 5 10 Remove the two retaining bolts 6 from the muffler supp...

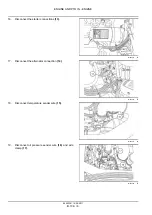
Page 18: ...e tube 8 cover turbocharger inlet to avoid entry of debris 931002031 8 13 Remove air cleaner housing 9 931002032 9 14 Loosen hose clamp and remove upper radiator hose 10 from engine 931002033 10 15 Di...

Page 19: ...arter connections 13 931002035 12 17 Disconnect the alternator connection 14 931002036 13 18 Disconnect temperature sender wire 15 931002037 14 19 Disconnect oil pressure sender wire 16 and wire clamp...

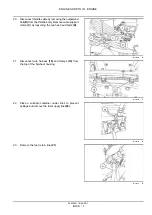
Page 20: ...p C by loosening the two hex head bolts D 931002039 16 21 Disconnect wire harness 18 and clamps 19 from the top of the flywheel housing 931002040 17 22 Place a suitable container under lines to preven...

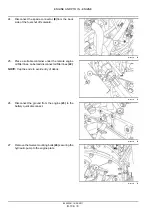
Page 21: ...nder the remote engine oil filter lines Label and disconnect oil filter lines 22 NOTE Cap the ends to avoid entry of debris 931002044 21 26 Disconnect the ground from the engine 23 to the battery quic...

Page 22: ...pan drain hose clamp F 931002050 24 29 Remove the front engine mounts 25 931002047 25 30 Remove the rear engine mount 26 931002048 26 31 Remove the four mounting bolts 27 from the fixed hood remove h...

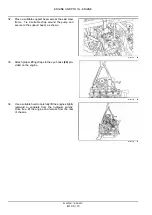
Page 23: ...e support beam as shown 931002051 28 33 Attach proper lifting straps to the eye hooks 28 pro vided on the engine 931002052 29 34 Use a suitable hoist to carefully lift the engine slightly rearward to...

Reviews:

Related manuals for C227