connection button: click to start connecting Lidar
Camera: camera switch control
PczToPCd: convert PCZ file to PCD file
Laser Power: set Lidar power percentage
Frame/S: display frames per second
Laser Rate: laser repetition rate
Point Type : Select the point cloud type
Point Size: The size of the point cloud point
Grid Size: The interval size of the point cloud coordinate frame
Color Cycle: The point cloud coloring distance distribution
View: The one-key switching of the point cloud imaging angle
5.3 operation process
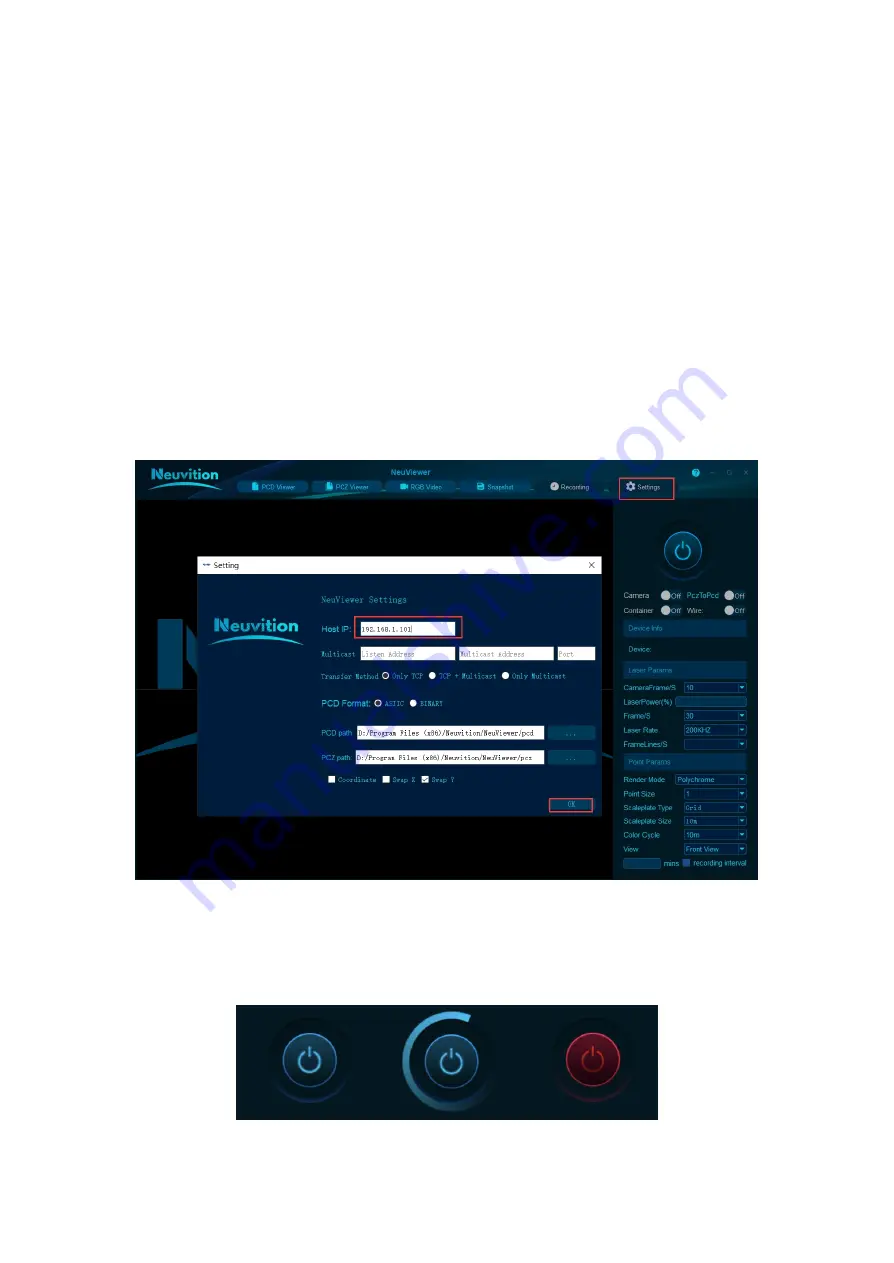
(1) As described in Chapter 6 Network Configuration, the computer and the Lidar network are
successfully connected, click the Setting interface, enter the IP address of the Lidar in the Host IP
text box (default 192.168.1.101), if there is any modification, fill in the modified IP address, and
click OK to take effect.
Figure 20 Fill in the Lidar IP address
(3) click the one-key connection switch of the client. The switch status is shown in Figure 21:
Initial state
Connecting
Connected
Figure 21 Client connection button state description
(3) If you need to display the camera image, you need to switch the Camera to on mode, and click
RGB Video in the functional area at the same time to pop up the video box.


