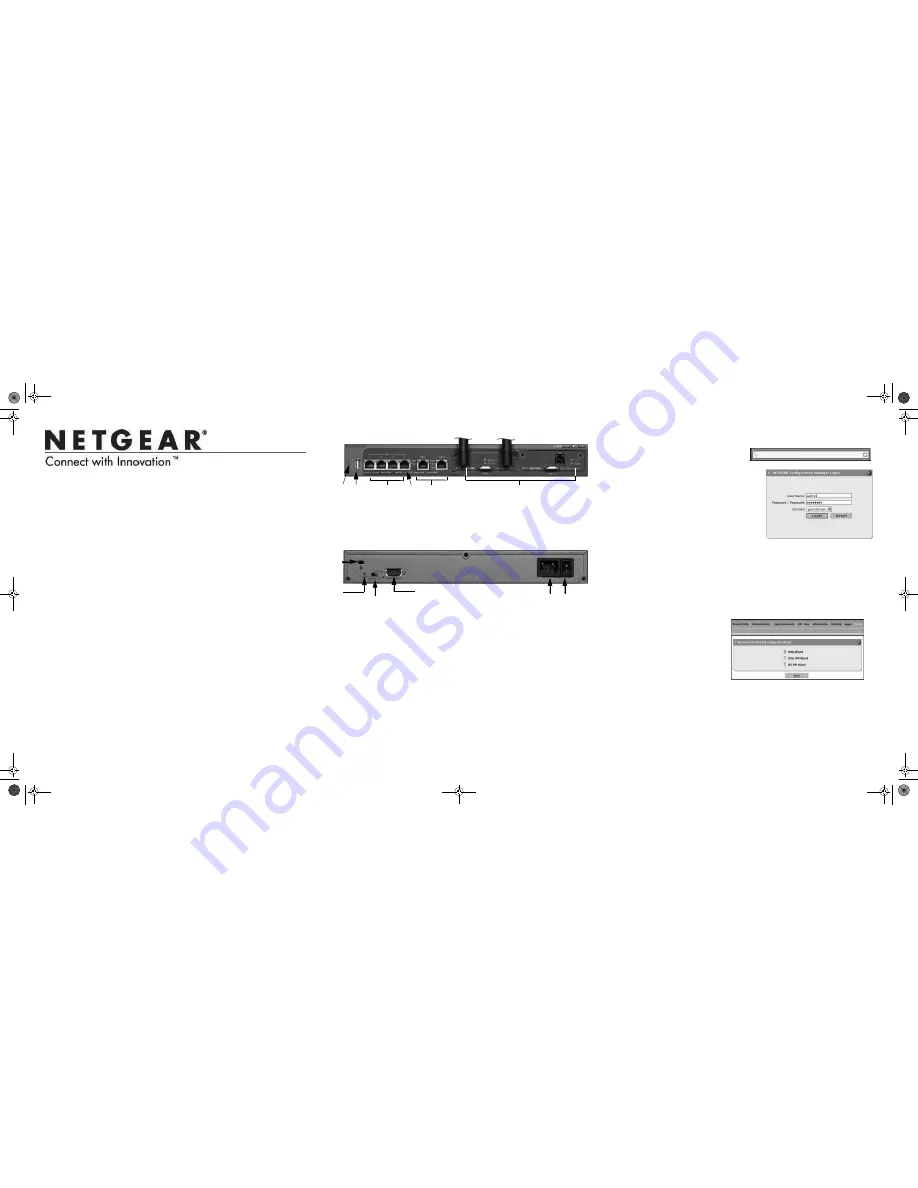
1
2
5
4
6
3
7. Kensington lock
9. Module selection for console 11. Power connector
8. Factory reset button
10. Console port
12. Power switch
7
10
9
8
11
12
Installation Guide
Connect the Unit
For initial setup, connect the WAN Ethernet port to an active WAN connection such
as a broadband modern, connect a DHCP enabled computer to a LAN port, and
turn on the unit. Verify the following:
•
Power LED
: It takes about a minute to boot. The power LED should turn solid
green. If it does not, see the Troubleshooting section of the
Reference Manual
.
•
Test LED
: When you first turn on the unit, the amber test LED is lit for
approximately 2 minutes.
•
WAN Status LED
: The status LED on the connected WAN port should be lit. If
not, make sure that the Ethernet cable is securely attached to the modem and
the WAN port, and that the modem is powered on.
•
LAN Status LED
: A LAN status LED should be lit. If not, ensure that the Ethernet
cable from the computer to the unit is securely attached at both ends, and that
the computer is turned on.
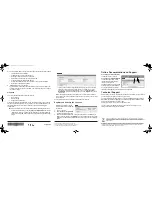
Log in to the Unit
1.
Use a browser to connect to
https://192.168.1.1
https://192.168.1.1
.
2.
When prompted, enter
admin
for the
User Name and
password
for the
Password. Click
Login.
You are now connected. After 5 minutes of
inactivity (the default login time-out), you
are automatically logged out.
Note:
When the unit scans secure HTTPS
traffic, import its root CA certificate into client
browsers. Click the link on the login screen to
download it.
Use the Setup Wizard for Basic Configuration
The Setup Wizard guides you through the basic network and scanning setup.
Note:
If you choose to bypass the Setup Wizard, be sure to configure an alerts
email address and change the admin password.
1.
Start the Setup Wizard.
Select
Wizards > SetupWizard
to start the wizard.
For guidance on how to fill in
the wizard screens, refer to the
online help or the reference
manual via a link in the
Support
> Documentation
page.
ProSecure Unified Threat Management Appliance UTM25S
Note: Electronic License
This product includes an electronic license
that activates automatically upon product registration.
Follow these instructions to configure your ProSecure® Unified Threat
Management appliance UTM25S appliance to use a single WAN interface, and
enable the default threat management scanning. Then, consult the reference
manual
for instructions for configuring other options such as multiple WAN settings,
VPN, firewall, and custom scanning. You can access the reference manual
from the
product management interface, via the resource CD and from the NETGEAR
support site:
http://downloadcenter.netgear.com
.
Estimated time: 30 minutes.
Verify the Package Contents
•
ProSecure UTM25S appliance
•
Installation guide
•
Resource CD
•
Rubber feet (4) with adhesive backing
•
Rack mount brackets (some models)
•
Power cord
Familiarize Yourself with the Unit and Complete Setup
Familiarize yourself with the ports
and LEDs on the front of the unit.and with the
connectors and controls on the back of the unit.
1. Power and Test LEDs
2. USB port (future use)
3. Gigabit LAN ports
4. LAN port 4 DMZ
5. Gigabit WAN ports,
6. Accessory modules
UTM25S_IG_13Sept2012.fm Page 1 Thursday, September 13, 2012 3:28 PM


