Installing hardware
25
2. Close the HDD tray handle.
Do not force the tray handle closed. If resistance is encountered check the hard dri-
ve is properly inserted and the hard drives on either side are properly inserted.
2.3.4. Removing a 3.5” Hard Drive
This procedure applies only for 3.5" model.
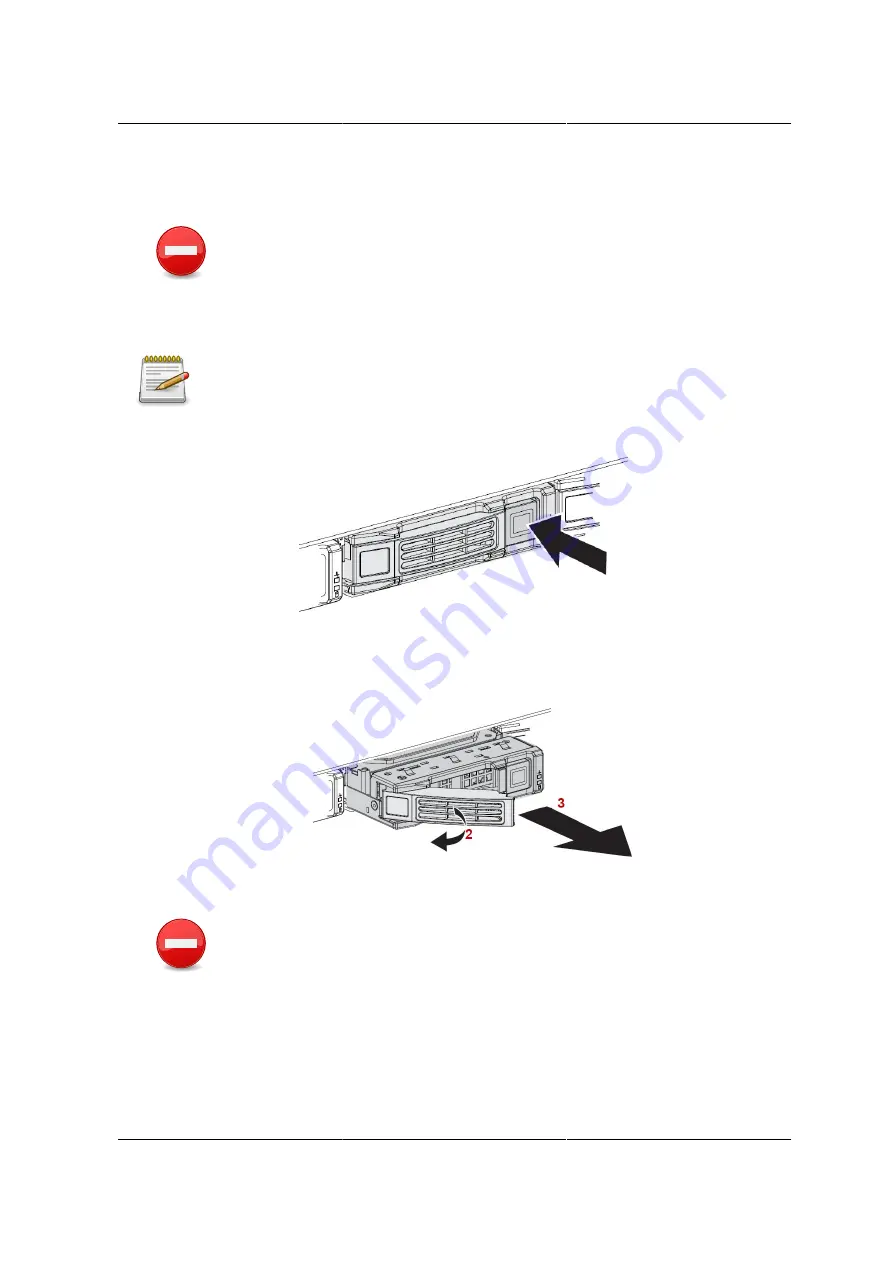
Figure 2.8. Opening the Hard Drive Tray Handle
1. Press the tray handle button.
Figure 2.9. Removing the 3.5” Hard Drive Tray
2. Pull the hard drive tray handle completely open.
Make sure the hard drive tray handle is in the fully open position.
3. Grasp the tray handle and pull the tray from the system.
4. Remove the four (4) screws securing the hard drive to the HDD tray.
Summary of Contents for Demos R130 M2
Page 1: ...Netberg Demos R130 M2 server...
Page 2: ...Netberg Demos R130 M2 server...
Page 11: ...Netberg Demos R130 M2 server xi 9 5 Aligning the Rails 222...
Page 14: ...1 Chapter 1 Netberg Demos R130 M2 server...
Page 31: ...Netberg Demos R130 M2 server 18 On HDD failure HDD Fault Amber Off No failure detected...
Page 32: ...19 Chapter 2 Installing hardware...
Page 57: ...Installing hardware 44 Figure 2 36 Installing the Air Duct...
Page 60: ...Installing hardware 47 Figure 2 40 Connecting the Fan Assembly Cables...
Page 143: ...130 Chapter 6 Server Management Software...
Page 169: ...156 Chapter 8 Web Graphical User Interface GUI for ESMS...
Page 230: ...217 Chapter 9 Rail Kit Assembly...
Page 236: ...223 Chapter 10 Troubleshooting...


