


CHAPTER 1. MMO-700
1.6. TRANSPORT
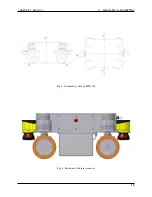
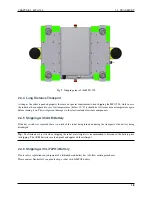
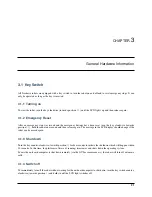
Fig. 2: Controller cabinet and robot arm mounted to mobile platform
Connect the cables inside the control cabinet to the appropriate plugs of the mobile platform. Please see the electrical
circuit diagram for details.
1.6.2 Installing the Auxiliary Batteries
In order to extend the robot’s uptime, a second battery set can be installed into the controller cabinet. Before installing
the auxiliary batteries, please turn off the robot and fully charge both the batteries that are currently used in the robot
as well as the additional battery pack.
Warning:
It is very important to fully charge both sets of batteries before connecting them. This will prevent
internal currents between battery sets of different charge levels. Such currents may cause overheating and damage
to the robot.
For charging the auxiliary batteries please use the adapter that was included in delivery to connect the battery charger
directly to the green 2 pin power connector -X42 inside the cabinet.
Remove the front plate of the controller cabinet and place the batteries inside the aluminium frame on the cabinet’s
base plate, with the battery cables facing to the right side of the robot.
Plug the battery cables into the four green connectors inside the cabinet. The connectors are protected against wrong
polarity.
Now put the front and side plates back in place, fasten them securely and start the robot.
Danger:
When the auxiliary batteries have been used, the robot must only be recharged by connecting the battery
charger to the robot manually or by using the automatic charging station. Do not recharge either set of batteries
6