background image

43

Fr

an

çais

Español

Deutsch

English

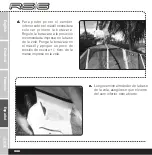
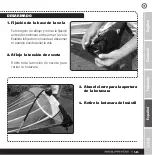
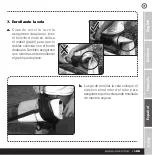
5. Aflojar la tensión del extensor 

A n t e s   d e   a f l o j a r   l a   t e n s i ó n   d e l

extensor, revise nuevamente si retiro 

la fijación de la base de la vela. Ponga 

su pie sobre el extensor, tire del cabo 
hacia arriba y hacia afuera de la 
mordaza del extensor. 

A f l o j e   l a   t e n s i ó n   d e l   e x t e n s o r  

suavemente, de esta manera los 

cambers se soltaran del mástil uno 
p o r   u n o   e v i t a n d o   e l   d e s g a s t e
innecesario de la vela y el mástil.

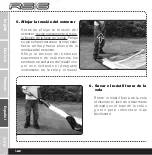
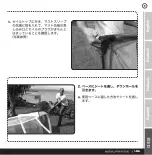
6. Sacar el mástil fuera de la 

vela 

Retire el mástil fuera de la vela 

utilizando el lazo de desarmado 
ubicado en el tope de la vela o 
g í r e l o   p a r a   r e m o v e r l o   m á s  

fácilmente.


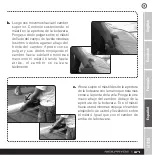
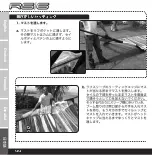
7. Enrollando la vela

a.

C u a n d o   e n r o l l e   l a   v e l a  

asegúrese deaplanar bien 

el bolsillo donde se coloca 

el mástil (gratil) para que el 
doblez coincida con el borde 
deataque. También asegúrese 

que mientras este enrollando 

el gratil quede plano.

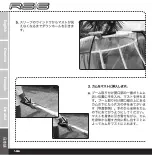
b.

Luego de enrollar la vela coloque el 
elástico alrededor del tubo para 

asegurarse que la vela quede enrollada 

de manera segura.

Summary of Contents for RS6

Page 1: ...WWW NEILPRYDE COM RIGGING AND TUNING GUIDE...

Page 2: ...www neilpryDe com...

Page 3: ...CONTeNTS eNGLISH DeUTSCH frANCAiS Step by Step Rigging 04 De Rigging 11 Schritt f r Schritt Aufriggen 14 Abriggen 21 Gr er tape par tape 24 D gr er 31 eSPANOL Armado Paso A Paso 34 Desarmado 41 44 51...

Page 4: ...ed the mast in until it runs into the leading edge of the luff sleeve Don t force it all the way up the sleeve while holding the bottom of the sail Instead walk up the sail and hold the mast with one...

Page 5: ...sch English c Next walk to the top and check if the head cap is properly inserted into the mast see picture 2 Attach and apply down haul a Thread the down haul through the mast base and the sail accor...

Page 6: ...onto the mast a Hold the mast in the boom opening with the hand closest to the bottom of the sail Place your other hand under the cam immediately above the boom opening Make sure the whole palm of you...

Page 7: ...mb and your fingers together pushing the cam forward while holding the mast back and the cam will pop on easily c For the cam below the boom hold the mast in the boom opening with the hand closest to...

Page 8: ...ail Next clamp the boom on the mast and apply a little bit of out haul tension Note If you have problems applying the cams to the mast first apply the boom and put some out haul tension on the sail Fo...

Page 9: ...cam supporting the cam with whole palm of your hand Push down gently with the hand on the edge of the sleeve while the hand under the cam pushes the cam forward a little and it will go on easily Close...

Page 10: ...10 English Deutsch Fran ais Espa ol c Close the zipper on the boom opening Now you are ready to go...

Page 11: ...emove the tack strap before de rigging the sail Leaving the tack strap on while releasing the down haul tension will damage the sail 2 Release out haul tension Take off the out haul tension in order t...

Page 12: ...ine up and out of the cleat Release down haul tension gently so the cams come off the mast one by one to prevent possible damage to the sail or mast 6 Take the mast out of the sail Pull the mast out o...

Page 13: ...e mast sleeve to have the fold on the seam on the leading edge Also while rolling up the sail make sure the luff sleeve stays flat b After rolling up the sail apply the elastic around the toggle to ma...

Page 14: ...oberen Masttaschenabschnitts hinein Schieben Sie den Mast nicht komplett bis zum Segeltop durch indem Sie mit einer Hand den unteren Bereich des Segels halten Gehen Sie anstatt dessen zum Segeltop und...

Page 15: ...t ganz nach oben zum Segeltop und berpr fen ob die Topkappe korrekt in den Maststopfen eingef hrt ist siehe Bild 2 SetzenSiedieMastverl ngerung ein und ziehen Sie das Vorliek durch a F deln Sie den Vo...

Page 16: ...hter am Segelhals befindet Legen Sie Ihre andere Hand unter den Camber der sich direkt oberhalb der Gabelbaumaussparung befindet Vergewissern Sie sich dass sich Ihre gesamte Innenhandfl che unterhalb...

Page 17: ...r anderen Hand gleichzeitig den Mast zur ckhalten Der Camber wird dabei ganz einfach aufspringen c UmdenCamberunterhalbdesGabelbaums auf den Mast zu dr cken halten Sie den Mast mit der Hand die sich d...

Page 18: ...etzenSiedieTrimmschot leicht durch Beachten Sie Sollten Sie Probleme haben die Camber auf den Mast zu dr cken befestigen Sie zuerst den Gabelbaum und setzten Sie dann die Trimmschot leicht durch Folge...

Page 19: ...dicht an der Masttasche befindet vorsichtig nach unten w hrend Sie mit der anderen Hand welche sich unter dem Camber befindet diesen ein wenig nach vorne dr cken Jetzt wird der Camber ganz einfach au...

Page 20: ...English Deutsch Fran ais Espa ol 20 c Schlie en Sie den Rei verschluss an der Gabelbaumaussparung Jetzt k nnen Sie aufs Wasser gehen...

Page 21: ...vor Sie Ihr Segel abriggen Wenn Sie die Vorliekspannung l sen bevor Sie das Gurtband am Segelhals entfernt haben k nnte Ihr Segel dabei Schaden nehmen 2 Lockern Sie die Trimmschot L sen Sie die Schoth...

Page 22: ...h oben und dadurch aus der Belegklemme heraus L sen Sie ganz vorsichtig die Vorliekspannung damit die Camber nacheinander vom Mast springen So vermeiden Sie unn tige Abnutzung von Segel und Mast 6 Zie...

Page 23: ...e r e Aufrollkante bildet Achten Sie ebenfalls darauf dass Vorliekbahn und Masttasche ganz glatt eingerollt werden b Nachdem Sie das Segel aufgerollt haben legen Sie das elastische Band um die Segelro...

Page 24: ...ran ais Espa ol 24 1 Ins rez le m t a Ins rez le m t dans le fourreau au dessus des lattes sans tenir compte des cams b Glissez la voile petit petit en tenant le m t d une main par le fen tre de wishb...

Page 25: ...eutsch English 25 c Faites le tour jusqu la t te de m t et v rifiez que le bouchon est bien rentr dans le m t voir photo 2 Etarquez l amure a R glez la longueur de l extension comme conseill et montez...

Page 26: ...laisse voir le m t 3 Ins rez les cams a Saisir le m t par l ouverture du wishbone de la main gauche Placer l autre main sous le cam se trouvant juste sous le wishbone et appliquez une l g re pression...

Page 27: ...une l g re pression avec vos doigts N oubliez pas que vous devez pouvoir ins rer les cams sans effort c Pour positionner le cam au dessus du wishbone prendre la m t de la main gauche et placer l autr...

Page 28: ...l d Pour appliquer le cam du bas vous devez d abord fixer le wishbone au m t en respectant bien s r la longueur recommand e et imprim e en bas de votre voile e Avant d enclencher le cam assurez vous q...

Page 29: ...corps de la voile et appliquez une l g re pression de l autre main enclenchez le cam sans effort Fermez ensuite le zip 4 Finissez de gr er a Tendez le guindant comme indiqu et v rifiez la tension d co...

Page 30: ...English Deutsch Fran ais Espa ol 30 c Fermez le zip de la fen tre de wishbone Vous tes maintenant pr t naviguer...

Page 31: ...sh 31 1 Sangle d amure Commencez par d tacher la sangle d amure Dans le cas contraire cel pourrait endommager votre voile 2 Rel chez la tension d coute 3 Ouvrez le zip de la fen tre de wishbone 4 D ta...

Page 32: ...nt la tension de guindant en pla ant un pied sur la rallonge Les cams vont sauter ce qui est normal 6 Retirez le m t Retirez le m t vous pouvez utiliser la boucle se trouvant en t te de m t et la fixe...

Page 33: ...7 Roulez votre voile a Roulez votre voile d licatement en vitant les plis b Apr s avoir roul votre voile fixez l lastique 33 Fran ais Espa ol Deutsch English...

Page 34: ...ice dentro del borde de ataque del gratil No fuerce el m stil mientras lo esta insertando a trav s del gratil tirando desde la base de la vela camine hacia el gratil y sostenga el m stil con una mano...

Page 35: ...cho este insertado dentro del tap n del m stil hembra metiendo un dedo dentro del agujero y sintiendo si esta correctamente colocado 2 Pase los cabos de extensor y aplique tensi n de pie de m stil com...

Page 36: ...s en el m stil a Sujete el m stil en la apertura de la botavara con la mano que esta m s cerca de la base de la vela Coloque la otra mano debajo del camber situado sobre la apertura de la botavara Ase...

Page 37: ...u pulgar y sus dedos empujando el camber hacia adelante mientras mantiene el m stil tirando hacia a t r s e l c a m b e r s e c a l z a r a f cilmente c Ahora sujete el m stil desde la apertura de la...

Page 38: ...car primero la botavara Regule la botavara a la posici n recomendada impresa en la base de la vela Ponga la botavara en el m stil y aplique un poco de tensi n de escota 6cm de la marca impresa en la v...

Page 39: ...lma de la mano Empuje suavemente con la mano que esta en el borde del gratil mientras que con la otra mano que esta abajo del camber empuja el camber un poco hacia fuera y el mismo se calzara f cilmen...

Page 40: ...English Deutsch Fran ais Espa ol 40 c Suba el cierre en la apertura de la botavara Ahora esta listo para salir...

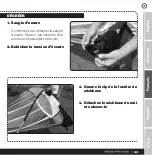
Page 41: ...r la fijaci n antes de comenzar a desarmar la vela Estandola fijaci n colocada al desarmar el aparejo puede da ar la vela 2 Afloje la tensi n de escota Retire toda la tensi n de escota para retirar la...

Page 42: ...del cabo hacia arriba y hacia afuera de la mordaza del extensor Afloje la tensi n del extensor suavemente de esta manera los cambers se soltaran del m stil uno por uno evitando el desgaste innecesari...

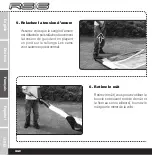
Page 43: ...ar bien el bolsillo donde se coloca el m stil gratil para que el doblez coincida con el borde deataque Tambi n aseg rese que mientras este enrollando el gratil quede plano b Luego de enrollar la vela...

Page 44: ...English Deutsch Fran ais Espa ol 44...

Page 45: ...Fran ais Espa ol Deutsch English 45...

Page 46: ...English Deutsch Fran ais Espa ol 46...

Page 47: ...47 Fran ais Espa ol Deutsch English...

Page 48: ...48 English Deutsch Fran ais Espa ol...

Page 49: ...49 Fran ais Espa ol Deutsch English...

Page 50: ...50 English Deutsch Fran ais Espa ol...

Page 51: ...Fran ais Espa ol Deutsch English 51...

Page 52: ...52 English Deutsch Fran ais Espa ol...

Page 53: ...53 Fran ais Espa ol Deutsch English...

Page 54: ...For more information on how to rig your RS 6 please visit www neilpryde com Enjoy your sail...

Page 55: ...WWW NEILPRYDE COM RIGGING AND TUNING GUIDE...

Reviews: