FlexPAK
NOTE!
Check all power conductors and protective con-
ductors one month after installation and tight-
en, if required, to ensure good contact. Service
to the electrical equipment may only be carried
out by a qualified electrician.
One month after installation, and then every year,
perform the following checks:
• Check all power and protective conductors and
ground wire connections. Tighten, if required, to en-
sure good contact.
• Inspect the integrity of the dust separator.
• Ensure that the inside of the unit and the connec-
tion ducts are free from deposits. A build-up of de-
posits inside the duct system may cause the dis-
charge of static electricity.
• Inspect valves, hoses and seals for leakage.
• Clean the area around the unit and all areas where
the collected material is stored to ensure that there
are no dust deposits.
• Check that all signs/markings regarding safe opera-
tion are in place and that the personnel knows about
them.
• Verify the function of all emergency stop buttons,
alarms and signalling devices.
9.2 Empty the collector bin
WARNING! Explosion risk
Never use the unit without a bag.
WARNING! Risk of personal injury
• Ensure that there is no vacuum in the dust
separator before removing the collector bin.
• Crush hazard. Be careful when lowering and
refitting the collector bin. Use proper pro-
tective equipment.
• Wear goggles, a dust mask and gloves when
emptying the collector bin.
CAUTION! Risk of equipment damage
Use only Nederman original spare parts and ac-
cessories.
NOTE!
The plastic bag is to be replaced when filled up
to 2/3, see
.
9.3 Replace the plastic bag
1
Check that the risk area is clear.
2
Ensure that there is no vacuum in the dust separ-
ator.
3
Remove the collector bin.
4
Seal and remove the plastic bag. Use a cable tie or
equivalent, see
.
5
Fit a new plastic bag in the collector bin, see
.
6
Refit the collector bin onto the dust separator.
7
Check that the pressure equalizer hose is attached
to the collector bin, see
8
Check that the collector bin seals properly once
the vacuum is re-applied to the dust separator.
9.4 Replace the main filter
WARNING! Risk of personal injury
• The electricity, vacuum and compressed air
to the unit must be turned off before com-
mencing filter change.
• This is a two person job. Use proper protect-
ive equipment.
• Don’t move under suspended tilted filter and
housing.
• Waste material collected in FlexPAK can con-
stitute a health risk. Always check the safety
requirements related to the specific waste
when handled.
• Perform a filter cleaning and wait for the dust
to settle, then empty and refit the collector
bin before replacing the filter.
• The used filter should be extracted into- and
stored in a plastic bag to minimize the spread
of filter contents.
NOTE!
• Filter replacement is to be noted in the ser-
vice protocol of the unit.
• Replacing individual filter bags is possible,
but it is recommended that the whole fil-
ter package is replaced since it is quicker
and causes less spreading of dust. If the fil-
ter bags are replaced separately, the plastic
holders will also have to be replaced.
1
Unscrew the four screws holding the lid, lift it a
bit for access to the hose connection. If necessary
disconnect the outlet to remove the lid. See
2
Detach the hose from the filter, see
item A.
3
Remove the hose and cable to the cleaning valve,
alternatively the entire valve, see
, item
B
EN
35
Summary of Contents for FlexPAK Standard
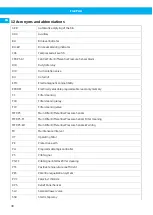
Page 9: ...FlexPAK 13 12 10 9 7 8 2 1 3 4 6 5 11 3 11 7 8 9 12 13 15 14 18 19 10 17 4 16 15 20 5 9...
Page 10: ...FlexPAK 6 1 2 3 6 7 8 9 16 15 14 13 11 10 12 4 5 7 10...
Page 12: ...FlexPAK 2 1 4 5 6 8 7 9 3 9 1 1643 1mm 65 662 1mm 26 2 1771 4 1mm 70 13mm 10 12...
Page 13: ...FlexPAK 11 12 13 14 13...
Page 14: ...FlexPAK 15 A B 16 14...
Page 15: ...FlexPAK A B C 4x 17 8x 18 15...
Page 16: ...FlexPAK A 4x B 19 Min 2 1m 83 20 1 0m 39 4 21 16...
Page 17: ...FlexPAK A B C 22 23 17...
Page 39: ...FlexPAK SUV Solenoid upper valve TVFD Twin valve feed out device EN 39...
Page 60: ...FlexPAK CS SUV Horn elektromagnetick ventil TVFD Za zen pro vypou t n dvojit ho ventilu 60...
Page 81: ...FlexPAK SUV verste magnetventil TVFD Udgangsenhed for tvillingeventil DA 81...
Page 127: ...FlexPAK SUV V lvula superior solenoide TVFD Dispositivo de vaciado por doble v lvula ES 127...
Page 148: ...FlexPAK FI SUV Solenoidin yl venttiili TVFD Kaksoisventtiilipoistolaite 148...
Page 171: ...FlexPAK SUV lectrovanne sup rieure TVFD Dispositif de vidage double vanne FR 171...
Page 194: ...FlexPAK HU SUV Fels m gneses szelep TVFD Ikerszelepes kiadagol berendez s 194...
Page 216: ...FlexPAK IT SUV Elettrovalvola superiore TVFD Dispositivo di svuotamento a doppia valvola 216...
Page 239: ...FlexPAK SUV Bovenste magneetklep TVFD Uitvoer van apparaat voorzien van dubbele klep NL 239...
Page 260: ...FlexPAK NO SUV vre magnetventil TVFD Utmatingsenhet med to ventiler 260...
Page 283: ...FlexPAK SUV G rny zaw r elektromagnetyczny TVFD Dwuzaworowe urz dzenie odprowadzaj ce PL 283...
Page 312: ...FlexPAK RU FlexPAK FlexPAK DX 5 1 9 8 5 2 5 5 2 1 6 1 3 Running 8 8 6 312...
Page 323: ...FlexPAK 9 1 9 2 N e d e r m a n 2 3 11 9 3 1 2 3 4 12 5 13 6 7 14 8 RU 323...
Page 326: ...FlexPAK RU N e d e r m a n 11 1 FlexPAK 93 6 326...
Page 328: ...FlexPAK RU SUV TVFD 328...
Page 364: ...FlexPAK ZH 9 3 Nederman CE 9 1 9 2 Nederman 2 3 11 9 3 1 2 3 4 12 5 13 6 7 14 8 364...
Page 368: ...FlexPAK ZH SUV TVFD 368...
Page 369: ...www nederman com...

