11
First setup
Before connecting and switching the reader on, make sure to download the drivers and the RF.Test
Lite tool on the computer which is going to be used to configure the reader. The drivers and RF.Test
Lite can be found on the support site (
http://www.nedaplibrary.com/support
Although the reader can be connected to the network via Ethernet, the reader will always need to be
set up the first time via USB. Connect the reader to the computer with the drivers, using the USB
cable.
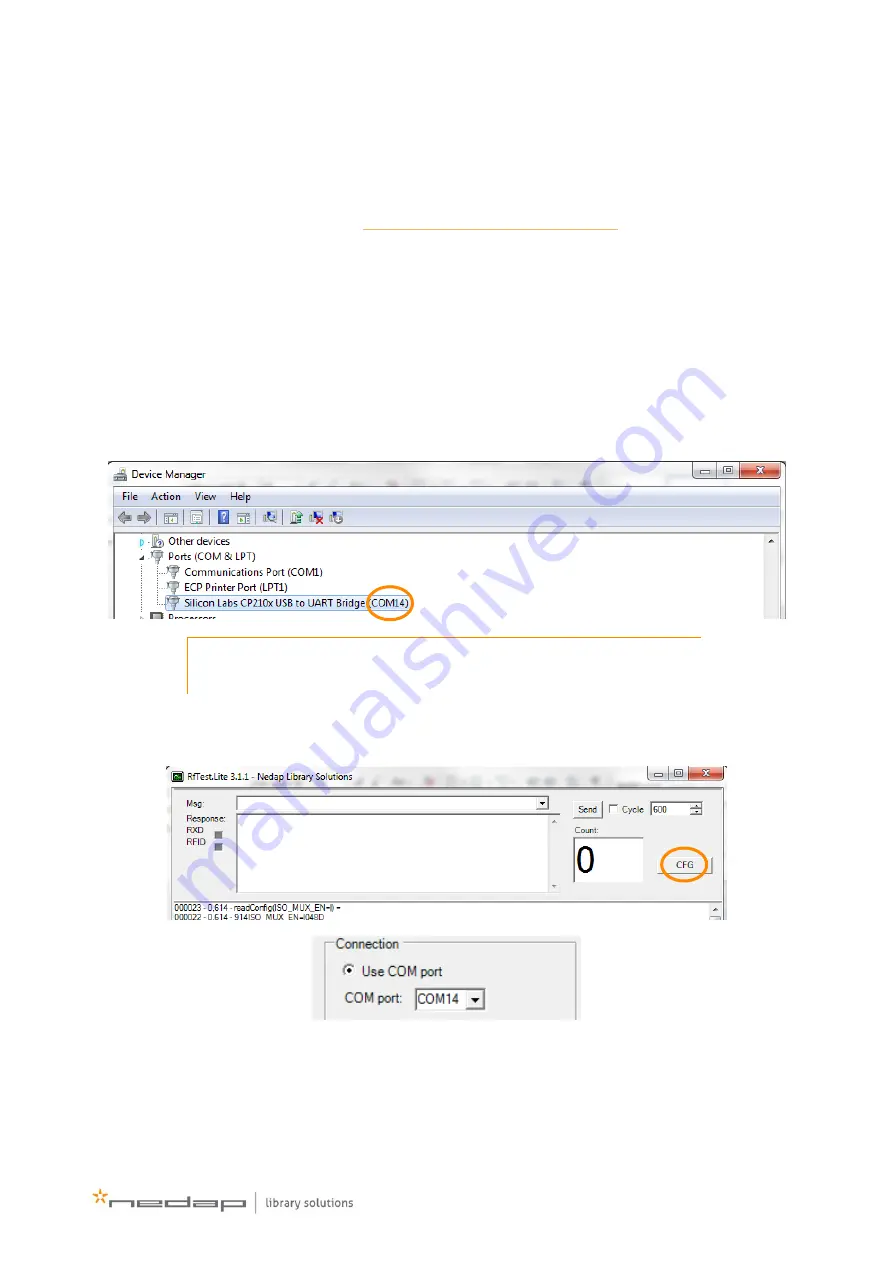
The product can now be configured with the RF.Test Lite tool. Find out which virtual COM-port is
corresponding to the RFID reader, by checking its settings in the device manager (
> Control Panel
> Devices and Printers > Device Manager).
The reader will be called ‘
Silicon Labs CP210x USB to UART Bridge (COM#)
’ under ‘
Ports (COM & LPT)
’.
The number between the brackets is the number that you will need to configure the reader.
Note: Whenever the reader is disconnected and reconnected, it could get a
new COM-port number.
Now you may start the RF.Test Lite tool, press the CFG button, and select the correct COM-port
according to the number you’ve just found in the Device Manager.
Now the Reader is connected via USB, and you may alter the settings under the ‘TUNING’ button.


