41
3. Convenient Features
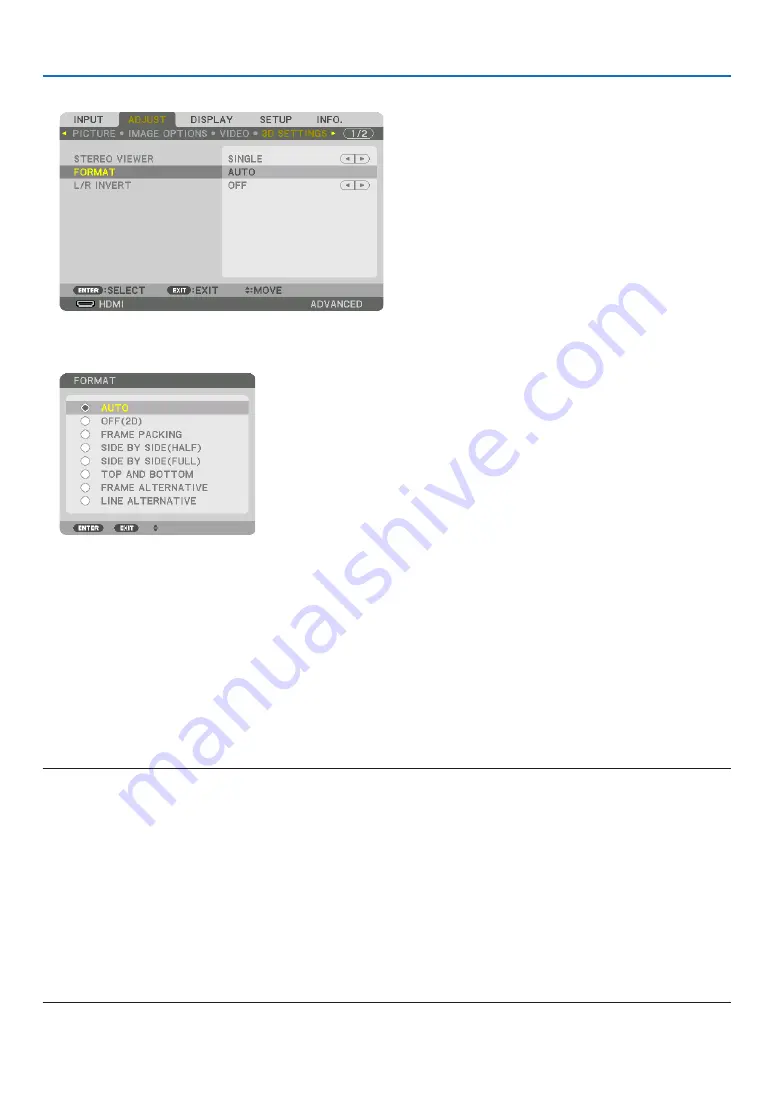
(3) Use the
▶
button to select [3D SETTINGS].
The [3D SETTINGS] screen will be displayed.
(4) Use the
▼
button to align the cursor with [FORMAT], then press ENTER.
The [FORMAT] screen will be displayed.
(5) Use the
▼
/
▲
buttons to align the cursor at one among format options, then press ENTER for setting it up.
The display will return to the [3D SETTINGS] screen.
Press the MENU button to return to the original screen.
• The 3D caution message screen will be displayed when switching to a 3D video (default factory setting when
shipped). Please read the “Health Precautions” on the previous page to watch videos in the correct manner. The
screen will disappear after 60 seconds or when the ENTER button is pressed. (
→
5. Turn on the power supply of the 3D eyewear and wear the eyewear to watch the video.
A normal video will be shown when a 2D video is input.
To watch a 3D video in 2D, select [OFF(2D)] in the [FORMAT] screen mentioned above in (5).
NOTE:
• Upon switching to 3D image, the following functions will be cancelled and disabled. [BLANKING], [PIP/PICTURE BY PICTURE],
[GEOMETRIC CORRECTION], [EDGE BLENDING] ([GEOMETRIC CORRECTION] and [EDGE BLENDING] adjustment values will
be maintained.)
• The output may not automatically switch to a 3D video depending on the 3D input signal.
• Check the operating conditions described in the user manual of the Blu-ray player.
• Please connect the DIN terminal of the 3D emitter to the 3D SYNC of the main projector.
• The 3D eyewear allows videos to be viewed in 3D by receiving synchronized optical signals output from the 3D emitter.
As a result, the 3D image quality may be affected by conditions such as the brightness of the surroundings, screen size, viewing
distance, etc.
• When playing a 3D video software on a computer, the 3D image quality may be affected if the computer CPU and graphics chip
performance are low. Please check the required operating environment of the computer that is stated in the operating manual
attached to the 3D video software.
• Depending on the signal, [FORMAT] and [L/R INVERT] may not be able to be selected. Please change the signal in that case.


