5. Making Connections
88
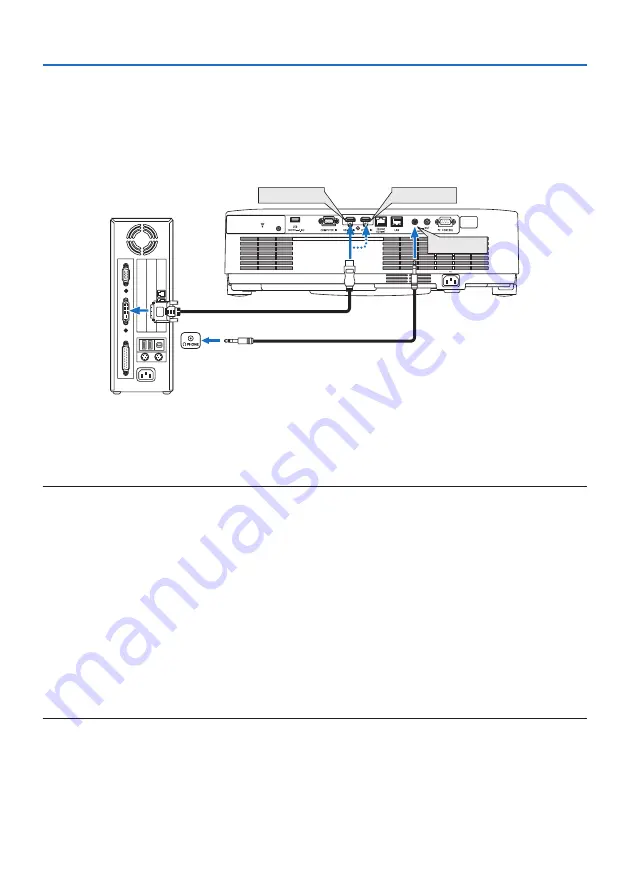
Cautions when using a DVI signal
• When the computer has a DVI output terminal, use a commercially available converter cable
to connect the computer to the projector’s HDMI 1 IN or HDMI 2 IN terminal (only digital video
signals can be input).
- Only digital video signals can be input.
HDMI 1 IN
HDMI 2 IN
AUDIO IN
Connect the audio output of the computer to the projector’s AUDIO IN terminal. In this case,
switch the [HDMI1] or [HDMI2] setting at [SETUP]
→
[OPTIONS(1)]
→
[AUDIO SELECT] the on-
screen menu to [COMPUTER]. (
→
page
NOTE:
When Viewing a DVI Digital Signal
• Turn off the power of the computer and projector before connecting.
• When a video deck is connected via a scan converter, etc., the display may not be correct during fast-forwarding and rewinding.
• Use a DVI-to-HDMI cable compliant with DDWG (Digital Display Working Group) DVI (Digital Visual Interface) revision 1.0 standard.
The cable should be within 197"/5 m long.
• Turn off the projector and the PC before connecting the DVI-to-HDMI cable.
• To project a DVI digital signal: Connect the cables, turn the projector on, then select the HDMI input. Finally, turn on your PC.
Failure to do so may not activate the digital output of the graphics card resulting in no picture being displayed. Should this happen,
restart your PC.
• Do not disconnect the DVI-to-HDMI cable while the projector is running. If the signal cable has been disconnected and then recon-
nected, an image may not be correctly displayed. Should this happen, restart your PC.
• The COMPUTER video input terminals support Windows Plug and Play.
• A Mac signal adapter (commercially available) may be required to connect a Mac computer.


