0
MAGNIFY
VOLUME
PICTURE
LAMP MODE
ASPECT
AV-MUTE
3D REFORM
FREEZE
ID SET
LENS SHIFT
FOCUS
/ZOOM
HELP
PAGE
MENU
L-CLICK
R-CLICK
EXIT
0
CLEAR
ENTER
UP
DOWN
ID
ID
OFF
ON
COMPUTER
VIDEO
S-VIDEO
VIEWER NETWORK
HDMI
PIP
MENU
EXIT
COMPONENT
AUTO ADJ.
1
3
2
4
6
5
7
9
8
0
CLEAR
POWER
ID
1
2
3
USB
LAMP
STATUS
SOURCE
AUTO ADJUST
3D REFORM
SELECT
3. Projecting an Image (Basic Operation)
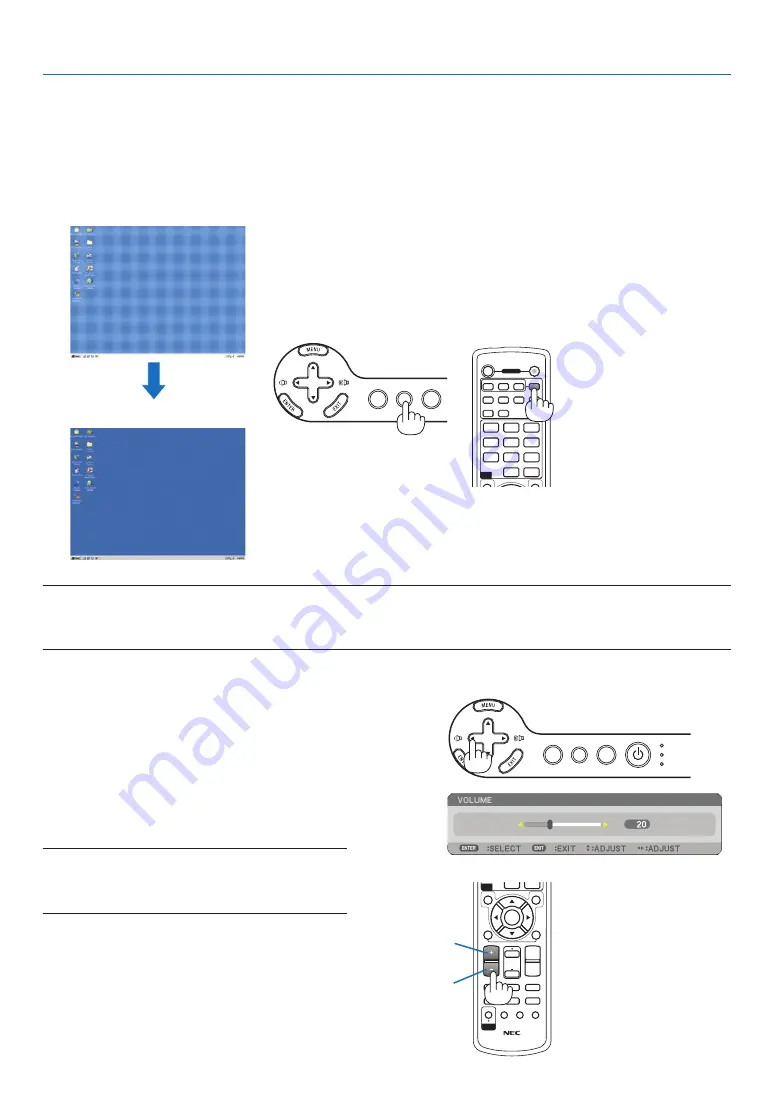
Optimizing an RGB Image Automatically
Adjusting the Image Using Auto Adjust
Optimizing an RGB image automatically.
Press the AUTO ADJUST button to optimize an RGB image automatically.
This adjustment may be necessary when you connect your computer for the first time.
[Poor picture]
[normal picture]
Sound level from the speaker and the AUDIO OUT
jack (Stereo mini) on the projector can be adjusted.
Another way to adjust volume is to use the menu.
Select [ADJUST]
→
[AUDIO]
→
[VOLUME] from
the menu.
NOTE:
• Volume control is not available with the SELECT
or
button when an image is enlarged by using the
MAGNIFY (+) button or when the menu is displayed.
NOTE:
• Some signals may take time to display or may not be displayed correctly.
• The Auto Adjust function does not work for component, video signals.
• If the Auto Adjust operation cannot optimize the RGB signal, try to adjust Clock and Phase manually. (
→
page
)
Adjusting Volume Up & Down
increase volume
decrease volume
USB
LAMP
STATUS
SOURCE
AUTO ADJUST
3D REFORM
SELECT


