background image

Portable Projector

M350X/M300X/M260X/M230X/M420X/

M420XV/M300W/M260W/M350XS/

M300XS/M260XS/M300WS/M260WS

User’s Manual

The  M350X,  M230X,  M420X,  M420XV,  M350XS,  M260XS,  and 
M260WS are not distributed in North America. 

Model No.
NP-M350X,  NP-M300X,  NP-M260X,  NP-M230X,  NP-M420X,  NP-
M420XV,  NP-M300W,  NP-M260W,  NP-M350XS,  NP-M300XS,  NP-
M260XS, NP-M300WS, NP-M260WS

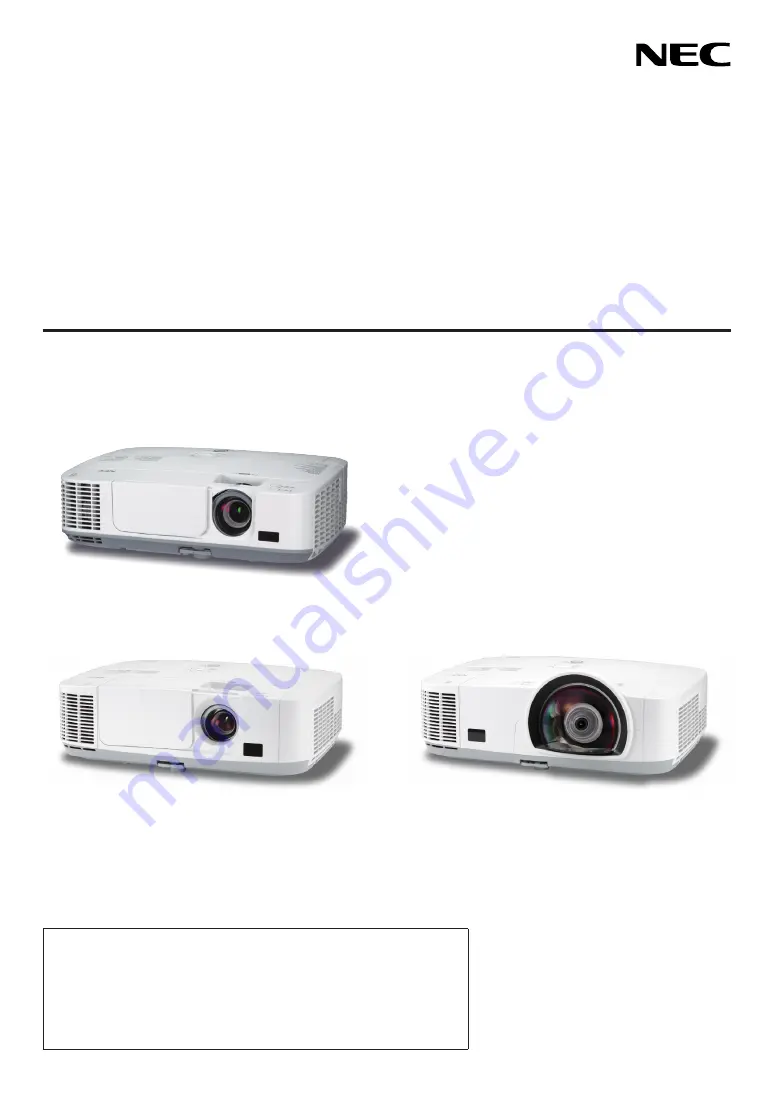
[M350X/M300X/M260X/M230X/M300W/M260W]

[M350XS/M300XS/M260XS/M300WS/M260WS]

[M420X/M420XV]

Summary of Contents for M230X

Page 1: ...anual The M350X M230X M420X M420XV M350XS M260XS and M260WS are not distributed in North America Model No NP M350X NP M300X NP M260X NP M230X NP M420X NP M420XV NP M300W NP M260W NP M350XS NP M300XS NP M260XS NP M300WS NP M260WS M350X M300X M260X M230X M300W M260W M350XS M300XS M260XS M300WS M260WS M420X M420XV ...

Page 2: ... WPA2 are registered trademarks of the Wi Fi Alli ance Blu ray is a trademark of Blu ray Disc Association Other product and company names mentioned in this user s manual may be the trademarks or registered trademarks of their respective holders GPL LGPL Software Licenses The product includes software licensed under GNU General Public License GPL GNU Lesser General Public License LGPL and others Fo...

Page 3: ... Class B digital apparatus meets all requirements of the Canadian Interference Causing Equipment Regula tions Machine Noise Information Regulation 3 GPSGV The highest sound pressure level is less than 70 dB A in accordance with EN ISO 7779 CAUTION Avoid displaying stationary images for a prolonged period of time Doing so can result in these images being temporarily sustained on the surface of the ...

Page 4: ...ncouraged to try to correct the interference by one or more of the following measures Reorient or relocate the receiving antenna Increase the separation between the equipment and receiver Connect the equipment into an outlet on a circuit different from that to which the receiver is connected Consult the dealer or an experienced radio TV technician for help For UK only In UK a BS approved power cor...

Page 5: ... not place any objects on top of the projector Do not touch the power plug during a thunderstorm Doing so can cause electrical shock or fire The projector is designed to operate on a power supply of 100 240V AC 50 60 Hz Ensure that your power supply fits this requirement before attempting to use your projector Do not look into the lens while the projector is on Serious damage to your eyes could re...

Page 6: ...ables before carrying the projector Turn off the projector and unplug the power cord before cleaning the cabinet or replacing the lamp Turn off the projector and unplug the power cord if the projector is not to be used for an extended period of time When using a LAN cable only models with the RJ 45 LAN port For safety do not connect to the connector for peripheral device wiring that might have exc...

Page 7: ...fall if the lamp has been burned out About High Altitude mode Set FAN MODE to HIGH ALTITUDE when using the projector at altitudes approximately 5500 feet 1600 meters or higher Using the projector at altitudes approximately 5500 feet 1600 meters or higher without setting to HIGH ALTITUDE can cause the projector to overheat and the protector could shut down If this happens wait a couple minutes and ...

Page 8: ...14 Flow of Projecting an Image 14 Connecting Your Computer Connecting the Power Cord 15 Turning on the Projector 16 Note on Startup screen Menu Language Select screen 17 Selecting a Source 18 Selecting the computer or video source 18 Adjusting the Picture Size and Position 19 Adjust the Tilt Foot 20 Zoom 21 Adjusting from the menu 22 Focus 23 Correcting Keystone Distortion Manually 24 Adjusting wi...

Page 9: ... Correction Tool in Image Express Utility Lite 56 What you can do with GCT 56 Projecting an Image from an Angle GCT 56 4 Using the Viewer 58 What you can do with the Viewer 58 Projecting images stored in a USB memory device 60 3 Converting PowerPoint files to Slides Viewer PPT Converter 3 0 66 5 Using On Screen Menu 69 Using the Menus 69 2 Menu Elements 70 3 List of Menu Items 71 4 Menu Descriptio...

Page 10: ...ut 109 Connecting to a Wired LAN 110 Connecting to a Wireless LAN Optional NP02LM series 111 Attaching the Optional Cable Cover NP01CV 114 7 Maintenance 115 Cleaning the Filters 115 2 Cleaning the Lens 119 3 Cleaning the Cabinet 119 4 Replacing the Lamp and the Filters 120 8 Appendix 127 Troubleshooting 127 Indicator Messages 127 Common Problems Solutions 128 If there is no picture or the picture ...

Page 11: ...and the util ity software 7N951543 For North America only Registration card Limited warranty For customers in Europe You will find our current valid Guarantee Policy on our Web Site www nec display solutions com The M420X M420XV and M350XS M300XS M260XS M300WS M260WS do not come with a soft case Important Infomation For North America 7N8N1181 For Other countries than North America 7N8N1181 and 7N8...

Page 12: ...ect Power Off This feature allows the projector to be turned off even when projecting an image by using the Main Power Switch or disconnecting the AC power supply To turn off the AC power supply when the projector is powered on use a power strip equipped with a switch and a breaker 1 The quick start time is only when STANDBY MODE is set to NORMAL in the on screen message 0 2 W 100 130 V AC 0 4 W 2...

Page 13: ...D ROM The supplied NEC Projector includes four programs Virtual Remote Tool Image Express Utility Lite PC Control Utility Pro 4 and Viewer PPT Converter 3 0 AUTO POWER ON and AUTO POWER OFF features The AUTO POWER ON AC AUTO POWER ON COMP1 AUTO POWER OFF and OFFTIMER features eliminate the need to always use the POWER button on the remote control or projector cabinet Preventing unauthorized use of...

Page 14: ...s 2600 lumens 3500 lumens 3000 lumens 2600 lumens 3000 lumens 2600 lumens Lamp Replace ment Time average OFF for ECO MODE ON for ECO MODE H 4000 5000 5000 6000 3000 3500 4000 5000 5000 6000 3000 3500 4000 5000 5000 6000 3000 3500 4000 5000 Lamp Model NP16LP NP15LP NP17LP NP16LP NP15LP NP17LP NP16LP NP15LP NP17LP NP16LP Lamp Wattage AC 230 W 180 W 265 W 230 W 180 W 265 W 230 W 180 W 265 W 230 W Zoo...

Page 15: ...ever page 21 Lens Cover Lens Cover Focus Ring page 23 Focus Ring page 23 Adjustable Tilt Foot page 20 Adjustable Tilt Foot page 20 Adjustable Tilt Foot Lever page 20 Adjustable Tilt Foot Lever page 20 Ventilation outlet Heated air is exhausted from here Ventilation outlet Heated air is exhausted from here Controls page 8 Lens Cap Ventilation inlet Filter Cover page 117 125 Focus Lever page 23 Remo...

Page 16: ...0 18 inch 4 6 mm in diameter AC Input Connect the supplied power cord s three pin plug here and plug the other end into an active wall outlet page 15 Connection for cable cover Left right Screw holes temporarily fixing grooves for the optional cable cover page 114 Port Cover for Optional USB Wireless LAN Unit When using the optional USB Wireless LAN Unit first remove the cover page 111 Terminal Pa...

Page 17: ...wn direction Doing so can cause damage to the lens cover sliding mechanism M350X M300X M260X M230X M300W M260W M420X M420XV M350XS M300XS M260XS M300WS M260WS AC Input Connect the supplied power cord s three pin plug here and plug the other end into an active wall outlet page 15 Connection for cable cover Left right Screw holes temporarily fixing grooves for the optional cable cover page 114 Port ...

Page 18: ...7 2 POWER Indicator page 15 16 27 127 3 STATUS Indicator page 127 4 LAMP Indicator page 120 127 5 ECO Button page 30 6 SOURCE Button page 18 7 AUTO ADJ Button page 26 8 MENU Button page 69 9 Volume Buttons Keystone Buttons page 24 26 10 ENTER Button page 69 11 EXIT Button page 69 ...

Page 19: ...4 109 6 USB PC Port Type B page 42 104 7 MONITOR OUT COMP 1 Connector Mini D Sub 15 Pin page 106 8 AUDIO OUT Mini Jack Stereo Mini page 106 not available on M420XV 9 S VIDEO IN Connector Mini DIN 4 Pin page 107 10 VIDEO IN Connector RCA page 107 11 VIDEO S VIDEO AUDIO IN L MONO R RCA page 107 not available on M420XV 12 LAN Port RJ 45 page 110 13 USB Port Type A page 60 14 PC CONTROL PC CONTROL Por...

Page 20: ...age 86 15 Numeric Keypad Button CLEAR Button page 86 16 FREEZE Button page 29 17 AV MUTE Button page 29 18 MENU Button page 69 19 EXIT Button page 69 20 Button page 69 21 ENTER Button page 69 22 D ZOOM Button page 29 23 MOUSE L CLICK Button page 41 24 MOUSE R CLICK Button page 41 25 PAGE Button page 41 26 ECO Button page 30 27 KEYSTONE Button page 25 28 PICTURE Button page 74 76 29 VOL Button page...

Page 21: ...tteries AAA Ensure that you have the batteries polarity aligned correctly The infrared signal operates by line of sight up to a distance of about 22 feet 7 m and within a 60 degree angle of the remote sensor on the projector cabinet The projector will not respond if there are objects between the remote control and the sensor or if strong light falls on the sensor Weak batteries will also prevent t...

Page 22: ...d to control the power ON OFF and source selection of the projector from your computer The Geometric Correction Tool GCT function allows you to correct distortion of images projected on a curved wall page 56 Name of software program Features PC Control Utility Pro 4 This is a software program used to operate the projector from the computer when the computer and the projector are connected with LAN...

Page 23: ... or higher recommended Windows XP Pentium M 1 0 GHz equivalent or higher required Dual core 1 0 GHz or higher recommended Memory Windows 7 Windows Vista 512 MB or more required 1 GB or more recommended Windows XP 256 MB or more required 512 MB or more recommended More memory may be required to run additional applications simultane ously Graphic processor Windows 7 Windows Vista The Graphics score ...

Page 24: ...e projector page 16 Step 3 Selecting a source page 18 Step 4 Adjusting the picture size and position page 19 Correcting keystone distortion KEYSTONE page 24 Step 5 Adjusting a picture and sound Optimizing a computer signal automatically page 26 Turning up or down volume page 26 Step 6 Making a presentation Step 7 Turning off the projector page 27 Step 8 After use page 28 2 Projecting an Image Basi...

Page 25: ...ied power cord s three pin plug to the AC IN of the projector and then connect the other plug of the supplied power cord in the wall outlet The projector s power indicator will flash for a few seconds and then will light orange standby mode The STATUS indicator will also light green This will apply for both indicators when NORMAL is selected for STANDBY MODE See the Power Indicator section page 12...

Page 26: ...an cause mechanical damage to the part around the lens 2 Press the POWER button on the projector cabinet or the POWER ON button on the remote control The POWER indicator will turn to blue and the projector will become ready to use TIP When the message Projector is locked Enter your password is displayed it means that the SECURITY feature is turned on page 32 After you turn on your projector ensure...

Page 27: ...ature of the projector is too high the projector detects abnormal high temperature In this condition the projector will not turn on to protect the internal system If this happens wait for the projector s internal components to cool down When the lamp reaches its end of usable life the projector will not turn on If this happens replace the lamp If the STATUS indicator lights orange with the power b...

Page 28: ...turned on 1 Press the MENU button The menu will be displayed 2 Press the button twice to select SETUP and press the H but ton or the ENTER button to select GENERAL 3 Press the button three times to select OPTIONS 2 4 Press the H button six times to select DEFAULT SOURCE SE LECT and press the ENTER button The DEFAULT SOURCE SELECT screen will be displayed page 90 5 Select a source as the default so...

Page 29: ...usting the throw angle the height of an image Tilt foot page 20 Adjusting the left and right tilt of an image Rear foot page 20 Finely adjusting the size of an image Zoom function page 21 Adjusting the focus Focus function page 23 Adjusting the keystone correction KEYSTONE page 24 Automatic Keystone Correction function is turned on at the time of shipment To perform keystone correction manually se...

Page 30: ... front of the projector Rotate the rear foot to the desired height in order to square the image on the projection surface CAUTION Do not use the tilt foot for purposes other than originally intended Misuses such as using the tilt foot to carry or hang from the wall or ceiling the projector can cause damage to the projector For short throw models M350XS M300XS M260XS M300WS M260WS Short throw model...

Page 31: ...0XS M300XS M260XS M300WS M260WS The image size can be adjusted electronically from the menu To do so follow the steps below Adjusting with the ZOOM button on the remote control 1 Press the ZOOM button The DIGITAL ZOOM bar will be displayed 2 Press the or button to adjust the image size 3 Press the EXIT button The DIGITAL ZOOM bar will be closed Zoom Lever ...

Page 32: ...ll be displayed 2 Press the button to select SETUP and press the ENTER button The GENERAL tab will be highlighted 3 Press the button The DIGITAL ZOOM will be highlighted 4 Use the or button to adjust the image size 5 After completing adjustment press the EXIT button four times The menu will be closed ...

Page 33: ...mage Basic Operation Focus M350X M300X M260X M230X M300W M260W M420X M420XV Use the FOCUS ring to obtain the best focus M350XS M300XS M260XS M300WS M260WS Use the FOCUS lever to obtain the best focus Focus Ring FOCUS lever ...

Page 34: ... get the desired result from the Auto Keystone correction depending on the position of the zoom lever If this hap pens perform the Keystone correction manually Adjusting with buttons on the cabinet 1 Press the or button with no menus displayed The keystone bar will be displayed 2 Use the or to correct the keystone distortion The keystone bar will be closed after a period of time 3 Press the ENTER ...

Page 35: ... with the remote control 1 Press the KEYSTONE button The Keystone bar will be displayed 2 Use the or button to correct the keystone distortion Adjust so that the right and left sides are parallel 3 Press the EXIT button The Keystone bar will be closed ...

Page 36: ...peration cannot optimize the computer signal try to adjust HORIZONTAL VERTICAL CLOCK and PHASE manually page 77 78 Turning Up or Down Volume not available on M420XV Sound level from the speaker can be adjusted TIP When no menus appear the and buttons on the projector cabinet work as a volume control NOTE Volume control is not available with the or button when an image is enlarged by using the D ZO...

Page 37: ...ight green when NORMAL is selected for STANDBY MODE Power On Steady blue light Standby Steady orange light CAUTION Parts of the projector may become temporarily heated if the projector is turned off with the POWER button or if the AC power supply is disconnected during normal projector operation Use caution when picking up the projector NOTE While the power indicator is blinking blue in short cycl...

Page 38: ...e projector Push the top of the lens cap to cover the lens 1 2 5 Put the projector and accessories in the supplied soft case Place the projector in the soft case with the lens facing upward as shown below This is to prevent the lens from damage Insert the projector with the lens facing upward NOTE When placing the projector in the soft case retract the tilt foot and the rear feet Failure to do so ...

Page 39: ...the lamp power may be restored to its original level temporarily To restore the image even if you press the AV MUTE button immediately after the start of the power saving function the lamp brightness may not be restored to its original level 2 Freezing a Picture Press the FREEZE button to freeze a picture Press again to resume motion NOTE The image is frozen but the original video is still playing...

Page 40: ...00WS M260WS and approx 80 Brightness on M300X M260X M230X M260W M260XS ECO2 M300X M260X and M260XS only Lower lamp power consumption than ECO1 mode ap prox 50 Brightness on M300X M260X M260XS To turn on the ECO MODE do the following 1 Press the ECO Button on the remote control to display ECO MODE screen 2 Press the ECO button again to select a mode you wish Each time the ECO button is pressed the ...

Page 41: ...ion kg when the projector s ECO MODE is set to AUTO ECO ECO1 or ECO2 This feature is called as CARBON METER There are two messages TOTAL CARBON SAVINGS and CARBON SAVINGS SESSION The TOTAL CARBON SAVINGS message shows the total amount of CO2 emission reduction from the time of shipment up to now You can check the information on USAGE TIME from INFO of the menu page 94 The CARBON SAVINGS SESSION me...

Page 42: ...e menu To enable the Security function 1 Press the MENU button The menu will be displayed 2 Press the button twice to select SETUP and press the button or the ENTER button to select GEN ERAL 3 Press the button to select INSTALLATION 4 Press the button three times to select SECURITY and press the ENTER button The OFF ON menu will be displayed 5 Press the button to select ON and press the ENTER butt...

Page 43: ...n enabled To turn on the projector when SECURITY is enabled 1 Press the POWER button The projector will be turned on and display a message to the effect that the projector is locked 2 Press the MENU button 3 Type in the correct keyword and press the ENTER button The projector will display an image NOTE The security disable mode is maintained until the main power is turned off or unplugging the pow...

Page 44: ... button The SECURITY KEYWORD screen will be displayed 4 Type in your keyword and press the ENTER button When the correct keyword is entered the SECURITY function will be disabled NOTE If you forget your keyword contact your dealer Your dealer will provide you with your keyword in exchange for your request code Your request code is displayed in the Keyword Confirmation screen In this example NB52 Y...

Page 45: ...an lock the logo to prevent it from changing Control Functions Power On Off signal selection picture freeze picture mute audio mute Logo transfer to the projector and remote control operation on your PC NOTE Audio mute function is not available on M420XV Virtual Remote screen Remote Control Window Toolbar This section provides an outline of preparation for use of Virtual Remote Tool For informatio...

Page 46: ... your computer Logo data graphics that can be sent to the projector with Virtual Remote Tool has the following restrictions Only via serial or LAN connection File size 64 KB or less Image size resolution Horizontal 699 dots vertical 499 dots or less Number of colors 256 colors or less The logo data that is sent with Virtual Remote Tool will be displayed at the center of the screen Its surrounding ...

Page 47: ...splayed 2 Click Install Virtual Remote Tool on the menu window The installation will start When the installation is complete the Welcome window will be displayed 3 Click Next END USER LICENSE AGREEMENT screen will be displayed Read END USER LICENSE AGREEMENT carefully 4 If you agree click I accept the terms in the license agreement and then click Next Follow the instructions on the installer scree...

Page 48: ... to complete the uninstallation For Windows XP 1 Click Start and then Control Panel The Control Panel window will be displayed 2 Double click Add Remove Programs The Add Remove Programs window will be displayed 3 Click Virtual Remote Tool from the list and then click Remove Follow the instructions on the screens to complete the uninstallation Step 2 Connect the projector to the computer 1 Use the ...

Page 49: ... Setup window will be displayed Follow the instructions on the screens When Easy Setup is completed the Virtual Remote Tool screen will be displayed NOTE When POWER SAVING is selected for STANDBY MODE from the menu the projector cannot be turned on via the computer cable VGA or network wired LAN wireless LAN connection TIP The Virtual Remote Tool screen or Toolbar can be displayed without displayi...

Page 50: ...l Displaying the help file using the taskbar 1 Click the Virtual Remote Tool icon on the taskbar when Virtual Remote Tool is running The pop up menu will be displayed 2 Click Help Help The Help screen will be displayed Displaying the help file using the Start Menu 1 Click Start All programs or Programs NEC Projector User Supportware Virtual RemoteTool and then Virtual Remote Tool Help in this orde...

Page 51: ...ath the mouse speed slider in the Mouse Properties dialog box Pointer Options tab Wait at least 5 seconds after disconnecting the USB cable before reconnecting it and vice versa The computer may not identify the USB cable if it is repeatedly connected and disconnected in rapid intervals NOTE Connect the projector to the computer with a USB cable after starting the computer Failure to so may fail t...

Page 52: ...B Display executes the projector s program only USB Display will not work in POWER SAVING of STANDBY MODE page 89 1 Start the computer 2 Connect the projector s power cord to the wall outlet and put the projector into standby condition Open the projector s lens cover 3 Use the USB cable to connect the computer with the projector USB PC The message The projector is in standby mode Connect it will b...

Page 53: ...ons 3 Sound Turns on or off AV MUTE Sound mute play the sound and turns up or down the volume The Sound function is not available on M420XV 4 Others Uses Update HTTP Server Settings and Information The HTTP Server cannot be selected when a USB cable is connected 5 Exit Exit Image Express Utility Lite You can also turn off the projector at the same time 6 Help Displays the help of Image Express Uti...

Page 54: ...ddress index html Use Image Express Utility Lite contained on the supplied NEC Projector CD ROM TIP The factory setting IP address is DHCP ON NOTE To use the projector in a network consult with your network administrator about network settings The display s or button s response can be slowed down or operation may not be accepted depending the settings of your net work Should this happen consult yo...

Page 55: ...dex html for the address or the entry column of the URL Example 2 When the IP address of the projector is 192 168 73 1 access is gained to the network setting by specifying http 192 168 73 1 index html for the address or the entry column of the URL PROJECTOR ADJUSTMENT POWER This controls the power of the projector ON Power is switched on OFF Power is switched off VOLUME This controls the volume o...

Page 56: ...e 76 SOURCE SELECT This switches the input connector of the projector COMPUTER 1 Switches to the COMPUTER 1 IN connector COMPUTER 2 Switches to the COMPUTER 2 IN connector HDMI Switches to the HDMI IN connector VIDEO Switches to the VIDEO IN connector S VIDEO Switches to the S VIDEO IN connector VIEWER Switches to the data on the USB memory device NETWORK Switches to a LAN signal USB DISPLAY Switc...

Page 57: ...et your IP address of DNS server connected to the projector Setting for WIRED LAN ENABLE Turn on wired LAN connection DISABLE Turn off wired LAN connection Setting for WIRELESS LAN with the optional USB Wireless LAN Unit equipped EASY CONNECTION Execute a wireless LAN using EASY CONNECTION CHANNEL Select a channel Available channels vary depending on the country and region When you select INFRASTR...

Page 58: ...communication devices such as PC or access point in your wireless network When you use WEP your image transmission speed will slow down WPA PSK TKIP WPA PSK AES WPA2 PSK TKIP and WPA2 PSK AES are not available when AD HOC is selected from NETWORK TYPE INDEX Select encryption key when selecting WEP 64 bit or WEP 128 bit in SECURITY TYPE KEY When selecting WEP 64 bit or WEP 128 bit in SECURITY TYPE ...

Page 59: ...Link PASSWORD Set a password for PJLink A password must be 32 characters or less Do not forget your password However if you forget your password consult with your dealer HTTP PASSWORD Set a password for HTTP server A password must be 10 characters or less AMX BEACON Turn on or off for detection from AMX Device Discovery when connecting to the network supported by AMX s NetLinx control system TIP W...

Page 60: ...ol Utility Pro 4 on the computer Step 2 Connect the projector to a LAN page 52 Step 3 Start PC Control Utility Pro 4 page 52 To run PC Control Utility Pro 4 on Windows XP Home Edition and Windows XP Professional Microsoft NET Framework Version 2 0 or later is required The Microsoft NET Framework Version 2 0 or later is available from Microsoft s web page Download and install the it on your compute...

Page 61: ...lation is complete the Welcome window will be displayed 3 Click Next END USER LICENSE AGREEMENT screen will be displayed Read END USER LICENSE AGREEMENT carefully 4 If you agree click I accept the terms in the license agreement and then click Next Follow the instructions on the installer screens to complete the installation When the installation is complete you will return to the menu window TIP U...

Page 62: ...he Control Panel in Windows and disable its standby sleep mode before running the scheduler Example For Windows 7 Select Control Panel System and Security Power Options Change when the computer sleeps Put the computer to sleep Never NOTE When POWER SAVING is selected for STANDBY MODE from the menu the projector cannot be turned on via the network wired LAN wireless LAN connection TIP Viewing the H...

Page 63: ...ing Image Express Utility Lite on the computer page 42 Image transmission The screen of your computer can be sent to the projector via a wired or wireless network without a computer cable VGA By using EASY CONNECTION function the complicated network settings can be simplified and the computer will automatically connect to the projector The screen of your computer can be sent to up to four projecto...

Page 64: ... the same procedures stated as in Uninstalling Virtual Remote Tool Read Virtual Remote Tool as Image Express Utility Lite page 38 Step 2 Connect the projector to a LAN Connect the projector to the LAN by following the instructions in Connecting to a Wired LAN page 110 Con necting to a Wireless LAN Optional NP02LM series page 111 and 9 Controlling the Projector by Using an HTTP Browser page 44 Step...

Page 65: ...d for STANDBY MODE from the menu the projector that is turned off will not be displayed in the select window for destination TIP Viewing the Help of Image Express Utility Lite Displaying the Help file of Image Express Utility Lite while it is running Click the help icon on the control window The Help screen will be displayed Displaying the Help file of GCT while it is running Click Help C Help on ...

Page 66: ...ion about Multi point Correction and Parameters Correction see the help file of Image Express Utility Lite page 55 Your correction data can be stored in the projector or your computer which can be restored when necessary The GCT function is available with a USB cable wired or wireless LAN connection and video cable Projecting an Image from an Angle GCT This section will show an example for use wit...

Page 67: ...e 6 After completing right click the mouse The green frame and the mouse pointer will disappear from the projected image area This will complete the cor rection 7 Click the X close button on the 4 point Correction screen The 4 point Correction screen will disappear and the 4 point correction will take effect 8 Click the button on the control window to exit the GCT TIP After performing the 4 point ...

Page 68: ...able presentations can be conducted simply with the projector Supported graphic format is JPEG The Viewer displays the thumbnail screen JPEG Exif only on which you can jump to any specific image you wish to project There are two ways of playback for slideshow manual playback and auto playback The interval time can be changed in auto playback The order of displaying images can be set by name date o...

Page 69: ...r USB memory in your computer refer to the document or help file that comes with your Windows We do not warrant that the USB port of the projector will support all USB memories in the market Supported images Supported file format for Viewer are as follows We do not warrant all the images are supported for Viewer Images other than mentioned in the table may not be supported Image type Extension Des...

Page 70: ...ctor page 62 Exiting the Viewer page 62 Preparation Before starting the Viewer store images to the USB memory using your computer W IR EL ES S WIREL ES S Starting the Viewer 1 Turn on the projector page 16 2 Insert the USB memory into the USB port of the projec tor Do not remove the USB memory from the projector while it s LED flashes Doing so may corrupt the data 3 Press the SOURCE button on the ...

Page 71: ...ton to select the next slide The slide on the right will be displayed The or button can be used to select the next right slide or the previous left slide in the thumbnail screen Pressing the MENU button during display of the thumbnail screen the slide screen or the slideshow screen will display the toolbar The toolbar is used to select or rotate an slide page 64 8 Press the EXIT button when the to...

Page 72: ...not operate correctly If this happens turn off the projector and unplug the power cord Wait 3 minutes then connect the power cord and turn on the projector Exiting the Viewer 1 Press the MENU button with the slide screen or the thumbnail screen displayed The control bar or the pop up menu will be dis played 2 Press the MENU button again The on screen menu will be displayed 3 Select a source other ...

Page 73: ... using but ton 5 Back icon This icon is used to return to the upper parent folder 6 Folder icon This icon shows that the USB memory has folders 7 Page up Page down icon This icon shows further folders or image files are available in the next previous page Use the button to go to the next previous row The PAGE or PAGE on the remote control is used to go to the next or previous page directly 8 Thumb...

Page 74: ...be displayed Press the MENU button again to close the SOURCE list Thumbnail toolbar Menu Options Description 1 Back Goes back to the previous image When the cursor reaches the top left of the screen it will go to the previous page 2 Forward Goes to the next image When the cursor reaches the bottom right of the screen it will go to the next page 3 Display Closes the menu and returns to the thumbnai...

Page 75: ...ise 4 Counter clockwise rotation Close the menu and rotate the image 90 counter clockwise Slideshow toolbar Menu Options Description 1 Stop Closes the menu and changes to the slide screen 2 Back Goes back to the previous image 3 Forward Goes to the next image 4 Interval Specifies interval time when playing back the slides 5 Repeat Repeats to play back the images in the folder Returns to the thumbn...

Page 76: ... the same name will be created where JPEG files will be saved to The projector s Viewer does not support index file with extension idx Install Viewer PPT Converter 3 0 on the computer NOTE To install or uninstall the program the Windows user account must have Administrator privilege Windows 7 Windows Vista and Windows XP Exit all running programs before installation If another program is running t...

Page 77: ... 3 0 once with the privilege used for installation Then exit from Viewer PPT Converter 3 0 without doing anything Starting Click Window s Start All Programs NEC Projector User Supportware Viewer PPT Converter 3 0 Viewer PPT Converter 3 0 in that order NOTE When installing Viewer PPT Converter 3 0 onto a personal computer that has PowerPoint installed Viewer PPT Converter 3 0 is automatically regis...

Page 78: ...convert and then click Open 4 Click Next 5 Select the USB memory drive for Card Drive and type in Index name Index name must be eight alphanumeric characters or less 2 byte character and file with a long filename cannot be used 6 Click Export A confirmation message will be displayed 7 Click OK Exporting a file will start 8 Click OK 9 Click Exit Viewer PPT Converter 3 0 will exit 10 Remove the USB ...

Page 79: ...projector cabinet to select the item you want to adjust or set You can use the buttons on the remote control or the projector cabinet to select the tab you want 5 Press the ENTER button on the remote control or the projector cabinet to display the submenu window 6 Adjust the level or turn the selected item on or off by using the buttons on the remote control or the projector cabinet Changes are st...

Page 80: ...tton to select an option in a dialog box Source Indicates the currently selected source Off Timer remaining time Indicates the remaining countdown time when the OFF TIMER is preset Slide bar Indicates settings or the direction of adjustment ECO mode symbol Indicates ECO MODE is set Key Lock symbol Indicates the CONTROL PANEL LOCK is enabled Thermometer symbol Indicates the ECO MODE is forcibly set...

Page 81: ...TONE ON OFF ON KEYSTONE 0 KEYSTONE SAVE OFF OFF ON WALL COLOR OFF OFF WHITEBOARD BLACKBOARD BLACKBOARD GRAY LIGHT YELLOW LIGHT GREEN LIGHT BLUE SKY BLUE LIGHT ROSE PINK ECO MODE AUTO ECO OFF AUTO ECO ECO1 ECO2 4 CLOSED CAPTION OFF OFF CAPTION1 CAPTION2 CAPTION3 CAPTION4 TEXT1 TEXT2 TEXT3 TEXT4 OFF TIMER OFF OFF 0 30 1 00 2 00 4 00 8 00 12 00 16 00 LANGUAGE ENGLISH ENGLISH DEUTSCH FRANÇAIS ITALIANO...

Page 82: ... 2 STANDBY MODE NORMAL NORMAL POWER SAVING AUTO POWER ON AC OFF OFF ON AUTO POWER ON COMP1 OFF OFF ON AUTO POWER OFF OFF OFF 0 05 0 10 0 20 0 30 DEFAULT SOURCE SELECT LAST LAST AUTO COMPUTER1 COMPUTER2 HDMI VIDEO S VIDEO VIEWER NETWORK USB DISPLAY WIRED LAN WIRED LAN ENABLE DISABLE ENABLE SETTINGS DHCP ON AUTO DNS ON DHCP IPADDRESS SUBNET MASK GATEWAY AUTO DNS DNS RECONNECT WIRELESS LAN PROFILE EA...

Page 83: ...nnected to your VIDEO input VCR DVD player or document camera S VIDEO Selects what is connected to your S VIDEO input VCR or DVD player NOTE A frame may freeze for a brief period of time when a video is played back in fast forward or fast rewind with a Video or S Video source VIEWER This feature enables you to make presentations using a USB memory that contains slides page 58 4 Using the Viewer NE...

Page 84: ...brightly lit room PRESENTATION Recommended for making a presentation using a PowerPoint file VIDEO Recommended for typical TV program viewing MOVIE Recommended for movies GRAPHIC Recommended for graphics sRGB Standard color values DICOM SIM Recommended for DICOM simulation format NOTE The DICOM SIM option is for training reference only and should not be used for actual diagnosis DICOM stands for D...

Page 85: ...function will perform gamma correction appropriate for the screen size LARGE For screen size of 150 MEDIUM For screen size of 100 SMALL For screen size of 50 NOTE This function is available only when DICOM SIM is selected for DETAIL SETTINGS Adjusting Color Temperature COLOR TEMPERATURE This option allows you to select the color temperature of your choice NOTE When PRESENTATION or HIGH BRIGHT is s...

Page 86: ...put signal CONTRAST BRIGHTNESS SHARPNESS COLOR HUE COMPUTER HDMI RGB Yes Yes Yes No No COMPUTER HDMI COMPONENT Yes Yes Yes Yes Yes VIDEO S VIDEO COMPONENT Yes Yes Yes Yes Yes VIEWER NETWORK USB DISPLAY Yes Yes Yes No No Yes Adjustable No Not adjustable RESET The settings and adjustments for PICTURE will be returned to the factory settings with the exception of the following Preset numbers and REFE...

Page 87: ...tion adjusts the clock frequencies that eliminate the horizontal banding in the image This adjustment may be necessary when you connect your computer for the first time PHASE Use this item to adjust the clock phase or to reduce video noise dot interference or cross talk This is evident when part of your image appears to be shimmering Use PHASE only after the CLOCK is complete NOTE The CLOCK and PH...

Page 88: ...emory for the current signal The next time you project the signal with the same resolution horizontal and vertical frequency its adjustments will be called up and applied To delete adjustments stored in memory from the menu you select RESET CURRENT SIGNAL or ALL DATA and reset the adjustments Selecting Overscan Percentage OVERSCAN Select overscan percentage 0 5 and 10 for signal Projected image Ov...

Page 89: ... in 15 9 aspect ratio 16 10 The image is displayed in 16 10 aspect ratio WIDE ZOOM M350X M300X M260X M230X M420X M420XV M350XS M300XS M260XS The image is stretched left and right Parts of the displayed image are cropped at the left and right edges and therefore not visible LETTERBOX M300W M260W M300WS M260WS The image of a letterbox signal is stretched equally in the horizontal and vertical direct...

Page 90: ...s pect ratio is automatically de termined NOTE To display a letterbox signal prop erly select LETTERBOX NOTE To display a squeezed signal prop erly select 16 9 TIP Image position can be adjusted vertically using POSITION when the 16 9 15 9 or 16 10 aspect ratios are selected The term letterbox refers to a more landscape oriented image when compared to a 4 3 image which is the standard aspect ratio...

Page 91: ...RIENTATION TIP The range of the AUTO KEYSTONE correction varies depending on the model name M420X M420XV M350X M300X M260X M230X M300W M260W up to 30 degrees vertical M350XS M300XS M260XS M300WS M260WS up to 20 degrees vertical The AUTO KEYSTONE correction will take effect in 2 seconds after changing the projection angle during projection Correcting Vertical Keystone Distortion Manually KEYSTONE Y...

Page 92: ...on in applications where the screen material is not white NOTE Selecting WHITEBOARD reduces lamp brightness Setting Eco Mode ECO MODE The ECO MODE increases lamp life while lowering power consumption and cutting down on CO2 emissions Four brightness modes of the lamp can be selected OFF AUTO ECO ECO1 and ECO2 modes page 30 ...

Page 93: ... after the countdown is complete NOTE To cancel the preset time set OFF for the preset time or turn off the power When the remaining time reaches 3 minutes before the projector is turned off the THE PROJECTOR WILL TURN OFF WITHIN 3 MINUTES message will be displayed on the bottom of the screen Selecting Menu Language LANGUAGE You can choose one of 27 languages for on screen instructions NOTE Your s...

Page 94: ...ector waits after the last touch of a button to turn off the menu The preset choices are MANUAL AUTO 5 SEC AUTO 15 SEC and AUTO 45 SEC The AUTO 45 SEC is the fac tory preset Selecting a Color or Logo for Background BACKGROUND Use this feature to display a blue black screen or logo when no signal is available The default background is BLUE NOTE If the LOGO item is selected for BACKGROUND with the N...

Page 95: ...TROL PANEL LOCK function NOTE This CONTROL PANEL LOCK does not affect the remote control functions When the control panel is locked pressing and holding the EXIT button on the projector cabinet for about 10 seconds will change the setting to OFF TIP When the CONTROL PANEL LOCK is turned on a key lock icon will be displayed at the bottom right of the menu Enabling Security SECURITY This feature tur...

Page 96: ...ion In this case the buttons on the projector cabinet can be used Your setting will not be affected even when RESET is done from the menu Pressing and holding the ENTER button on the projector cabinet for 10 seconds will display the menu for canceling the Control ID Assigning or Changing the Control ID 1 Turn on the projector 2 Press the ID SET button on the remote control The CONTROL ID screen wi...

Page 97: ...eed Auto mode High speed mode and High Altitude mode AUTO The built in fans automatically run at a variable speed according to the internal temperature HIGH The built in fans run at high speed HIGH ALTITUDE The built in fans run at a high speed Select this option when using the projector at altitudes approximately 5500 feet 1600 meters or higher When you wish to cool down the temperature inside th...

Page 98: ...elect OFF NOTE The OFF is selected at the time of shipment of M350X M300X M260X M230X M420X M420XV M350XS M300XS M260XS The ON is selected at the time of shipment of M300W M260W M300WS M260WS Enabling the deinterlace DEINTERLACE Turns on or off the deinterlace function for a telecine signal OFF Select this option if there is any jitter or artifacts in video ON Default standard setting NOTE This fe...

Page 99: ...AUDIO OUT connector LAN and Mail Alert functions Buttons other than POWER button on the cabinet Buttons other than POWER ON button on the remote control Virtual Remote Tool USB Display fucntion NOTE When CONTROL PANEL LOCK CONTROL ID or AUTO POWER ON COMP1 is turned on the STANDBY MODE setting is not available Even when POWER SAVING is selected for STANDBY MODE power on or off can be done by using...

Page 100: ... this option is selected you can enable the projector to automatically turn off at the selected time 5min 10min 20min 30min if there is no signal received by any input or if no operation is performed Selecting Default Source DEFAULT SOURCE SELECT You can set the projector to default to any one of its inputs each time the projector is turned on LAST Sets the projector to default to the previous or ...

Page 101: ...d LAN connection will be turned on SETTINGS DHCP ON IP address subnet mask and gateway will be automatically assigned to the projector from your DHCP server OFF Specify IP address subnet mask and gate way assigned by your network administra tor IP ADDRESS Set your IP address of the network connected to the projector SUBNET MASK Set your subnet mask number of the network connected to the projector ...

Page 102: ...f EASY CONNECTION Select EASY CONNECTION to execute a wireless LAN easily using Image Express Utility Lite on the supplied NEC Projector CD ROM PROFILE 1 Up to two settings for the USB wireless LAN unit can be stored in memory of the projector page 47 To recall the settings from memory select PROFILE 1 or PROFILE 2 from PROFILE PROFILE 2 RECONNECT Retry to connect the projector to a network Try th...

Page 103: ...ecessary settings for SETTINGS and click SAVE From the projector menu select SETUP WIRELESS LAN PROFILE PROFILE 1 or PROFILE 2 To select an SSID Access the HTTP server function to display the web browser page 44 and select NETWORK SETTINGS SETTINGS WIRELESS LAN CONNECTION SITE SURVEY and select the ID If you do not use SITE SURVEY type the SSID in CONNECTION and select INFRASTRUCTURE or AD HOC pag...

Page 104: ...remaining lamp time reaches 0 hours the projector will not turn on The message to the effect that the lamp or the filters should be replaced will be displayed for one minute when the projector is turned on and when the POWER button on the projector or the remote control is pressed To dismiss this message press any button on the projector or the remote control Lamp life H Replacement lamp Model ECO...

Page 105: ...DEX HORIZONTAL FREQUENCY VERTICAL FREQUENCY SIGNAL TYPE VIDEO TYPE SYNC TYPE SYNC POLARITY SCAN TYPE WIRED LAN IP ADDRESS SUBNET MASK GATEWAY MAC ADDRESS WIRELESS LAN IP ADDRESS SUBNET MASK GATEWAY MAC ADDRESS SSID NETWORK TYPE WEP WPA CHANNEL SIGNAL LEVEL ...

Page 106: ...96 5 Using On Screen Menu VERSION FIRMWARE Version DATA Version OTHERS PROJECTOR NAME MODEL NO SERIAL NUMBER LAN UNIT TYPE CONTROL ID when CONTROL ID is set ...

Page 107: ...ing Lamp Hour Meter CLEAR LAMP HOURS Resets the lamp clock back to zero Selecting this option displays submenu for a confirmation Select YES and press the ENTER button NOTE Elapsed time of the lamp use will not be affected even when RESET is done from the menu NOTE The projector will turn off and go into standby mode when you continue to use the projector for another 100 hours after the lamp has r...

Page 108: ...rojector is from the screen or wall the larger the image The minimum size the image can be is approximately 25 0 64 m measured diagonally when the projector is roughly 35 inches 0 9 m from the wall or screen The largest the image can be is 300 7 6 m when the projector is about 435 inches 11 0 m from the wall or screen 300 240 D i s t a n c e U n i t m i n c h Lens center Screen Size Screen Size Un...

Page 109: ...ed by intermediate values between tele and wide Use as a rule of thumb For more details on throw distance see page 101 M300W M260W The further your projector is from the screen or wall the larger the image The minimum size the image can be is approximately 25 0 64 m measured diagonally when the projector is roughly 37 inches 0 9 m from the wall or screen The largest the image can be is 300 7 6 m w...

Page 110: ...h TIP Digital Zoom can result in a blurry image due to the electronic zoom For more details on throw distance see page 102 M300WS M260WS The further your projector is from the screen or wall the larger the image The minimum size the image can be is approximately 56 1 4 m measured diagonally when the projector is 22 inches 0 57 m from the wall or screen The largest the image can be is 104 2 6 m whe...

Page 111: ...48 41 1048 217 5514 361 9174 19 476 10 8 6 5 210 5334 168 4267 126 3200 43 1100 228 5792 379 9635 20 500 10 8 6 5 240 6096 192 4877 144 3658 50 1257 261 6626 434 11018 23 572 10 7 6 5 270 6858 216 5486 162 4115 56 1414 294 7460 488 12401 25 643 10 7 6 5 300 7620 240 6096 180 4572 62 1572 327 8294 543 13784 28 714 10 7 6 5 M420X M420XV Screen Size B C D α Diagonal Width Height wide tele wide tele i...

Page 112: ...334 178 4523 111 2827 46 1166 240 6107 401 10181 10 247 10 8 6 5 240 6096 204 5169 127 3231 52 1333 275 6986 458 11642 11 283 10 8 6 5 270 6858 229 5816 143 3635 59 1499 310 7865 516 13103 13 318 10 8 6 5 300 7620 254 6462 159 4039 66 1666 344 8744 573 14564 14 353 10 8 6 5 M350XS M300XS M260XS Screen Size B C D α Diagonal Width Height wide wide inch mm inch mm inch mm inch mm inch mm inch mm degr...

Page 113: ...nd 104 F 40 C Eco mode se lected automatically at 95 F to 104 F 35 C to 40 C Do not expose the projector to moisture dust or smoke This will harm the screen image Ensure that you have adequate ventilation around your projector so heat can dissipate Do not cover the vents on the side or the front of the projector Reflecting the Image Using a mirror to reflect your projector s image enables you to e...

Page 114: ... is not turned on unless connected to the projector before being powered up If the screen goes blank while using your remote control it may be the result of the computer s screen saver or power manage ment software Enabling the computer s external display Displaying an image on the notebook PC s screen does not necessarily mean it outputs a signal to the projector When using a PC compatible laptop...

Page 115: ...he cable should be within 197 5 m long Turn off the projector and the PC before connecting the DVI to HDMI cable To project a DVI digital signal Connect the cables turn the projector on then select the HDMI input Finally turn on your PC Failure to do so may not activate the digital output of the graphics card resulting in no picture being displayed Should this happen restart your PC Some graphics ...

Page 116: ...og image you re projecting NOTE Daisy chain connection is not possible When audio equipment is connected the projector speaker is disabled The M420XV does not come with the AUDIO OUT connector stereo mini jack AUDIO IN PHONE MONITOR OUT COMP 1 AUDIO OUT MONITOR OUT COMP 1 Com puter cable VGA supplied Stereo mini plug audio cable not supplied Computer cable VGA not supplied M420XV ...

Page 117: ... shared between the Video and S Video inputs The M420XV does not come with the AUDIO IN connectors RCA NOTE Refer to your VCR owner s manual for more information about your equipment s video output requirements NOTE An image may not be displayed correctly when a Video or S Video source is played back in fast forward or fast rewind via a scan converter AUDIO OUT VIDEO OUT S VIDEO VIDEO L R AUDIO IN...

Page 118: ... the projector cabinet Button on the remote control COMPUTER 1 IN COMPUTER 1 COMPUTER 1 COMPUTER 2 IN COMPUTER 2 COMPUTER 2 NOTE Refer to your DVD player s owner s manual for more information about your DVD player s video output requirements NOTE The M420XV does not come with the AUDIO IN connector AUDIO IN L R AUDIO OUT L R Component Y Cb Cr AUDIO IN COMPUTER 1 IN COMPUTER 1 IN Audio cable not su...

Page 119: ...MI TIP For users of audio video equipment with an HDMI connector Select Enhanced rather than Normal if HDMI output is switchable between Enhanced and Normal This will provide improved image contrast and more detailed dark areas For more information on settings refer to the instruction manual of the audio video equipment to be connected When connecting the HDMI IN connector of the projector to the ...

Page 120: ...rt RJ 45 which provides a LAN connection using a LAN cable To use a LAN connection you are required to set the LAN on the projector menu Select SETUP WIRED LAN page 91 Example of LAN connection Example of wired LAN connection LAN Server Hub LAN cable not supplied NOTE Use a Category 5 or higher LAN cable ...

Page 121: ...ected to a network First use the wired LAN to connect the projector to a network and then use the HTTP server to set the wireless LAN After setting the wireless LAN by using the HTTP server set NETWORK SETTINGS SETTINGS WIRED DISABLE When switching to set on the projector after connecting to the wireless LAN Use the menu to set the wireless LAN connection for the projector page 92 Select DISABLE E...

Page 122: ...use NOTE Do not force to insert the USB Wireless LAN Unit 4 Put the USB LAN port cover back into place Insert the catch of the USB LAN port cover into the groove of the projector cabinet and then tighten the screw to secure the port cover To remove the USB Wireless LAN Unit disconnect the power cord and use the above procedure NOTE The green LED on the USB Wireless LAN Unit flashes to show that Wi...

Page 123: ...Wireless LAN Unit To enable direct communication i e peer to peer between personal computers and projectors you need to select the Ad Hoc mode Use the HTTP server function to make the settings page 44 PC with wireless LAN card inserted PC with built in wireless LAN function Use the HTTP server function to make the settings page 44 Example of wireless LAN connection Network Type Ad Hoc USB Wireless...

Page 124: ...able cover Attach the cable cover after installing the projector on the ceiling and connecting cables Tool needed for attaching Phillips screwdriver plus head 1 Align two tabs on the outside of the cable cover with grooves of the projector and push the top end 1 2 1 Tabs At the same time two tabs on the inside of the cable cover will be engaged in the responding grooves of the projector NOTE Be ca...

Page 125: ... outsides intake side of the first and second layer filters remove dust To clean the filter detach the filter unit and the filter cover Filter removal procedure is different depending on the model CAUTION Before cleaning the filters turn off the projector disconnect the power cord and then allow the cabinet to cool Failure to do so can result in electric shock or burn injuries M350X M300X M260X M2...

Page 126: ... filter unit with the filter cover and push the six protru sions into place Make sure all six mounting points are aligned properly 7 Put the filter unit back to the projector cabinet Insert two catches of the tip of the filter unit into the groove of the cabinet and push the button to close the filter unit Push the filter unit until it clicks into place 8 Clear the filter usage hours Plug the powe...

Page 127: ...ion filters large and small 2 Push the left end of each filter and remove the hard two honeycomb filters large and small The large filter cannot be removed by pushing on its right end 4 Use a vacuum cleaner to vacuum all the dust inside Get rid of dust in the accordion filter NOTE Whenever you vacuum the filter use the soft brush attachment to vacuum This is to avoid damage to the filter Do not wa...

Page 128: ...ach pro trusion of the filter unit 7 Put the filter unit back to the projector cabinet Make sure that the filter unit is placed in the correct orienta tion 8 Put the filter cover back to the projector cabinet Insert two catches of the top side of the filter cover into the groove of the cabinet and push the buttons on the left and right to close the filter cover Push the filter cover until it click...

Page 129: ...led use a mild detergent Never use strong detergents or solvents such as alcohol or thinner When cleaning the ventilation slits or the speaker using a vacuum cleaner do not force the brush of the vacuum cleaner into the slits of the cabinet Vacuum the dust off the ventilation slits Clogged ventilation slits may cause a rise in the internal temperature of the projector resulting in malfunction Do n...

Page 130: ...nd poor picture quality The projector will turn off and go into standby mode when you continue to use the projector for another 100 hours after the lamp has reached the end of its life If this happens be sure to replace the lamp If you continue to use the lamp after the lamp reaches the end of its life the lamp bulb may shatter and pieces of glass may be scattered in the lamp case Do not touch the...

Page 131: ...n this case to prevent the risk of electrical shock Do not attempt to circumvent this interlock 2 Remove the lamp housing by holding it Interlock To replace the lamp 1 Remove the lamp cover 1 Loosen the lamp cover screw The lamp cover screw is not removable 2 Push and slide the lamp cover off CAUTION Make sure that the lamp housing is cool enough to before removing it M420X M420XV M350XS M300XS M2...

Page 132: ...reset the lamp clock back to zero When the lamp time clock is reset to zero the LAMP indicator goes out 4 Reattach the lamp cover 1 Slide the lamp cover back until it snaps into place 2 Tighten the screw to secure the lamp cover Be sure to tighten the screw 3 Install a new lamp housing 1 Insert a new lamp housing until the lamp housing is plugged into the socket 2 Push the top center of the lamp h...

Page 133: ...abinet The projector is precision equipment Keep out dust and dirt during filter replacement Do not wash the filters with soap and water Soap and water will damage the filter membrane Put filters into place Incorrect attachment of a filter may cause dust and dirt to get into the inside of the projector Before replacing the filters replace the lamp page 120 M350X M300X M260X M230X M300W M260W 1 Pus...

Page 134: ...these slits with the protrusions of the filter cover 4 Attach the filter cover back to the filter unit Align the filter unit with the filter cover and push the protrusions into place Make sure all six mounting points are aligned properly 5 Put the filter unit back to the projector cabinet Insert two catches of the tip of the filter unit into the groove of the cabinet Push the filter unit until it ...

Page 135: ...er unit and pull it out 2 Remove the filter unit by pulling out the tab 3 Remove the four filters 1 Turn the filter unit over and pull out the two soft accordion filters large and small 2 Push the left end of each filter and remove the hard two honeycomb filters large and small The large filter cannot be removed by pushing on its right end Filter cover Filter unit ...

Page 136: ...binet Make sure that the filter unit is placed in the correct orientation 7 Put the filter cover back to the projector cabinet Insert two catches of the top side of the filter cover into the groove of the cabinet and push the buttons on the left and right to close the filter cover Push the filter cover until it clicks into place This completes the filter replacement Go on to the clearing lamp and ...

Page 137: ...our dealer Orange 1 cycle 0 5 sec On 2 5 sec Off Network conflict Both the built in wired LAN and the wireless LAN can not be connected to the same network at the same time To use both built in wired LAN and wireless LAN at the same time connect them to different networks Green Re firing the lamp The projector is cooling down The projector is re firing Wait for a moment Steady light Green Standby ...

Page 138: ...ok PC is not turned on unless connected to the projector before being powered up If the screen goes blank while using your remote control it may be the result of the computer s screen saver or power management software See also the next page Picture suddenly becomes dark Check if the projector is in the Forced ECO mode because of too high ambient temperature If this is the case lower the internal ...

Page 139: ...played correctly Should this happen deactivate the notebook PC s LCD screen when the projector display is in use Each notebook PC has a different way of deactivate reactivate the local LCD screens as described in the previous step Refer to your computer s documentation for detailed information Image displayed is incorrect when using a Macintosh When using a Macintosh with the projector set the DIP...

Page 140: ...umens when the PRESET mode is set to HIGH BRIGHT If any other mode is selected as the PRESET mode the light output value may drop slightly 3 Compliance with ISO21118 2005 Electrical M350X M300X M260X M230X M300W M260W Inputs 2 RGB Component D Sub 15 P 1 HDMI Type A HDMI Connector HDCP supported 4 1 S Video DIN 4 P 1 Video RCA 1 L R RCA Audio 2 Stereo Mini Audio Outputs 1 RGB D Sub 15P 1 Stereo Min...

Page 141: ...certain content is protected with HDCP and might not be displayed due to the decision intention of the HDCP community Digital Content Protection LLC 5 An image with higher or lower resolution than the projector s native resolution M350X M300X M260X M230X 1024 768 M300W M260W 1280 800 will be displayed with Advanced AccuBlend Mechanical M350X M300X M260X M230X M300W M260W Installation Orientation D...

Page 142: ...4 P 1 Video RCA 1 L R RCA Audio 2 Stereo Mini Audio 2 RGB Component D Sub 15 P 1 HDMI Type A HDMI Connector HDCP supported 4 1 S Video DIN 4 P 1 Video RCA Outputs 1 RGB D Sub 15P 1 Stereo Mini Audio 1 RGB D Sub 15P PC Control 1 PC Control Port D Sub 9P Wired LAN Port 1 RJ 45 10BASE T 100BASE TX Wireless LAN Port Optional IEE 802 11 b g n optional Wireless LAN Unit NP02LM Series required USB Port 1...

Page 143: ...ue to the decision intention of the HDCP community Digital Content Protection LLC 5 An image with higher or lower resolution than the projector s native resolution 1024 768 will be displayed with Advanced AccuBlend Mechanical M420X M420XV Installation Orientation Desktop Front Desktop Rear Ceiling Front Ceiling Rear Dimensions 15 7 W 4 5 H 11 1 D 398 mm W 115 mm H 282 mm D not including protrusion...

Page 144: ...d as the PRESET mode the light output value may drop slightly 3 Compliance with ISO21118 2005 Electrical M350XS M300XS M260XS M300WS M260WS Inputs 2 RGB Component D Sub 15 P 1 HDMI Type A HDMI Connector HDCP supported 4 1 S Video DIN 4 P 1 Video RCA 1 L R RCA Audio 2 Stereo Mini Audio Outputs 1 RGB D Sub 15P 1 Stereo Mini Audio PC Control 1 PC Control Port D Sub 9P Wired LAN Port 1 RJ 45 10BASE T ...

Page 145: ...ention of the HDCP community Digital Content Protection LLC 5 An image with higher or lower resolution than the projector s native resolution M350XS M300XS M260XS 1024 768 and M300WS M260WS 1280 800 will be displayed with Advanced AccuBlend Mechanical M350XS M300XS M260XS M300WS M260WS Installation Orientation Desktop Front Desktop Rear Ceiling Front Ceiling Rear Dimensions 15 7 W 12 2 H 5 5 D 398...

Page 146: ...Appendix 257 10 1 99 3 9 339 13 4 100 3 9 108 4 3 59 4 2 34 175 6 9 200 7 9 150 5 9 130 5 1 Cabinet Dimensions M350X M300X M260X M230X M300W M260W Lens center Lens center Holes for ceiling mount Unit mm inch ...

Page 147: ...137 8 Appendix M420X M420XV 398 15 7 115 4 5 282 11 1 73 5 2 9 11 5 0 5 175 6 9 24 0 9 34 1 3 130 5 1 150 5 9 29 1 1 200 7 9 134 5 3 Unit mm inch Lens center Lens center Holes for ceiling mount ...

Page 148: ... M350XS M300XS M260XS M300WS M260WS 398 15 7 140 5 5 75 3 11 5 0 5 175 6 9 24 0 9 39 8 1 6 130 5 1 150 5 9 29 1 1 200 7 9 134 5 3 288 11 3 21 0 8 309 12 2 Lens center Lens center Holes for ceiling mount Unit mm inch ...

Page 149: ...9 7 8 COMPUTER 1 IN NOTE Pin Nos 12 and 15 are required for DDC CI Pin No RGB Signal Analog YCbCr Signal 1 Red Cr 2 Green or Sync on Green Y 3 Blue Cb 4 Ground 5 Ground 6 Red Ground Cr Ground 7 Green Ground Y Ground 8 Blue Ground Cb Ground 9 No Connection 10 Sync Signal Ground 11 No Connection 12 Bi directional DATA SDA 13 Horizontal Sync or Composite Sync 14 Vertical Sync 15 Data Clock ...

Page 150: ... M420XV M350XS M300XS M260XS 2 Native resolution on WXGA model M300W M260W M300WS M260WS 3 The projector may fail to display these signals correctly when AUTO is selected for ASPECT RATIO in the on screen menu The factory default is AUTO for ASPECT RATIO To display these signals select 16 9 for ASPECT RATIO NOTE An image with higher or lower resolution than the projector s native resolution M350X ...

Page 151: ...T SELECT COMPUTER 2 02H 03H 00H 00H 02H 01H 02H 0AH INPUT SELECT HDMI 02H 03H 00H 00H 02H 01H 1AH 22H INPUT SELECT VIDEO 02H 03H 00H 00H 02H 01H 06H 0EH INPUT SELECT S VIDEO 02H 03H 00H 00H 02H 01H 0BH 13H INPUT SELECT VIEWER 02H 03H 00H 00H 02H 01H 1FH 27H INPUT SELECT NETWORK 02H 03H 00H 00H 02H 01H 20H 28H INPUT SELECT USB DISPLAY 02H 03H 00H 00H 02H 01H 22H 2AH PICTURE MUTE ON 02H 10H 00H 00H ...

Page 152: ... outlet Lamp cover is installed correctly AUTO POWER OFF is turned off only models with the AUTO POWER OFF function OFF TIMER is turned off only models with the OFF TIMER function Video and Audio Image is too dark Remains unchanged even though you adjust the brightness and or the contrast Image is distorted Image appears to be trapezoidal unchanged even though you carry out the KEYSTONE adjustment...

Page 153: ...er s cable Model number Length inch m Distribution amplifier Model number Switcher Model number Adapter Model number Projector PC DVD player Installation environment Screen size inch Screen type White matte Beads Polarization Wide angle High contrast Throw distance feet inch m Orientation Ceiling mount Desktop Power outlet connection Connected directly to wall outlet Connected to power cord extend...

Page 154: ...models have the TCO mark on the marking plate on the bottom of the product To see a list of our TCO certified projectors and their TCO Certification in English only visit our website at http www nec display com ap en_projector tco index html The TCO certification designed by TCO Development is an international environmental and ergonomics standard for IT equipment In some cases we may post a list ...

Page 155: ... NEC Display Solutions Ltd 2010 2011 7N951543 ...

Reviews: