


Troubleshooting 6-3
Preparation
You need a support disk, “Windows Server 2003 OEM-DISK for NEC EXPRESSBUILDER” to start up
the Recovery Console. Have “Windows Server 2003 OEM-DISK for NEC EXPRESSBUILDER” ready
before starting the Recovery Console.
If you do not have a computer that runs Windows Server 2003 or Windows
2000/XP/NT.
Follow the steps below to create a “Windows Server 2003 OEM-DISK for NEC
EXPRESSBUILDER”:
1.
Prepare a 3.5-inch floppy disk.
2.
Power on the peripherals and then NEC Express5800/320Fc system.
3.
Disable the configuration for OS Boot Monitoring function.
In the BIOS setup, select [Server] - [Monitoring Configuration] - [OS Boot
Monitoring] and choose “Disabled.” See “Step 3: Disable OS Boot Monitoring
Function” (page 4-9) for details.
4.
Insert the NEC EXPRESSBUILDER CD-ROM into the drive of the server.
5.
Then, reset (pressing
Ctrl
+
Alt
+
Delete
) or power off/on NEC Express5800/320Fc system
to reboot it.
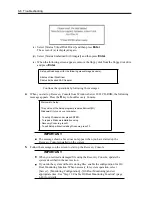
The system will start up from the CD-ROM to start NEC EXPRESSBUILDER.
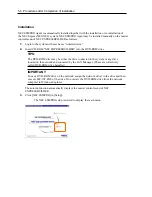
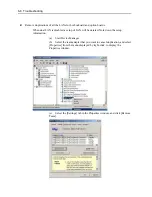
6.
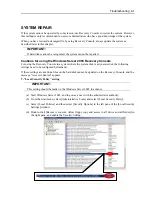
From the [Tools] menu, select [Create Support Disk].
7.
From the [Create Support Disk] menu, select [Windows Server 2003 OEM-DISK for NEC
EXPRESSBUILDER].
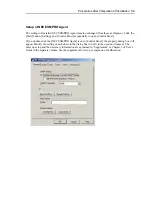
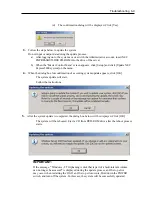
8.
Follow the instructions on the screen to insert the floppy disk.
“Windows Server 2003 OEM-DISK for NEC EXPRESSBUILDER” will be
created on the floppy disk. Write-protect and place a label on the disk and keep it
in a safe place.
IMPORTANT:
Enable the configuration for OS Boot Monitoring function to deploy the system without performing
the system repair which uses the Recovery Console. In the BIOS setup, select [Server] - [Monitoring
Configuration] - [OS Boot Monitoring] and set appropriate time. See “Step 13: Enable OS Boot
Monitoring Function” (page 4-40) for details.
Summary of Contents for Express5800/320Fc-LR
Page 1: ...NEC Express5800 320Fc system NEC Express5800 320Fc LR MR Setup Guide ...
Page 2: ......
Page 17: ...Before Using 1 3 Inside of device ...
Page 26: ...1 12 Before Using ...
Page 28: ......
Page 45: ...Installing Server 3 15 ...
Page 93: ...Windows Setup 4 50 ...
Page 130: ......
Page 131: ......
Page 132: ......