background image

Issue 6

Electra Elite

7 - 46

Installing Optional Equipment


3.12.3

Installing the Wall Mount Unit and Mounting the Multiline
Terminal using the WMU-U Unit

When installing any Adapter unit, a separate WMU-U Unit
must be purchased to accommodate this unit. 

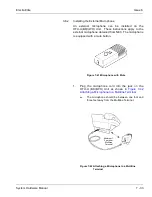
1.

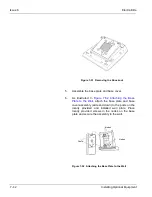
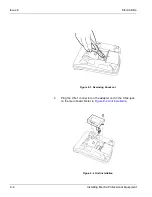
Remove the line cord, base plate and base cover
from the Multiline Terminal as shown in the previous
section.  

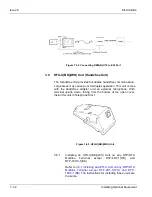
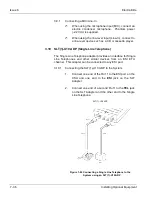
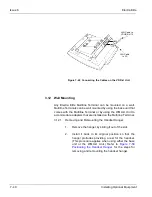
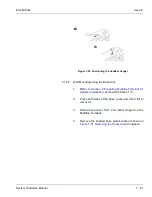
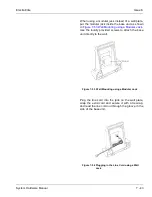
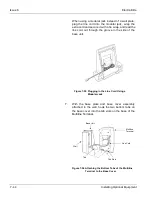
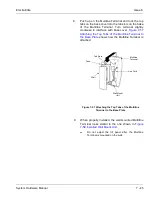
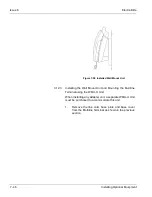
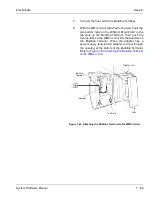
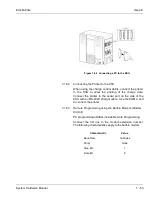
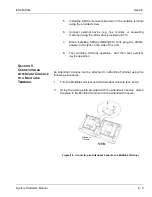
Figure 7-58 Installed Wall Mount Unit

Summary of Contents for Electra Elite 192

Page 1: ...wing and printing thisdocument we cannot guaranteethatyourspecificPCorprinterwillsupportallofthefontsor graphics Therefore when you view the document fonts may besubstituted and your individual printer may not have the capability toprint the document correctly Hardcopies of this document may be ordered by contacting NEC America Inc customerservice department Request Stock Number 750363 Issue6 ...

Page 2: ...SYSTEM HARDWARE MANUAL Stock Number 750363 Issue 6 Series 6000 192 ...

Page 3: ......

Page 4: ...perty of NEC America Inc and shall not be reproduced without prior written approval of NEC America Inc Dterm is a registered trademark of NEC Corporation and Electra Elite is a registered trademarks of NEC America Inc Windows is a registered trademark of Microsoft Corporation AT T is a registered trademark of AT T Wireless Services Inc Copyright 2002 NEC Infrontia Inc 6535 N State Highway 161 Irvi...

Page 5: ......

Page 6: ... MANUAL This manual contains detailed instructions to install the Electra Elite 192 KSUs ETUs Multiline Terminals and optional equipment in the following chapters Chapter 1 Introduction Chapter 1 is a brief description of the Electra Elite 192 system and contains a detailed list of equipment available with the system Chapter 2 System Specifications Chapter 2 contains detailed specifications for th...

Page 7: ...ectra Professional terminals on the Electra Elite 192 system Chapter 9 System Maintenance Chapter 9 is a guide to help the technician troubleshoot and diagnose problems during and after system installation SUPPORTING DOCUMENTS Other manuals in the set are described below Electra Elite 48 192 Features and Specifications Manual Stock Number 750361 This manual describes each available feature for the...

Page 8: ...ual provides general information about the Elite ACD Plus features installation procedures and feature programming The NEC Elite ACD Plus is an Automatic Call Distribution card that supports up to 40 agents and 12 supervisors at one time Electra Elite Wireless System Manual Stock Number 750423 This manual describes the system and provides hardware installation and programming procedures for the El...

Page 9: ...THIS PAGE INTENTIONALLY LEFT BLANK ...

Page 10: ...Regulatory Information ...

Page 11: ......

Page 12: ... is required to give adequate notice of the changes COMPANY NOTIFICATION Before connecting this telephone system to the telephone network the following information must be provided to the telephone company 1 Your telephone Number 2 FCC registration number When the system is to be installed as a Key Function system no dial access to Trunk Groups Route Advance Blocks use the following number AY5THA ...

Page 13: ...and Jack Types for Electra Elite System ETUs Trunk Station ETU Type FIC REN SOC Jack BRT 4 U10 ETU 02IS5 N A 6 0F N A CAMA Trunk 02RV O 0 7A 9 0F RJ21X COI 4 U10 ETU Loop Start 02LS2 0 7A 9 0F RJ21X COI 8 U10 ETU Loop Start 02LS2 0 7A 9 0F RJ21X COI 8 U10 ETU Ground Start 02GS2 0 7A 9 0F RJ21X COIB 4 U10 ETU for COID COI Mode Loop Start 02LS2 0 7A 9 0F RJ21X COIB 4 U10 ETU for COI Mode Ground Star...

Page 14: ...RING AID COMPATIBILITY The NEC Multiline Terminals and NEC Single Line Telephones provided for this system are hearing aid compatible The manufacturer of other Single Line Telephones for use with the system must provide notice of hearing aid compatibility to comply with FCC rules that prohibit the use of non hearing aid compatible telephones DIRECT INWARD DIALING Operating this equipment without p...

Page 15: ...ion prior to monitoring or recording a telephone conversation Some of these laws incorporate strict penalties MUSIC ON HOLD IMPORTANT NOTE In accordance with U S Copyright Law a license may be required from the American Society of Composers Authors and Publishers or other similar organization when radio or TV broadcasts are transmitted through the Music On Hold feature of this telecommunication sy...

Page 16: ...using an acceptable method of connection The customer should be aware that compliance with the above conditions may not prevent degradation of service in some situations Repairs to certified equipment should be coordinated by a representative designated by the supplier Any repairs or alterations made by the user to this equipment or equipment malfunctions may give the telecommunications company ca...

Page 17: ...asse A prescrites dans le reglement sur le brouillage radioelectrique edicte par Industrie Canada BATTERY DISPOSAL The Electra Elite system includes the batteries listed below When disposing of these batteries KSUs and or ETUs you must comply with applicable federal and state regulations regarding proper disposal procedures Table 2 Battery Types and Quantities for KSUs and ETUs Unit Name Type of B...

Page 18: ...is PROHIBITED BY LAW in most areas Contact your local solid waste management officials for other information regarding the environmentally sound collection recycling and disposal of the battery Nickel Cadmium or sealed lead batteries must be returned to a federal or state approved nickel cadmium or sealed lead battery recycler This may be where the batteries were originally sold or a local seller ...

Page 19: ...E RECYCLED OR DISPOSED OF PROPERLY MUST NOT BE DISPOSED OF IN MUNICIPAL WASTE CONTAINS SEALED LEAD BATTERY BATTERY MUST BE RECYCLED MUST NOT BE DISPOSED OF IN MUNICIPAL WASTE Pb Ni Cd CONTAINS NICKEL METAL HYDRIDE BATTERY BATTERY MUST BE RECYCLED OR DISPOSED OF PROPERLY MUST NOT BE DISPOSED OF IN MUNICIPAL WASTE Ni MH ...

Page 20: ......

Page 21: ...n 3 Maximum System Capacities 2 4 Section 4 System Requirements and Specifications 2 5 4 1 Cabling Requirements and Specifications 2 5 4 2 Cabling Precautions 2 8 4 2 1 Cable Placement 2 8 4 2 2 Environmental Conditions 2 8 4 3 Power Requirements 2 8 4 3 1 Power Supply Inputs 2 8 4 3 2 Power Supply Consumption 2 9 4 3 3 Fuse Replacement 2 9 4 4 Outside Line Types 2 10 4 5 Transmission Network and ...

Page 22: ...usic on Hold Station Background Music 2 17 4 9 2 External Paging Audio 2 17 4 9 3 External Tone Ringer Night Chime Output 2 18 4 9 4 SMDR Output 2 18 4 9 5 PC Connection 2 18 4 9 6 ACD MIS Connector 2 18 4 9 7 Relay Contact 2 18 4 10 Audible and Visual Indications 2 18 4 10 1 Tone Patterns 2 18 4 10 2 LED Flash Patterns 2 18 Chapter 3 Hardware Requirements Section 1 General Information 3 1 Section...

Page 23: ...eral Information 4 1 Section 2 Site Preparation and MDF IDF Construction 4 1 2 1 Precautionary Information 4 1 2 2 Surveying the Customer Site 4 1 2 3 Selecting the Best Location for Proper Installation 4 2 2 3 1 Selecting the KSU Installation Site 4 2 2 3 2 Selecting a Permanent MDF Location 4 3 2 3 3 Selecting a Site for Installing the Telephones 4 3 2 4 Constructing the Main Distribution Frame ...

Page 24: ...ry Expansion Cables on the KSU 4 26 3 10 2 Grounding Requirements 4 27 3 11 Replacing the Power Supply Unit in the KSU 4 29 3 11 1 Connecting the Power Supply Unit to the Basic KSU 4 29 3 11 2 Connecting Battery Expansion Cables to the Expansion KSU 4 31 3 11 3 Fuse Replacement 4 32 3 12 Installing Built In and External Batteries in the KSU 4 33 3 12 1 Built In Battery Installation 4 33 3 12 2 Ext...

Page 25: ... 10 3 1 5 LED Indications 5 10 3 1 6 Replacing Memory Backup 5 11 3 2 CLKG U10 Unit 5 11 3 2 1 Description 5 11 3 2 2 Installation 5 12 3 2 3 Connectors 5 12 3 2 4 Switch Settings 5 12 3 3 EXP U10 ETU 5 13 3 3 1 Description 5 13 3 3 2 Installation 5 13 3 3 3 Connectors 5 14 3 4 KMA 1 0 U 5 14 3 4 1 Description 5 14 3 4 2 Installation 5 14 3 5 KMM 1 0 U 5 14 3 5 1 Description 5 14 3 5 2 Installatio...

Page 26: ...5 20 3 8 Modem Kit Unit 5 20 3 8 1 Description 5 20 3 8 2 Installation 5 20 Section 4 Trunk ETUs 5 21 4 1 BRT 4 U10 ETU 5 21 4 1 1 Description 5 21 4 1 2 Installation 5 22 4 1 3 Switch Settings 5 22 4 1 4 Jumpers 5 22 4 1 5 LED Indications 5 22 4 1 6 Connectors 5 23 4 1 7 Connections 5 24 4 2 COI 4 8 U10 ETU 5 25 4 2 1 Description 5 25 4 2 2 Installation 5 26 4 2 3 Switch Settings 5 26 4 2 4 LED I...

Page 27: ... 31 4 4 2 Installation 5 32 4 4 3 Switch Settings 5 32 4 4 4 LED Indications 5 32 4 4 5 Connectors 5 32 4 4 6 Connections 5 32 4 5 DID 4 U10 ETU 5 33 4 5 1 Description 5 33 4 5 2 Installation 5 34 4 5 3 LED Indications 5 34 4 5 4 Connectors 5 34 4 5 5 Connections 5 34 4 6 DTI U10 20 ETU 5 35 4 6 1 Description 5 35 4 6 2 Installation 5 36 4 6 3 Switch Settings 5 36 4 6 4 LED Indications 5 37 4 6 5 ...

Page 28: ... ETU 5 43 4 8 1 Description 5 43 4 8 2 Installation 5 44 4 8 3 Switch Settings 5 44 4 8 4 LED Indications 5 45 4 8 5 Alarm Conditions 5 46 4 8 6 Connectors 5 47 4 8 7 Connections 5 47 4 9 TLI 2 U10 ETU 5 48 4 9 1 Description 5 48 4 9 2 Installation 5 48 4 9 3 Switch Settings 5 49 4 9 4 LED Indications 5 49 4 9 5 Connectors 5 49 4 9 6 Connections 5 50 Section 5 Station ETUs 5 51 5 1 CNF 8 U10 ETU 5...

Page 29: ...nstallation Precautions 5 59 5 3 DPH 4 U10 ETU 5 60 5 3 1 Description 5 60 5 3 2 Installation 5 60 5 3 3 Switch Settings 5 61 5 3 4 LED Indications 5 61 5 3 5 Connectors 5 62 5 3 6 Specifications 5 62 5 4 ESI 8 U10 ETU 5 63 5 4 1 Description 5 63 5 4 2 Switch Settings 5 63 5 4 3 Installation 5 63 5 4 4 LED Indications 5 64 5 4 5 Connectors 5 64 5 4 6 Connections 5 64 5 5 FMS 2 4 8 U10 ETU 5 65 5 5...

Page 30: ...scription 5 73 5 7 2 Installation 5 74 5 7 3 LED Indications 5 74 5 7 4 Connectors 5 74 5 7 5 Connections 5 74 5 8 VDH2 8 U10 ETU 5 75 5 8 1 Description 5 75 5 8 2 Specifications 5 75 5 8 3 Cabling 5 76 5 8 4 Installing the VDH2 8 U10 5 79 5 8 5 Switch Settings and Jumpers 5 81 5 8 6 LED Indications 5 82 5 8 7 Connectors 5 83 5 9 VMS 2 4 8 U10 ETU 5 84 5 9 1 Description 5 84 5 9 2 Installation 5 8...

Page 31: ... U10 ETU 5 92 6 2 1 Description 5 92 6 2 2 Installation 5 92 6 2 3 Switch Settings 5 92 6 2 4 LED Indications 5 94 6 2 5 Connectors 5 96 6 2 6 ZT II Connections 5 96 6 3 ECR U10 ETU 5 97 6 3 1 Description 5 97 6 3 2 Installation 5 97 6 3 3 LED Indications 5 97 6 3 4 Connectors 5 99 6 3 5 Specifications 5 100 6 4 PBR U10 ETU 5 101 6 4 1 Description 5 101 6 4 2 Installation 5 102 6 4 3 LED Indicatio...

Page 32: ...2DT 1 WH TEL 6 1 2 2 DTU 8 1 BK WH TEL 6 2 2 3 DTU 8D 2 BK WH TEL 6 3 2 4 DTU 16 1 BK WH TEL 6 4 2 5 DTU 16D 2 BK WH TEL 6 5 2 6 DTU 32 1 BK WH TEL 6 6 2 7 DTU 32D 2 BK WH TEL 6 7 2 8 DCU 60 1 BK WH CONSOLE 6 8 Section 3 Single Line Telephones 6 9 3 1 DTP 1 1 WH or DTP 1 2 WH BK TEL 6 9 3 2 DTP 1HM 1 WH or DTP 1HM 2 WH BK TEL 6 10 Section 4 Connecting a Multiline Terminal to the System 6 11 Sectio...

Page 33: ...ction 11 Installing Dterm Handset Cordless Terminal 6 22 11 1 Selecting an Installation Location 6 22 11 2 Connecting the Telephone Cord 6 22 11 3 Applying Power to the Base Unit 6 23 Section 12 Installing a Dterm Analog Cordless Terminal 6 24 12 1 Selecting an Installation Location 6 24 12 2 Connecting the Telephone Cord 6 24 12 3 Applying Power to the Base Unit 6 25 Section 13 Dterm PS II 6 26 1...

Page 34: ...necting Cables on the APA U Unit 7 15 3 4 APR U Unit Analog Port Ringer 7 16 3 4 1 Installing an APR U Unit on any DTP DTU Multiline Terminal except DTP 2DT 1 WH and DTP 16HC 1 BK 7 16 3 4 2 Switch Settings 7 19 3 4 3 Connecting Cables on the APR U Unit 7 20 3 5 CTA U Unit Computer Telephony Application 7 21 3 5 1 Installing the CTA U Unit 7 22 3 5 2 Connecting the Cables on the CTA U Unit 7 22 3 ...

Page 35: ...ne 7 36 3 10 1 Connecting the SLT 1 U10 ADP to the System 7 36 3 10 2 Wall Mounting the SLT 1 U10 ADP 7 38 3 11 VDD U Unit Voice Data Unit for Digital Terminals 7 39 3 11 1 Installing a VDD U Unit on a Multiline Terminal 7 39 3 11 2 Connecting Cables to the VDD U Unit 7 39 3 12 Wall Mounting 7 40 3 12 1 Removing and Remounting the Handset Hanger 7 40 3 12 2 Wall Mounting using the Base Unit 7 41 3...

Page 36: ...lectra Professional Multiline Terminals 8 1 Section 3 Connecting an Electra Professional Multiline Terminal to the Electra Elite System 8 2 3 1 Modular Terminal Connections 8 2 3 1 1 Connecting Multiline Terminals Attendant Add On Consoles and SLT Adapters 8 2 3 2 Attach a Multiline Terminal to the System 8 3 Section 4 Installing an Ancillary Device Adapter in the Multiline Terminal 8 3 4 1 Ancill...

Page 37: ...eration 9 5 4 2 3 Reset 9 6 4 3 Flowcharts 9 6 No internal Dial Tone to any Multiline Terminal or SLT 9 7 No LED or Display Indications on any Multiline Terminal 9 8 Radio Frequency Interference RFI 9 9 No or Intermittent CO PBX Ring 9 10 Call Dropping 9 11 No Outside Dial Tone Access 9 12 CO PBX Dialing Problem Cannot Dial Out on CO 9 13 Multiline Terminal Function Problems 9 14 Multiline Termina...

Page 38: ...Issue 6 Electra Elite xviii Table of Contents SMDR Output Problems No Call Accounting System 9 22 Appendix A Glossary of Abbreviations ...

Page 39: ...3 Figure 4 6 Mounting the Cable Clamp on the KSU Frame 4 14 Figure 4 7 Attaching the Sponge to the Clamp 4 14 Figure 4 8 Attaching the Front Cover and Front Cover Extender 4 15 Figure 4 9 Attaching the Front Cover and the Front Cover Extender to the KSU 4 16 Figure 4 10 Threading the Velcro Strap Through the Hook on the KSU 4 16 Figure 4 11 Connecting the Expansion Cable 4 17 Figure 4 12 Threading...

Page 40: ...the PSU 4 29 Figure 4 29 Mounting the PSU onto the KSU 4 30 Figure 4 30 Connecting the PSU Power Cable to the Basic KSU 4 30 Figure 4 31 Connecting Battery Expansion Cables to the Expansion KSU 4 31 Figure 4 32 Removing the PSU from the KSU 4 32 Figure 4 33 PSU Fuse Replacement 4 33 Figure 4 34 Connecting Built In Batteries 4 33 Figure 4 35 Placing the Batteries into the KSU 4 34 Figure 4 36 Conne...

Page 41: ...SU 5 3 Figure 5 3 Handling an ETU 5 3 Figure 5 4 Safety Precautions when Setting Switches on an ETU 5 4 Figure 5 5 Sliding the ETU into the KSU Slot 5 5 Figure 5 6 Lifting the Ejector Tabs on the ETU 5 6 Figure 5 7 CPUB U10 ETU 5 8 Figure 5 8 CLKG U10 Unit 5 12 Figure 5 9 EXP U10 ETU 5 13 Figure 5 10 MIFA U10 ETU 5 15 Figure 5 11 MIFM U10 ETU 5 18 Figure 5 12 BRT 4 U10 ETU 5 21 Figure 5 13 BRT 4 U...

Page 42: ...TU Connections 5 50 Figure 5 30 CNF 8 U10 ETU 5 51 Figure 5 31 EliteMail CTI System Board 5 55 Figure 5 32 EliteMail CTI Daughter Board 5 57 Figure 5 33 EliteMail CTI Port Expansion Board 5 58 Figure 5 34 DPH 4 U10 ETU 5 60 Figure 5 35 DPH 4 U10 ETU Doorphone Connections 5 62 Figure 5 36 ESI 8 U10 ETU 5 63 Figure 5 37 ESI 8 U10 ETU Connection 5 64 Figure 5 38 FMS 2 4 U10 ETU 5 66 Figure 5 39 FMS 8...

Page 43: ...0 Block Diagram 5 98 Figure 5 56 ECR U10 ETU 5 100 Figure 5 57 PBR U10 ETU 5 101 Figure 5 58 VRS 4 U10 ETU 5 103 Figure 6 1 DTP 2DT 1 WH TEL 6 1 Figure 6 2 DTU 8 1 BK WH TEL Multiline Terminal 6 2 Figure 6 3 DTU 8D 2 BK WH TEL Multiline Terminal 6 3 Figure 6 4 DTU 16 1 BK WH TEL Multiline Terminal 6 4 Figure 6 5 DTU 16D 2 BK WH TEL Multiline Terminal 6 5 Figure 6 6 DTU 32 1 BK WH TEL Multiline Ter...

Page 44: ... 20 Locating the Adjustment Tabs on the Multiline Terminal 6 17 Figure 6 21 Raising the Base Plate on the Multiline Terminal 6 17 Figure 6 22 Adjusting the Line Cord Length 6 18 Figure 6 23 Lowering the Base Plate on the Multiline Terminal 6 18 Figure 6 24 Dterm Cordless Lite Terminal 6 19 Figure 6 25 Dterm Cordless II 6 20 Figure 6 26 Connecting the Base Unit 6 21 Figure 6 27 Dterm Handset Cordle...

Page 45: ...the Multiline Terminal 7 8 Figure 7 11 Leading the Audio Cable out from the ADA U Unit 7 8 Figure 7 12 ADA U Unit 7 9 Figure 7 13 Attaching Cables to the ADA U Unit 7 9 Figure 7 14 ADA U Unit Switch Settings 7 11 Figure 7 15 APA U Unit 7 13 Figure 7 16 Attaching the Unit to the Multiline Terminal 7 14 Figure 7 17 APA U Unit Switches 7 14 Figure 7 18 Connecting Cables on the APA U Unit 7 15 Figure ...

Page 46: ... Connecting the Bracket 7 28 Figure 7 35 Threading Screw into Wall 7 29 Figure 7 36 Hanging DBM B U10 on Screw 7 30 Figure 7 37 Installing Bottom Screws 7 30 Figure 7 38 Connecting DBM B U10 7 31 Figure 7 39 Connecting DBM B U10 to ESI Port 7 32 Figure 7 40 HFU U BK WH Unit 7 32 Figure 7 41 Microphone with Mute 7 33 Figure 7 42 Attaching a Microphone to a Multiline Terminal 7 33 Figure 7 43 HFU U ...

Page 47: ...tiline Terminal to the Base Plate 7 45 Figure 7 58 Installed Wall Mount Unit 7 46 Figure 7 59 Removing the Tabs from the Adapter 7 47 Figure 7 60 Removing the Tabs from the WMU U Unit 7 47 Figure 7 61 Leading the Line Cord out of the WMU U Unit 7 48 Figure 7 62 Attaching the Wall Mount Unit to the Wall 7 48 Figure 7 63 Attaching the Multiline Terminal to the WMU U Unit 7 49 Figure 7 64 Removing th...

Page 48: ...Issue 6 Electra Elite xxviii List of Figures Figure 8 4 Unit Installation 8 4 Figure 8 5 Connecting an Attendant Console to a Multiline Terminal 8 5 ...

Page 49: ... Replacement 2 9 Table 2 10 Weights and Dimensions 2 14 Table 2 11 Tone Patterns 2 19 Table 2 12 Multiline Terminal LED Flash Pattern 2 20 Table 3 1 Number of Required Interface ETUs 3 7 Table 4 1 MDF Cable Connections 4 5 Table 4 2 MDF PFT Connections J3 Only 4 8 Table 5 1 CPUB U10 ETU Default Switch Settings 5 9 Table 5 2 MIFA U10 Default Switch Settings 5 16 Table 5 3 MIFM U10 Default Switch Se...

Page 50: ... 5 19 FMS 2 4 8 U10 ETU Switch Settings 5 68 Table 5 20 FMS DIP Switch Functions 5 68 Table 5 21 VDH2 8 U10 ETU Specifications 5 75 Table 5 22 VDH2 8 U10 ETU Default Switch Settings 5 81 Table 5 23 Jumper Settings 5 81 Table 5 24 Configuration Support Table 5 85 Table 5 25 VMS 2 4 8 U10 ETU Switch Settings 5 87 Table 5 26 VMS DIP Switch Functions 5 87 Table 5 27 BSU 2 U10 ETU Default Switch Settin...

Page 51: ...Electra Elite Issue 6 System Hardware Manual xxxi Table 7 4 APR U Unit Switch Settings for SW1 and SW3 7 19 Table 7 5 HFU U Unit Switch Settings 7 34 Table 9 1 Voltage Measurement 9 3 ...

Page 52: ...Issue 6 Electra Elite xxxii List of Tables THIS PAGE INTENTIONALLY LEFT BLANK ...

Page 53: ...n system includes the basic and two expansion units that provide a capacity of 192 ports Electra Elite 192 is a feature rich system that provides telephone functions and supports advanced features such as Automatic Number Indication ANI Caller ID Automatic Call Distribution ACD Automatic Route Selection Caller ID Call Return Centralized Voice Mail Computer Telephony Integration CTI Dialed Number I...

Page 54: ...lectra Professional terminals can easily connect them to the Electra Elite 192 system to provide inexpensive migration Most Electra Elite 192 system features are available with the Electra Professional Multiline Terminals The Electra Elite 192 system supports a wide range of additional equipment such as Single Line Telephones external speakers facsimile machines external microphones and headsets t...

Page 55: ...nal Speakerphone Headset Attendant Console Dterm Cordless Lite CO PBX Centrex DID Tie FT1 ISDN BRI ISDN PRI Least Cost Routing Electra Elite Multiline Terminal Dterm Series E Multiline Terminal Dterm Cordless II Computer Telephony Integration ElectraMail CTI Unified Messaging Message Display Board Voice over Internet Protocol VoIP Trunks Dterm Handset Cordless PS II ZT II Wireless Dterm ISDN EXTen...

Page 56: ...rface ETU are installed Equipment Name Description Basic KSU Basic 1 Expansion KSU Basic 2 Expansion KSUs Key Service Units Power Supply Units and Adapters B64 U10 KSU The Basic Key Service Unit KSU for the Electra Elite System provides service for outside lines Attendant Consoles and interconnection of the station terminals The basic KSU provides 64 ports that can be expanded to a maximum of 192 ...

Page 57: ...Boards 32 PC Telephony Boards 32 PC Telephony Boards 16 Conference Circuits CLKG U10 Unit The Clock Unit provides synchronization for FT1 T1 lines ISDN Primary Rate and ISDN Basic Rate connections The unit is piggybacked on the CPUB U10 ETU and supports the DTI U10 20 BRT 4 U10 PRT 1 U10 20 and BSU 2 U10 ETUs 1 per system with FT1 ISDN BRI ISDN PRI or Wireless connections EXP U10 ETU The Expansion...

Page 58: ...maximum number depends on other trunk cards installed This ETU shares the total number of CO PBX lines in the system A CLKG U10 Unit must be installed 4 ETUs 32 B Channels 8 ETUs 64 B Channels 8 ETUs 64 B Channels COI 4 U10 ETU Electrical fuses posistors are built into this ETU This ETU supports four outside CO PBX lines and provides circuitry for ring detection holding and dialing The outside lin...

Page 59: ...e interface When ETU is set for COID mode Loop Start trunks and or Caller ID trunks are supported When the ETU is set for COI mode Loop Start or Ground Start is supported Caller ID is not supported in COI mode Connections for Ground Start trunks are polarity sensitive Only DTMF signaling is supported This ETU can provide an E911 CAMA trunk The maximum number depends on other Trunk cards installed ...

Page 60: ...istors are built into this ETU That supports eight outside CO PBX lines and provides circuitry for ring detection holding and dialing This ETU is loop start only and is installed in slots S1 S4 in the basic or first expansion B64 U10 KSU This ETU can provide an E911 CAMA trunk The maximum number depends on other trunk cards installed This ETU shares the total number of CO PBX lines in the system 4...

Page 61: ...e maximum combination of DTI U10 20 and PRT 1 U10 20 ETUs is 3 per system A CLKG U10 Unit must be installed 2 ETUs 48 lines 3 ETUs 64 lines 3 ETUs 64 lines IPT 4 U10 ETU This IP Gateway ETU is an optional Interface that can combine trunk calls into Gateway trunks This ETU can emulate the following ETUs TLI 2 U10 DID 4 U10 COI 4 8 U10 or COID 4 8 U10 Refer to the applicable ETU assignment for the t...

Page 62: ... channels and one D channel 23B D for voice call trunking The B channels provide 23 CO DID connections This ETU is installed in slots S1 and S4 in the basic B64 U10 KSU and slot S1 of the first expansion B64 U10 KSU The maximum number depends on other trunk cards installed This ETU shares the total number of Trunk lines in the system The maximum combination of PRT 1 U10 20 and DTI U10 20 ETUs is t...

Page 63: ... number of station ports in the system 1 ETU DPH 4 U10 ETU The Doorphone interface ETU allows four DP D 1A Doorphones to be connected Two simultaneous calls are allowed and four Door Lock Release relays are provided This ETU is installed in slots S1 S8 in the B64 U10 KSU 1 ETU 1 ETU 1 ETU ESI 8 U10 ETU The Electronic Station Interface ETU contains eight circuits Each circuit can support any Attend...

Page 64: ... ETUs 88 ports SLI 8 U10 ETU The Single Line Interface ETU supports a maximum of eight Single Line Telephones and or voice mail ports This ETU provides Ringing Signal Generator RSG and Message Waiting MW LED voltage to Single Line Telephones This ETU is installed in slots S1 S8 in the B64 U10 KSU The maximum number depends on other station cards installed This ETU shares the total number of statio...

Page 65: ...12 ZT IIs 8 ETUs 16 ZT IIs 8 ETUs 16 ZT IIs ECR U10 ETU The External Control Relay ETU provides common audible tone signaling using relay contacts for external ringing equipment and an audible output for external paging systems Four External Tone Ringer Control relays one Night Chime relay three External Paging relays and two General Purpose relays are provided This ETU is installed in slots S1 S8...

Page 66: ...ume control data jack message waiting lamp and eight programmable Feature Speed Dial keys Each terminal requires an SLI 4 8 U10 ETU or SLT 1 U10 ADP 48 112 112 DTP 2DT 1 WH TEL This is a fully modular terminal with two Flexible Line keys each with 2 color LED eight function keys built in Speakerphone and a large LED to indicate incoming calls and messages This phone does not support any adapter Ea...

Page 67: ...is terminal Each terminal requires an ESI 8 U10 ETU port 40 DTP DTU 16 1 BK WH TEL This digital Multiline Terminal has 16 programmable line keys each with a 2 color LED a built in speakerphone a large LED to indicate incoming calls and messages headset jack and compatibility with ADA U APR U CTA U CTU C U CTU S U HFU U and VDD U Units 55 119 119 DTP 16D 1 DTU 16D 2 BK WH TEL These digital Multilin...

Page 68: ...DTR 4R 1 BK TEL The Dterm Cordless II terminal uses 900 MHz Digital Spread Spectrum DSS Technology and is connected in tandem to a Multiline Terminal This terminal can be switched between cordless and the Multiline Terminal connected to it using a key on the base unit or the Handset This terminal has a 16 digit by 2 line LCD Display 10 ETW 4R 1 BK TEL This Dterm Cordless Terminal can be connected ...

Page 69: ...s each with 2 color LED eight function keys 12 programmable One Touch keys dual path ability built in speakerphone ADA compatibility and a large LED to indicate incoming calls and messages This terminal has a 16 character by 2 line Liquid Crystal Display LCD 56 120 120 EDW 48 1 2 BK SW CONSOLE This console has a tilt stand 48 programmable keys with dual LEDs green and red and 12 function keys with...

Page 70: ...nger adapter is used an additional Single Line Telephone or a modem can be connected to an Electra Elite Multiline Terminal This adapter can be installed on any DTP or DTU Multiline Terminal except DTP 2DT 1 WH TEL DTP 16HC 1 BK TEL or Cordless terminals 56 120 120 CTA U Unit TAPI Microsoft Telephony Application Programming Interface adapter allows an Electra Elite Multiline Terminal to be connect...

Page 71: ... to the VDH2 8 U10 ETU This unit can be connected directly to the test port This unit can be installed on the ISA bus on any IBM compatible PC 32 32 32 PCT S U10 Unit NEC PC Telephony Board TAPI without a modem This unit can be installed on the ISA bus on any IBM compatible PC 32 32 32 RAK U10 Unit This 19 unit is used to simplify installation by rack mounting the Electra Elite 192 system 1 2 3 SL...

Page 72: ...ultiline Terminal or DTP 2DT 1 WH TEL to the wall 56 120 120 ZT II The Zone Transceiver maintains radio communication with the PS II terminals 12 16 16 Software SAT S W END USER S6000 System Administration Terminal Software for End User 1 SAT S W TECH S6000 System Administration Terminal Software for Technician 1 SAT LCR Version 2 00 System Administration Terminal Software for Least Cost Routing 1...

Page 73: ...Electra Elite Issue 6 System Hardware Manual 1 21 THIS PAGE INTENTIONALLY LEFT BLANK ...

Page 74: ...Issue 6 Electra Elite 1 22 Introduction ...

Page 75: ...upported when the ETU is installed Table 2 1 List of Abbreviations provides abbreviations that are used in the diagram Table 2 1 List of Abbreviations Abbreviation Description ACD Automatic Call Distribution AMP Amplifier APR Analog Port Ringer BRT Basic Rate Trunk Interface BSU Base Station Unit CNF Multiline Conference Bridge COI Central Office Interface COIB Central Office Interface COI COID mo...

Page 76: ...mise Extension PBR Push Button Receiver PC Personal Computer PCM Pulse Code Modulation PCT C PC Telephony Board Coreline Interface PCT S PC Telephony Board without Modem PRT Primary Rate Trunk PS II Personal System Wireless Terminal SLI Single Line Interface SLT Single Line Telephone SPK Speaker TLI Tie Line Interface VDD Voice Data Digital Adapter VDH Voice Data Hub VM Voice Mail VMS Built In Voi...

Page 77: ...M Port VRS 4 PBR COI 4 8 CO Line CO Line with Caller ID Analog VM SLT AMP SPK Audio Relay Package Control Path HDLC Voice Path PCM Highway DPH 4 ECR SLI 4 8 OPX 2 DPH Electra Mail CTI SLT ADP SLT PCT S PC PC PCT C Electra Elite VDD Coreline VDH2 8 CPUB U10 ETU CLKG U10 MOH PC 10Base T LAN 10Base T 2 PRT 1 10 20 ISDN Primary S3000 CNF 8 Multiline Conference Bridge FMS 2 4 8 IPT 4 8 VoIP COID 4 8 ZT...

Page 78: ... 8 CLKG U10 Unit 1 1 1 CNF 8 U10 ETU 2 2 2 COI 4 U10 ETU 7 15 16 COI 8 U10 ETU 7 8 8 COIB 4 U10 ETU COI mode 7 COID mode 4 COI mode 15 COID mode 8 COI mode 16 COID mode 8 COID 4 U10 ETU 4 8 8 COID 8 U10 ETU 4 8 8 CPUB U10 ETU 1 1 1 CTA U Unit 32 32 32 CTI VP 4 8 12 16 U10 ETU 1 CTU C S U Unit 32 32 32 DBM B U10 Box 8 8 8 DBM E U10 Box 40 40 40 DID 4 U10 ETU 7 15 16 DPH 4 U10 ETU 1 1 1 Dterm Analog...

Page 79: ...SI VDH and PCT Board Table 2 6 Cabling Requirements and Table 2 7 Zone Transceiver II Range FMS 2 4 8 U10 ETU 1 1 1 HFU U Unit 56 120 120 IPT 4 U10 ETU Variable Variable Variable IPT 8 U10 ETU Variable Variable Variable MIFA U10 Unit 1 1 1 MIFM U10 Unit 1 1 1 OPX 2 U10 ETU 6 14 22 PBR U10 ETU 1 1 1 PCT C S U10 Unit 32 32 32 PRT 1 U10 ETU 2 3 3 SLI 4 U10 ETU 7 14 22 SLI 8 U10 ETU 7 14 14 TLI 2 U10 ...

Page 80: ...DTP 16D 1 BK WH TEL DTU 16D 2 BK WH TEL 26 450 900 DTP 16HC 1 BK TEL 57 1083 DTP 32 1 BK WH TEL DTU 32 1 BK WH TEL 21 360 720 DTP 32D 1 BK WH TEL DTU 32D 2 BK WH TEL 21 360 720 DTR 1R 1 BK TEL 35 600 1000 DTR 4R 1 BK TEL N A 650 1000 ETW 8 1 2 BK SW TEL 35 600 1000 ETW 16DC 1 2 BK SW TEL 26 450 900 ETW 16DD 1 2 BK SW TEL 21 360 720 ETW 24DS 1 2 BK SW TEL 26 450 900 ETW 4R 1 BK TEL N A 650 650 EDW ...

Page 81: ...U Twisted Pair 300 ohms SLT 1 U10 ADP Twisted Pair 50 feet Mixing digital and analog ports through the same 25 pair cable runs is not recommended Table 2 5 Cable Connection Between ESI VDH and PCT Board Connected Equipment Cable Maximum Loop Resistance Ohms Attached Telephone PCT C U10 Unit 10 Base T 35 Connected 31 Not Connected PCT S U10 Unit Twisted 1 Pair 35 Connected 31 Not Connected Table 2 ...

Page 82: ... affected by gases and chemicals An unstable place subject to vibration 4 2 2 Environmental Conditions Temperature Operating 32 F 104 F 0 C 40 C Long Term 50 F 90 F 10 C 32 2 C Humidity Operating 10 90 noncondensing 4 3 Power Requirements 4 3 1 Power Supply Inputs AC input requirements for the system are listed below AC Input P64 U10 PSU 117 Vac 10 60 Hz 10 Single Phase 7 5A circuit A dedicated ou...

Page 83: ...2 9 Fuse Replacement KSU Maximum RMS Current Watts Used Idle Watts Used Maximum Basic KSU B64 U10 KSU 2 5 A 120 230 Basic KSU Expansion KSU 5 0 A 240 460 Basic KSU 2 Expansion KSUs 7 5 A 360 690 Table 2 9 Fuse Replacement Unit Fuse Number Specifications Description Dimensions P64 U10 PSU F1 125V 6 0A AC Input 1 4 x 1 1 4 P64 U10 PSU F101 250V 10A Battery Input 1 4 x 1 1 4 All fuses are normal blow...

Page 84: ...etailed list of Facility Interface Codes Ringer Equivalence Numbers Service Order Codes and Jack Types 4 5 Transmission Network and Control Specifications 4 5 1 Transmission Data Length From Multiline Terminal to ESI 8 U10 ETU 23 bits From ESI 8 U10 ETU to Multiline Terminal 23 bits Data Transmission Rates Between ESI 8 U10 ETU and Multiline Terminal 184K bps voice and signaling Scanning Time for ...

Page 85: ...it microprocessor 4 5 4 Telephone The voltage current ring signal information for the Electra Elite Multiline Terminals Single Line Telephone equipment and APA APR units are listed below Multiline Terminal Voltage 11 26 Vdc Maximum Current 250 mA Acoustical characteristics meet Electronic Industry Association EIA standard proposal SP 1286 and standard EIA RS 470 Single Line Telephone Standard 2500...

Page 86: ... ms 800 ms 4 6 2 Dual Tone Multifrequency DTMF Address Signaling DTMF signaling describes push button or Touchtone dialing When a key on a telephone is pushed two tones one high frequency and one low frequency are provided In the Electra Elite 192 system the following DTMF specifications are used Frequencies Two sinusoidal frequencies are provided one from the high frequency group and one from the...

Page 87: ...lure the system is backed up using a rechargeable battery This battery backup supports all of the system operations for approximately 30 minutes 4 7 2 Memory Backup The CPUB U10 ETU has a battery installed to provide backup of system memory When the battery is fully charged system memory customer data is retained for approximately 21 days 1209 1336 1477 697 1 2 3 770 4 5 6 852 7 8 9 941 0 Nominal ...

Page 88: ... 1 312 mm 13 7 348 mm 18 457 mm BRT 4 U10 ETU 14 6 oz 414 g 1 97 50 mm 9 45 240 mm 7 68 195 mm BSU 2 U10 ETU 13 2 oz 374 g 1 97 50 mm 9 45 240 mm 7 68 195 mm CNF 8 U10 ETU 12 0 oz 340 g 1 89 48 mm 11 47 290 mm 8 46 214 mm COI 4 U10 ETU 13 6 oz 385 g 1 97 50 mm 9 45 240 mm 7 68 195 mm COI 8 U10 ETU 16 6 oz 471 g 1 97 50 mm 9 45 240 mm 7 68 195 mm COIB 4 U10 ETU 14 4 oz 408 g 1 97 50 mm 9 45 240 mm ...

Page 89: ...8 oz 760 g 2 36 60 mm 6 22 158 mm 8 81 224 mm DTP 2DT 1 WH TEL 41 oz 1163 g 4 8 123 mm 7 8 197mm 9 3 235 mm DTU 4R 1 BK WH TEL 15 4 oz 437 g 2 25 57 mm 4 25 108 7 5 191 DTP 8 1 BK WH TEL DTU 8 1 BK TEL 41 0 oz 1163 g 4 8 123 mm 7 8 197 mm 9 3 235 mm DTP 8D 1 BK WH TEL DTU 8D 2 BK TEL 43 5 oz 1233 g 4 8 123 mm 7 8 197 mm 9 3 235 mm DTP 16HC 1 BK TEL 53 oz 1503 g 6 00 152 mm 9 08 230 mm 8 04 204 mm ...

Page 90: ... 1 2 BK SW TEL 39 oz 1106 g 3 98 101mm 8 07 205 mm 8 81 223 mm EXP U10 ETU 14 6 oz 414 g 1 89 48 mm 11 47 290 mm 8 46 214 mm FMS 2 4 8 U10 ETU 6 4 lbs 2903 g 1 89 48 mm 11 47 290 mm 8 46 214 mm HFU U BK WH Unit 7 1 oz 201 g 2 4 60 mm 4 2 107 mm 5 2 133 mm IPT 4 U10 ETU 32 oz 907 g 5 0 127 mm 10 254 mm 10 254 mm IPT 8 U10 ETU 32 oz 907 g 5 0 127 mm 10 254 mm 10 254 mm MIFA U10 ETU 12 1 oz 343 g 1 9...

Page 91: ... mm 7 68 195 mm SLI 8 U10 ETU 14 1 oz 400 g 1 97 50 mm 9 45 240 mm 7 68 195 mm SLT 1 U10 ADP 9 oz 255 g 1 8 45 mm 2 8 70 mm 4 8 120 mm TLI 2 U10 ETU 13 8 oz 391 g 1 97 50 mm 9 45 240 mm 7 68 195 mm VDD U Unit 12 4 oz 352 g 2 5 63 mm 8 8 224mm 10 8 275 mm VDH2 8 U10 ETU 18 4 oz 522 g 1 97 50 mm 9 45 240 mm 7 68 195 mm VMS 2 4 8 U10 ETU 6 4 lbs 2903 g 1 89 48 mm 11 47 290 mm 8 46 214 mm VRS 4 U10 ET...

Page 92: ...Issue 6 Electra Elite 2 18 System Specifications Output Impedance 600 Ω Relay Contact Rating 500 mA 24 Vdc ...

Page 93: ... Visual Indications The tables in this section provide the audible and visual indications used in the Electra Elite 192 systems 4 10 1 Tone Patterns Tones are used in the Electra Elite 192 systems to inform the station user of various system functions such as dial tone busy tone or ringback tone Table 2 11 Tone Patterns lists the frequency and the pattern for the tones used in the Electra Elite 19...

Page 94: ... 440 Continuous Reorder Tone 480 620 120 IPM Service Set Tone 440 Continuous Special Dial Tone 440 240 IPM Tone Burst 1 Tone 440 Continuous Tone Burst 2 Tone 620 Continuous Tie DID Ringback Tone 440 480 2 sec On 4 sec Off Camp On Tone Call Alert Notification Attendant Tone Override 440 Continuous DIT Alert Tone 480 620 Continuous Call Forward Alert Tone Call Forward Configuration Tone 350 440 120 ...

Page 95: ... Internal Call Incoming Outside Call Message from Attendant Voice Mail Message Red Green Green Red P ON System Data Entry Red Red R Conference in Progress Barge In All Conference Circuits Used Hold Conference Call ICM Call Hold SPD Confirmation Red Red Red Red Red O Incoming Trunk Exclusive Hold User Ringing Line Preference Voice Over with Broker s Call Red Green Red Green T Callback Set Auto Repe...

Page 96: ...Issue 6 Electra Elite 2 22 System Specifications ...

Page 97: ...S An unlimited number of Attendant positions can be assigned in the Electra Elite 192 system An Attendant Position can have one to four DCU 60 1 BK WH Consoles attached Each Attendant Console must be supported by an ESI 8 U10 ETU A maximum of four Attendant Consoles can be installed in each Electra Elite 192 system SECTION 4 PROGRAMMING FROM A PC Electra Elite 192 systems can be programmed using a...

Page 98: ...e Terminal one of the following terminals is required DTP 8D 1 BK WH TEL DTU 8D 2 BK WH TEL DTP 16D 1 BK WH TEL DTU 16D 2 BK WH TEL DTP 32D 1 BK WH TEL DTU 32D 2 BK WH TEL ETW 16DC 1 2 BK SW TEL ETW 16DD 1 2 BK SW TEL ETW 24DS 1 2 BK SW TEL SECTION 6 ELECTRA ELITE REMOTE PC PROGRAMMING The Electra Elite 192 system can be programmed from a remote location using a personal computer 6 1 Remote Progra...

Page 99: ...erminal without LCD DTP 8 1 BK WH TEL DTU 8 1 BK WH TEL 8 line digital Multiline Terminal without LCD DTP 8D 1 BK WH TEL DTU 8D 2 BK WH TEL 8 line digital Multiline Terminal with LCD and softkeys DTP 16 1 BK WH TEL DTU 16 1 BK WH TEL 16 line digital Multiline Terminal without LCD DTP 16D 1 BK WH TEL DTU 16D 2 BK WH TEL 16 line digital Multiline Terminal with LCD and softkeys DTP 16HC 1 BK TEL 16 l...

Page 100: ...ket modem to work It can be installed in the ISA slot or S1 S2 if a locally provided external modem is used The MIFM U10 ETU with KMM 1 0 U must be installed in the ISA S1 or S2 slot for LCR and Caller ID scrolling and dialing to work DTU 4R 1 BK TEL Multiline Cordless Telephone with LCD ETW 8 1 2 BK SW TEL 8 line Multiline Terminal without LCD ETW 16DC 1 2 BK SW TEL 16 line Multiline Terminal wit...

Page 101: ...130 138 146 154 162 170 178 186 129 137 145 153 161 169 177 185 S1 S2 S3 S4 S5 S6 S7 S8 EXP KSU1 72 80 88 96 104 112 120 128 71 79 87 95 103 111 119 127 70 78 86 94 102 110 118 126 69 77 85 93 101 109 117 125 68 76 84 92 100 108 116 124 67 75 83 91 99 107 115 123 66 74 82 90 98 106 114 122 65 73 81 89 97 105 113 121 S1 S2 S3 S4 S5 S6 S7 S8 BASIC KSU ISA BUS SLOT 8 16 24 32 40 48 56 64 7 15 23 31 3...

Page 102: ...below indicates how the CO and trunk numbers can be used The following ETUs are installed for the Figure 3 2 Telephone and CO Port Numbering Example Slot ETU S1 DTI U10 16 channels used S2 Open S3 ESI 8 U10 S4 TLI 2 U10 S5 COI 8 U10 S6 SLI 8 U10 S7 DID 4 U10 S8 Open Figure 3 2 Telephone and CO Port Numbering Example CO Ports 1 8 Open CO Ports 9 16 Telephone Ports 1 8 CO Ports 17 18 CO Ports 19 26 ...

Page 103: ...s An optional PBR U10 ETU that provides an additional four circuits can be installed The number of PBR U10 ETUs needed depends on the number of Single Line Telephones facsimile machines modems and analog voice mail ports needed Automated Attendant and DISA trunks connected to the system must also be considered When the optional PBR U10 ETU is installed these PBR circuits can be used only for SLI p...

Page 104: ...Issue 6 Electra Elite 3 8 Hardware Requirements THIS PAGE INTENTIONALLY LEFT BLANK ...

Page 105: ...nformation 1 Never install telephone wiring during a lightning storm 2 Never install telephone jacks in wet locations unless the jack is specifically designed for wet locations 3 Never touch uninsulated telephone wires or terminals unless the telephone line is disconnected at the network interface 4 Use caution when installing or modifying telephone lines 2 2 Surveying the Customer Site In most ca...

Page 106: ...ctra Elite system equipment The area where the KSU is located must be free of corrosive and inflammable gases excessive chemical or industrial dusts and other materials that could cause a hazard to personnel or to the proper functioning of the equipment The operating ambient temperature and humidity must be within the limits specified in 4 2 2 Environmental Conditions in Chapter 2 System Specifica...

Page 107: ...When a site is selected for telephone installation consider the following conditions to ensure proper installation Ensure that the cable length and line resistance loop between the KSU and the telephones comply with the specifications show in Table 2 3 Multiline Terminal Loop Resistance and Cable Length Select a place where devices that require an external power supply can be easily connected to a...

Page 108: ...elephones from the central equipment and the Central Office Network from the system Refer to Figure 4 1 Typical Full MDF Layout The Electra Elite 192 KSU is connected to each of the Multiline Terminals Single Line Telephones optional equipment CO PBX DID ISDN 4 wire E M Tie lines Types I and V and FT1 digital trunks by separate twisted pair cable through the MDF The 4 wire E M Tie lines FT1 lines ...

Page 109: ...P 2 2 OR WH RD YL R R R R R R R M 1 RB RB 1 28 WH GN GN BK T T T T T T T 1 TA 2 EP Zone 1 DP 3 ZT II 3 GN WH RD YL R R R R R R R 1 TB 2 2 29 WH BR GN BK T T T T T T T1 1 RA 2 Night Chime DP 4 4 BR WH RD YL R R R R R R R1 1 RB 2 30 WH SL GN BK T T T GND TA 3 External Tone Ringer 4 DLR 1 5 SL WH RD YL R R R TB 3 31 RD BL GN BK T T T E 2 RA 3 External Tone Ringer 3 DLR 2 6 BL RD RD YL R R R M 2 RB 3 ...

Page 110: ...4 12 OR BK RD YL R R R R R R R1 1 RB 2 38 BK GN GN BK T T T GND TA 3 External Tone Ringer 4 DLR 1 13 GN BK RD YL R R R TB 3 39 BK BR GN BK T T T E 2 RA 3 External Tone Ringer 3 DLR 2 14 BR BK RD YL R R R M 2 RB 3 40 BK SL GN BK T T T T 2 TA 4 External Tone Ringer 2 DLR 3 15 SL BK RD YL R R R R 2 TB 4 41 YL BL GN BK T T T Fax Brnch T1 2 RA 4 External Tone Ringer 1 DLR 4 16 BL YL RD YL R R R R1 2 RB...

Page 111: ...k T T T GND TA 3 Ext Ringer 4 DLR 1 21 BL VI RD YL R R R TB 3 47 VI OR GN BK T T T E 2 RA 3 Ext Ringer 3 DLR 2 22 OR VI RD YL R R R M 2 RB 3 48 VI GN GN BK T T T T 2 TA 4 Ext Ringer 2 DLR 3 23 GN VI RD YL R R R R 2 TB 4 49 VI BR GN BK T T T Fax Brnch T1 2 RA 4 Ext Tone Ringer 1 DLR 4 24 BR VI RD YL R R R R1 2 RB 4 50 25 PFT circuits are only connected to AMP3 AMP1 is connected to S1 S2 and S3 AMP2...

Page 112: ... Not Used 5 Not Used Not Used 31 Not Used Not Used 6 Not Used Not Used 32 Not Used Not Used 7 Not Used Not Used 33 Not Used Not Used 8 Not Used Not Used 34 Not Used Not Used 9 Not Used Not Used 35 Not Used Not Used 10 Not Used Not Used 36 Not Used Not Used 11 Not Used Not Used 37 Not Used Not Used 12 Not Used Not Used 38 Not Used Not Used 13 Not Used Not Used 39 Not Used Not Used 14 Not Used Not U...

Page 113: ...FT2 CO Tip 20 PFT2 CO Ring 46 PFT2 SLI Tip 21 PFT2 SLI Ring 47 PFT2 SLT Tip 22 PFT2 SLT Ring 48 PFT3 CO Tip 23 PFT3 CO Ring 49 PFT3 SLI Tip 24 PFT3 SLI Ring 50 PFT3 SLT Tip 25 PFT3 SLT Ring PFT circuits are only connected to AMP3 AMP1 is connected to S1 S2 and S3 AMP2 is connected to S4 S5 and S6 AMP3 is connected to S7 and S8 Table 4 2 MDF PFT Connections J3 Only Continued MDF Pin Number PFT Conn...

Page 114: ...atches the CO line dialing type 10 pps 20 pps or DTMF where it is connected A Single Line Telephone with a ground button must be used with Ground Start Trunks Figure 4 2 Power Failure Transfer Connections is a relay diagram The relay is shown with the power ON 3 PFT Circuits for each B64 U10 KTU Figure 4 2 Power Failure Transfer Connections M D F M D F C O I S L I Relay 1 Tip Ring Tip Ring T E L C...

Page 115: ...Electra Elite 192 KSU provides easy installation The KSUs can be floor mounted or wall mounted Only the Basic KSU can be floor mounted The floor mounting option is for demonstration purposes only The information in this section provides detailed instructions for installing the KSU Before beginning installation ensure that the Power Supply Unit PSU is OFF and that the power cord is disconnected fro...

Page 116: ...10 KSU is also used as the expansion unit that can be attached to the basic KSU to provide an additional 64 ports Two expansion units can be added to the Electra Elite 192 system providing a maximum of 192 ports Each expansion KSU provides eight flexible slots and accommodates 8 channel interface cards A Power Supply Unit P64 U10 PSU and backup batteries are included with each expansion unit The i...

Page 117: ... panel slide it to the right and pull 3 3 Installing a Front Cover Extender FCE U10 Unit When installing a VDH2 8 U10 ETU a Front Cover Extender is required to allow for the cabling Figure 4 4 Removing the Front Panel of the KSU Figure 4 5 Front Cover Extender FCE U10 Unit ...

Page 118: ...e clamp on the KSU frame as shown in Figure 4 6 Mounting the Cable Clamp on the KSU Frame 2 Attach the sponge provided to the inner surface of the clamp lining and close the clamp over the cables as shown in Figure 4 7 Attaching the Sponge to the Clamp Figure 4 6 Mounting the Cable Clamp on the KSU Frame Figure 4 7 Attaching the Sponge to the Clamp Sponge ...

Page 119: ...using the two screws Refer to Figure 4 8 Attaching the Front Cover and Front Cover Extender 4 To install the front cover and front cover extender on the KSU place the hooks at the top of the front extender in the KSU slots and slide left to engage Install the provided screw Refer to Figure 4 9 Attaching the Front Cover and the Front Cover Extender to the KSU Figure 4 8 Attaching the Front Cover an...

Page 120: ...cured using the provided velcro strap When wall mounting this should be done prior to attaching the KSU to the wall mount bracket 1 Thread the velcro strap through the hook on the back side of the KSU Figure 4 9 Attaching the Front Cover and the Front Cover Extender to the KSU Figure 4 10 Threading the Velcro Strap Through the Hook on the KSU ...

Page 121: ... Secure the Expansion Cable to the KSU Frame using tie wraps To only install a basic KSU proceed to the next step 3 When one or two amphenol cables are attached to the KSU the velcro strap can be threaded around the cable and through the hooks Figure 4 11 Connecting the Expansion Cable Figure 4 12 Threading the Velcro Strap to Secure One or Two Amphenol Cables Tie Wraps Tie Wraps ...

Page 122: ...attached to the KSU 3 5 Wall Mounting the Basic KSU 1 Before wall mounting the KSU Use the four locally provided screws to attach the wall mount bracket to the wall as shown in Figure 4 14 Attaching the Wall Mount Bracket Figure 4 13 Threading the Velcro Strap to Secure Three Amphenol Cables Figure 4 14 Attaching the Wall Mount Bracket ...

Page 123: ... Place and adhere the spacer to the position shown in Figure 4 15 Attaching the Wall Mount Bracket with Spacer 3 Hang the KSU on the two hooks protruding from the wall mount bracket as shown in Figure 4 16 Hanging the Basic KSU on the Bracket Figure 4 15 Attaching the Wall Mount Bracket with Spacer Spacer 2 56 in 2 17 in ...

Page 124: ...the wall by placing a screw locally provided and washer into the hole in the center of the wall mount bracket as shown in Figure 4 17 Securing the Basic KSU to the Wall Figure 4 16 Hanging the Basic KSU on the Bracket Figure 4 17 Securing the Basic KSU to the Wall ...

Page 125: ...to the Basic Wall Mount Bracket 2 Hang the KSU on the two hooks protruding from the expansion wall mount bracket as shown in Figure 4 16 Hanging the Basic KSU on the Bracket 3 To secure the KSU to the wall install a screw locally provided in the hole in the center of the wall mount bracket as shown in Figure 4 24 Securing the KSU to the Floor Mounting Bracket Figure 4 18 Attaching the Expansion Wa...

Page 126: ... Figure 4 19 RAK U10 Unit and KSU Use three screws on the right side at 1 2 and 3 and three screws on the left side 2 Mount the Wall Mount Bracket onto the RAK U10 Unit using the four provided screws Install two screws in the upper holes at A and two screws in the lower holes at A1 Figure 4 19 RAK U10 Unit and KSU RAK U10 Unit 2 3 Wall Mount Bracket KSU A 1 A1 ...

Page 127: ...e Wall Mount Bracket as shown in Figure 4 20 Hanging the KSU on the Bracket 4 Secure the KSU to the RAK U10 Unit by installing a provided screw into the KSU tab and bracket hole A2 Refer to Figure 4 21 Securing the KSU to the RAK U10 Unit Figure 4 20 Hanging the KSU on the Bracket Figure 4 21 Securing the KSU to the RAK U10 Unit Hooks KSU KSU Tab A2 ...

Page 128: ...on of the rack mounting bracket The Basic KSU is secured using the five threaded screw holes marked A 3 The 1st Expansion KSU is installed in the center position and is secured using the five threaded screw holes marked B 4 The 2nd Expansion KSU is installed in the upper position and is secured using the five threaded screw holes marked C Figure 4 22 Location for Rack Mounting the KSUs Basic KSU 1...

Page 129: ...ided screws to attach the floor mount bracket to the floor 2 Slide the KSU over the four hooks protruding from the floor mount bracket as shown in Figure 4 23 Floor Mounting the Basic KSU 3 To secure the KSU to the floor mounting bracket install the two screws as indicated in Figure 4 24 Securing the KSU to the Floor Mounting Bracket Figure 4 23 Floor Mounting the Basic KSU ...

Page 130: ... the KSU 1 Use the DC Expansion Cable included with the EXP U ETU to connect the BATTERY EXT on the Basic KSU to the BATTERY EXT of the Expansion KSU Figure 4 24 Securing the KSU to the Floor Mounting Bracket Figure 4 25 Connecting DC Expansion Cables Tie Wrap Expansion Cable FG Terminal Power Cable Power Cable ...

Page 131: ...other FG plate is required 3 10 2 Grounding Requirements The KSUs must be properly grounded The Electra Elite KSUs are provided with a typical AC third wire ground If this ground is questionable an alternative ground must be provided 1 Connect the grounding cable green wire to the ground terminal on the right side of the Basic KSU The locally provided grounding cable AWG must be greater than 16 Fi...

Page 132: ...table ground inside of a building in accordance with local telephone company procedures 3 When no suitable ground is available a ground rod should be installed in accordance with the operating procedures of the local telephone company Figure 4 27 KSU Grounding ...

Page 133: ...ry backup interface and accepts 117 Vac and outputs 5V and 24V to the system 3 11 1 Connecting the Power Supply Unit to the Basic KSU 1 Connect the 8 wire cable from the PSU to the connector on the backboard of the KSU Figure 4 28 Connecting Wires to the PSU Before replacing the PSU remove the defective PSU and verify that the power cord on the replacement PSU is unplugged Cable Connections ...

Page 134: ...the KSU using the two provided screws 3 Lead the KSU power cable through the clamp and connect the PSU as shown in Figure 4 30 Connecting the PSU Power Cable to the Basic KSU Figure 4 29 Mounting the PSU onto the KSU Figure 4 30 Connecting the PSU Power Cable to the Basic KSU Clamp FG Terminal Clamp Power Cable Clamp ...

Page 135: ...rough the clamps and tie them to the KSU with a tie wrap on the expansion KSU 2 When using two expansion KSUs connect the PSU of each expansion KSU with the Battery expansion cables lead the cables through the clamps and tie them with a tie wrap Figure 4 31 Connecting Battery Expansion Cables to the Expansion KSU Frame Ground Terminal DC Expansion Cable Tie Wrap DC Expansion Cable ...

Page 136: ...to Figure 4 4 Removing the Front Panel of the KSU 2 Pull out the drawer that holds the PSU and disconnect the cable as shown in Figure 4 32 Removing the PSU from the KSU Figure 4 32 Removing the PSU from the KSU For continued protection against risk of fire replace fuses with the same type and rating originally installed Cable Connections ...

Page 137: ...t In and External Batteries in the KSU 3 12 1 Built In Battery Installation 1 Connect the two batteries in series as shown in Figure 4 34 Connecting Built In Batteries The red cord attaches to the red terminal and the black cord attaches to the black terminal Figure 4 33 PSU Fuse Replacement Figure 4 34 Connecting Built In Batteries F101 DC In F1 AC In Be careful and properly connect the terminals...

Page 138: ...ries into the KSU 3 Install the battery cover as illustrated in Figure 4 35 Placing the Batteries into the KSU 4 Connect the cable to the BATTERY INT connector of the PSU as shown in Figure 4 36 Connecting the Batteries to the Power Supply Unit Figure 4 35 Placing the Batteries into the KSU Figure 4 36 Connecting the Batteries to the Power Supply Unit ...

Page 139: ...re 4 37 Connecting Cables for External Batteries in the Basic KSU Figure 4 37 Connecting Cables for External Batteries in the Basic KSU When installing external batteries disconnect the battery cable for the built in batteries from the BATTERY EXT connector of each KSU When the built in batteries are connected with the external batteries a large charging current could flow from the external batter...

Page 140: ...xternal Battery to the Basic KSU Connect the external battery cable to the EXT connector on the PSU of the Basic KSU Bundle any extra cabling together 3 Route the cables through the clamps on the KSU as shown in Figure 4 39 Threading the Cables through the Clamps on the Basic KSU Figure 4 38 Connecting the External Battery to the Basic KSU ...

Page 141: ...on the Basic KSU remove the knockout indicated by the arrow with nippers Refer to Figure 4 40 Removing the Knockout on the Cover of the Basic KSU Figure 4 39 Threading the Cables through the Clamps on the Basic KSU Figure 4 40 Removing the Knockout on the Cover of the Basic KSU ...

Page 142: ...must also be made to the Basic KSU are noted in the following instructions Although a 3 cabinet drawing is not provided the third KSU draws its external battery power by connecting a cable to the EXT connection of the second KSU This provides a daisy chain connection between all three KSUs 1 Connect cabling provided by NEC to the external batteries as shown in Figure 4 37 Connecting Cables for Ext...

Page 143: ...onnector on the PSU of the Basic KSU and the Expansion KSU as shown in Figure 4 42 External Battery Cable Installation Bundle any extra cabling together Figure 4 42 External Battery Cable Installation Connecting this cable to PSU EXT connector solves voltage drop problems To EXT To EXT To EXT To EXT ...

Page 144: ...the Basic KSU to the EXT connector on the PSU of the Basic KSU Route the cables through the clamps on the Basic and Expansion KSUs as shown in Figure 4 43 Threading the Cables through the Clamps on the Basic and Expansion KSUs Figure 4 43 Threading the Cables through the Clamps on the Basic and Expansion KSUs ...

Page 145: ...nd Expansion KSUs remove the knockouts indicated by the arrows with nippers On the Basic KSU knockouts must be removed from the top and the bottom of the KSU cover On the Expansion KSU only the bottom knockout is removed Refer to Figure 4 44 Removing the Knockouts on the Covers of Basic and Expansion KSUs Figure 4 44 Removing the Knockouts on the Covers of Basic and Expansion KSUs Expansion KSU Ba...

Page 146: ...y cables through the knockouts on the Basic and Expansion KSUs and secure the front covers on the KSUs Refer to Figure 4 45 Leading the Battery Cables out of the Basic and Expansion KSUs Figure 4 45 Leading the Battery Cables out of the Basic and Expansion KSUs ...

Page 147: ...led in this slot in the Expansion KSU ISA Slot This slot the second slot in the KSU is reserved for the MIFA U10 or MIFM U10 ETU Do not install a CPU or EXP ETU in this slot in the Expansion KSU Interface Slots S1 S8 In the B64 U10 KSU interface slots are physically located in slots 3 10 but are labeled S1 S8 on the KSU All other interface ETUs can be installed in any of these slots Slots S1 and S...

Page 148: ...the KSU When installed the component side of all ETUs must face the left side of the KSU Ejector tabs are always on top Refer to Figure 5 1 Inserting the ETU into the KSU When carrying an ETU keep it in a conductive polyethylene bag to prevent damage due to static electricity When handling an ETU the installer must wear a grounded wrist strap to protect the ETU from static electricity Figure 5 1 I...

Page 149: ...U When holding an ETU do not touch the components or the soldered surfaces with your bare hands Place one hand under the bottom corner of the ETU and with the other hand hold the ejector tab located in the top corner of the ETU Figure 5 2 Inserting or Removing ETUs from the KSU Figure 5 3 Handling an ETU Frame Ground Terminal ETU KSU Wrist Strap Ejector Tab ...

Page 150: ... a grounded conductive work surface to avoid static electricity Do not touch the surface of the ETU A small screw driver can be used to change the switch settings when the installer follows the recommended safety precautions Figure 5 4 Safety Precautions when Setting Switches on an ETU Wrist Strap ETU Grounded Conductive Surface ...

Page 151: ...he KSU Slots 1 To unlock the ETUs slots move the slide bar to the left 2 Slide the ETU into the proper slot in the KSU 3 After the ETU is pushed all the way to the back of the KSU move the slide bar to the right to lock the ETU slots Figure 5 5 Sliding the ETU into the KSU Slot ...

Page 152: ... Units 2 3 Removing an ETU from the KSU 1 To unlock the ETUs move the slide bar to the left 2 Lift the ejector tab on the ETU and pull the ETU out of the slot 3 To secure remaining ETUs move slide bar to the right Figure 5 6 Lifting the EjectorTabs on the ETU ...

Page 153: ... bit microprocessor executes the programs stored on the Flash ROM ICs of the MPU unit This controls the entire system when data is transferred to and from other ETUs This ETU provides the following items Time Division Switch TDSW Static Random Access Memory SRAM 32 bit Processor 4 channel DTMF Receiver PBR Sixteen 4 party Conference Circuits Internal digital music Music on Hold source External Mus...

Page 154: ... Units 3 1 2 Installation Each system must have this ETU in the CPU EXP slot of the basic B64 U10 KSU Each system has one CPUB U10 ETU Refer to Figure 5 7 CPUB U10 ETU Figure 5 7 CPUB U10 ETU If the CPUB U10 ETU is installed in slots S1 S8 it will be damaged ...

Page 155: ...rt Off On Factory Test On On Flash ROM load from EPROM SW1 3 Description Off MF Mode On KF Mode SW2 Description Momentary Switch System Reset SW3 1 Description On System boot by EPROM Off System boot by Flash ROM SW3 2 Description N A Not Used Pressing SW2 interrupts all service and causes a second initialization This switch should not be used in an Pressing SW2 interrupts all service and causes a...

Page 156: ...ckup fails for any reason When CPUB U10 ETU is removed for long term storage disconnect the battery from CN4 This prevents the battery from discharging completely The fully charged battery retains memory for approximately 21 days The CPUB U10 ETU has the following connectors CN1 Connects to the backboard CN2 Connects to the ISA bus CN3 Connects to CN2 on the EXP U10 ETU via the expansion cable CN4...

Page 157: ...0 ETU 3 Turn off the KSU power 4 Remove the CPUB U10 ETU from the slot in the KSU 5 Using a suitable cutting tool cut the tie wrap and remove the old the battery 6 Fasten the new battery with a tie wrap 7 Install the CPUB U10 ETU again 8 Turn on the KSU power 3 2 CLKG U10 Unit 3 2 1 Description The CLKG U10 Unit provides clock synchronization for FT1 lines ISDN BRI lines ISDN PRI and Wireless line...

Page 158: ...ed 3 2 3 Connectors The CLKG U10 Unit has two connectors CN1 Connects to CN5 on the CPUB U10 ETU CN2 Connects to CN6 on the CPUB U10 ETU 3 2 4 Switch Settings Leave SW1 set to ISDN PHS when ISDN T1 or ISDN T1 and Wireless trunks are installed When only Wireless trunks are installed set SW1 to PHS Figure 5 8 CLKG U10 Unit ...

Page 159: ...U10 ETU is the Expansion KSU Controller This ETU controls transmission between the CPUB U10 ETU and the other ETUs installed in the expansion KSU if it is installed 3 3 2 Installation Turn system power off and install the EXP U10 ETU in the CPU slot of the expansion KSU Figure 5 9 EXP U10 ETU ...

Page 160: ... 3 4 KMA 1 0 U 3 4 1 Description The KMA 1 0 U is a feature module that is installed on the MIFA U10 ETU to provide ACD with MIS 3 4 2 Installation Like all ICs this unit has a notch on one side Find the notch on the IC6 silkscreen and align the KMA 1 0 U so the notches are on the same side before installing 3 5 KMM 1 0 U 3 5 1 Description The KMM 1 0 U is a feature module that is installed on the...

Page 161: ...th this ETU but the ACD with MIS requires a KMA 1 0 U to be installed on the MIFA U10 ETU 3 6 2 Installation Only one MIFA U10 can be installed in the system When ACD MIS is used the MIFA U10 must be installed in the ISA slot and have the KMA 1 0 U installed on it The MIFA U10 ETU can be installed in the first or second IF slot of the basic B 64 KSU if KMA 1 0 U is not installed Figure 5 10 MIFA U...

Page 162: ...power on Off No Power LED1 indications are listed below Steady Red Problem while loading Flash ROM from EPROM when using this mode Steady Red PC Programming or LCR Programming is connected Flashing Red Loading Flash ROM from EPROM Table 5 2 MIFA U10 Default Switch Settings SW2 1 SW2 2 Description Off Off Normal Operation On Off Factory Test Off On Not Used On On Flash ROM load from EPROM SW1 Descr...

Page 163: ...d CN2 Connects to the Backboard CN3 Used to connect the ETU backup battery during installation and disconnect the battery when storing the ETU IC6 Socket for the optional KMA 1 0 U The ACD MIS cable connects at the COM4 a standard female RS 232C DCE port on the KSU that contains the MIFA U10 ETU A straight RS 232C cable is required ...

Page 164: ...r ID scrolling and dialing require the KMM 1 0 U to be installed on the MIFM U10 ETU When the MIFM U10 ETU is installed in an IF slot as opposed to the ISA slot the Modem Kit Unit can be mounted on the MIFM U10 ETU This method is desirable because the Modem Kit Unit does not require external cabling analog ports The MIFM U10 can be installed in the ISA slot or the first or second IF slot in the ba...

Page 165: ...dications are listed below Steady Red Problem while loading Flash ROM from EPROM when using this mode Steady Red PC Programming or LCR Programming is connected Flashing Red Loading Flash ROM from EPROM Table 5 3 MIFM U10 Default Switch Settings SW2 1 SW2 2 Description Off Off Normal Operation On Off Factory Test Off On Not Used On On FROM Flash ROM load from EPROM Erasable Programmable Read Only M...

Page 166: ...LCR Wireless Programming COM2 SMDR Both COM ports are standard female RS 232C DCE ports A straight cable is required When an external modem is used connect the modem to COM1 port via the modem cable adapter A straight RS 232C cable is required 3 8 Modem Kit Unit 3 8 1 Description This optional modem mounts on the MIFM U10 ETU or PCT S U10 Unit and does not require analog port connection The MIFM U...

Page 167: ...ace ETU terminates ISDN Basic Rate Trunk lines and supports four ISDN BRI circuits Each trunk supports two B channels These eight B channels can be used for CO trunks with DTMF signaling Tip and Ring electrical fuses are provided to comply with UL 1459 requirements This ETU uses an S T type interface When connecting to a CO a locally provided Network Termination unit NT1 is required Caller ID is s...

Page 168: ... on the 100Ω terminal CN201 and CN202 Set the 100Ω termination to On or Off for Channel 2 Jumper Pins 1 and 2 are shorted together at the factory to turn on the 100Ω terminal CN301 and CN302 Set the 100Ω termination to On or Off for Channel 3 Jumper Pins 1 and 2 are shorted together at the factory to turn on the 100Ω terminal CN401 and CN402 Set the 100Ω termination to On or Off for Channel 4 Jump...

Page 169: ...nel 1 LED7 Steady Red when B1 or B2 is busy in Channel 2 LED8 Steady Red when B1 or B2 is busy in Channel 3 LED9 Steady Red when B1 or B2 is busy in Channel 4 LED10 Steady Red when a communication error occurs or during self diagnostics This LED is normally off LED11 System Communication Indication Steady Red when a communication error occurs or during self diagnostics This LED is normally off 4 1...

Page 170: ...ctions Figure 5 13 BRT 4 U10 ETU Connections Network and CO TELCO U Interface 2 Wire NT1 NT1 ST 4 Wire ST 4 Wire MDF for BRI Card Channel 1 Channel 2 TA 1 TB 1 RA 1 RB 1 TA 2 TB 2 RA 2 RB 2 NT1 NT1 ST 4 Wire ST 4 Wire TA 3 TB 3 RA 3 RB 3 TA 4 TB 4 RA 4 RB 4 Channel 3 Channel 4 ...

Page 171: ...trol functions This ETU can provide a CAMA trunk for Enhanced E911 The COI 8 U10 ETU provides identical circuits to serve up to eight CO trunks that can be any combination of Loop Start or Ground Start with DTMF signaling The COI 4 U10 is for Loop Start trunks with DTMF signaling only ETU Tip and Ring electrical fuses are provided to comply with UL 1459 requirements Refer to Figure 5 14 COI 8 U10 ...

Page 172: ...g Red Normal Operation Steady Red Operation Stopped power On Off No Power LEDs 1 8 or 1 4 indications are listed below Steady Red Lines 1 8 busy Off Lines 1 8 idle 4 2 5 Connectors The COI U10 ETU has one connector CN1 Connects to the backboard Table 5 4 COI 4 8 U10 ETU Default Switch Settings Switch Setting Description SW1 8 Set according to the line type Default Setting LP Switches between Loop ...

Page 173: ...6 Connections Figure 5 15 COI 4 8 U10 ETU Connections MDF T 1 R 1 T 2 R 2 T 3 R 3 T 4 R 4 T 5 R 5 T 6 R 6 T 7 R 7 T 8 R 8 T R T R T R T R T R T R T R T R CO Demark COI 4 U10 Card COI 8 U10 Card T 1 R 1 T 2 R 2 T 3 R 3 T 4 R 4 T R T R T R T R MDF Demark CO ...

Page 174: ... for COI mode Loop Start or Ground Start is supported Caller ID is not supported in the COI mode Connections for Ground Start Trunks are polarity sensitive This ETU contains circuitry for outside ring detection holding dialing and control functions It can also provide a CAMA trunk for E911 When functioning as a COI 4 U10 or COID 4 U10 ETU only DTMF signaling is supported Tip and Ring electrical fu...

Page 175: ...ations are listed below Blinking Red Normal Operation Steady Red Operation Stopped power On Off No Power LEDs 1 4 indications are listed below Steady Red Channel busy Off Channel idle FAX LED Steady Red FAX busy Off FAX Idle Switch SW400 must be set to Loop Start LP for FAX CO Branch function to work Table 5 5 COIB 4 U10 ETU Default Switch Settings Switch Setting Description SW100 400 Set for line...

Page 176: ...one Units 4 3 5 Connectors The COIB 4 U10 ETU has the following connectors CN1 Connects to the backboard CN2 Future CN3 Future 4 3 6 Connections Figure 5 17 COIB 4 U10 Connections COIB 4 U10 ETU CO MDF T 1 R 1 T 2 R 2 T 3 R 3 T 4 R 4 T R T R T R T R Demark ...

Page 177: ...ion This ETU provides circuitry for outside ring detection hold dialing Caller ID detection and control functions This ETU can provide a CAMA trunk for Enhanced 911 The COID 4 8 U10 ETU provides four eight trunks that are Loop Start with DTMF signaling only Tip and Ring electrical fuses are provided to comply with UL 1459 requirements Figure 5 18 COID 8 U10 ETU ...

Page 178: ... Blinking Red Normal Operation Steady Red Operation Stopped power On Off No Power LED 1 8 or 1 4 indications are listed below Steady Red Lines 1 8 busy Off Lines 1 8 idle 4 4 5 Connectors The COID U10 has one connector CN1 Connects to the backboard 4 4 6 Connections Figure 5 19 COID 4 8 U10 ETU Connections MDF T 1 R 1 T 2 R 2 T 3 R 3 T 4 R 4 T 5 R 5 T 6 R 6 T 7 R 7 T 8 R 8 T R T R T R T R T R T R ...

Page 179: ...nes and 2 way DID lines This ETU provides a maximum of four DID lines Wink start delay start immediate start and second Dial Tone are accommodated with this ETU Dial Pulse and DTMF are also supported There are four built in DTMF signal detectors Tip and Ring electrical fuses are provided to comply with UL 1459 requirements Figure 5 20 DID 4 U10 ETU ...

Page 180: ...ive LED indications are listed below Blinking Red Normal Operation Steady Red Operation Stopped power On Off No Power LED 1 4 indications are listed below Steady Red Line busy Off Line idle 4 5 4 Connectors The DID 4 U10 ETU has one connector CN1 Connects to the backboard 4 5 5 Connections Figure 5 21 DID 4 U10 ETU Connections MDF T 1 R 1 T 2 R 2 T 3 R 3 T 4 R 4 T R T R T R T R CO Demark ...

Page 181: ...24 DS 0 channels trunks and supports Automatic Number indication ANI on T1 A combination of Loop Start and Ground Start signaling can be used on the DTI U10 20 ETU DTMF Dial Pulse dialing Tie line E M and DID are supported The DTI U10 20 ETU has 24 built in DTMF detectors Tip and Ring electrical fuses are provided to comply with UL 1459 requirements Figure 5 22 DTI U10 20 ETU ...

Page 182: ...tings Refer to Table 5 6 DTI U10 20 ETU Default Switch Settings Table 5 6 DTI U10 20 ETU Default Switch Settings Switch Setting Description SW1 1 On Indicates alarm or loopback status of the channel Off Indicates channel is busy or idle Default Off Used to assign LED Indications SW1 2 On Loopback on Off Loopback off Default Off Switches Loopback on and off SW1 3 On DTE Loopback enabled Software Lo...

Page 183: ...owing For a description of the alarms refer to 4 6 5 Alarm Conditions LED 1 LSA Alarm LED 2 AIS Alarm LED 3 OOF Alarm LED 4 RAI Alarm LED 5 CRC Alarm LED 6 BPV Alarm LED 7 SLIP Alarm LED 8 N A LED 9 TSC Alarm LED 10 ESA Alarm LED 11 LOS Alarm LEDs 12 16 N A LED 17 Line Loopback On LED 18 DTE Loopback On LEDs 19 24 N A 4 6 5 Alarm Conditions A brief description of each alarm is given below Alarm In...

Page 184: ...Violation BPV Detection When excessive BPV is detected the LED lights red Line Synchronization Alarm LSA Detection When an FT1 trunk loses frame synchronization the LED lights red Out of Frame OOF Condition Detection When two of the four or five framing data bits received are in error the LED lights red Remote Alarm Indication RAI Detection When RAl is received the LED lights red 4 6 6 Connectors ...

Page 185: ...IP Gateway IPT 4 8 U10 ETU is an optional interface for the Electra Elite KSU that can combine various trunk and Tie line calls into Gateway trunks This ETU can be assigned as a 2 port TLI 2 U10 4 port DID 4 U10 COI 4 U10 COID 4 U10 ETU or 8 port COI 8 COID 8 U10 ETU Figure 5 24 IPT 8 U10 ETU ...

Page 186: ...placed to PD this LED lights red The IPT ETU starts shutdown When shut down is complete this LED goes off along with all others to indicate that the ETU can be removed from the KSU CH8 1 Indicates the status of associated channel or trunk as in COID DID as follows Live Flashes red when ETU is receiving power from the KSU Table 5 7 IP Gateway Options Configuration Number of Ports IPT 4 IPT 8 Instal...

Page 187: ...unit comes with two attached standoffs with an extra screw in the bottom 1 Remove the screw from the bottom of each standoff 2 Line up the IPE 4 U10 Unit standoffs with Holes 1 and 2 and connector J1 with IPT 4 U10 ETU connector J5 and press down until the IPE 4 U10 Unit is firmly attached to the IPT 4 U10 ETU 3 Install the two previously removed screws through holes 1 and 2 to Connect the standof...

Page 188: ...ch S1 must be in power down PD for ETU installation and placed in PU to activate the ETU After the ETU is activated S1 is placed in PD to power down the ETU for removal 4 7 7 Connections Figure 5 25 IPT 4 8 U10 ETU Connections VoIP Trunk Card Ethernet Gateway Trunk Card RJ 45 Connector ...

Page 189: ...ides for the termination of an ISDN PRI line for voice service only The PRT 1 U10 20 ETU supports AT T 4ESS Custom AT T 5ESS Lucent DMS 100 Custom or National ISDN and NI 2 protocols Call by Call and Universal call handling are also supported Tip and Ring electrical fuses are provided to comply with UL 1459 requirements Figure 5 26 PRT 1 U10 20 ETU ...

Page 190: ...eration A small flat screwdriver can be used to set positions as follows Position 0 Alarm Indications Position 1 B Channels 01 12 Status Indication using LEDs 1 12 Position 2 B Channels 13 23 Status Indication using LEDs 1 12 Positions 3 CO Trunks 01 12 assigned to PRT ETU Status Indication using LEDs 1 12 Positions 4 CO Trunks 13 23 assigned to PRT ETU Status Indication using LEDs 1 12 Positions ...

Page 191: ...atus LED 2 SLIP Controlled Slip Indication LED 3 RAI Remote Alarm Indication LED 4 LOF Loss of Frame LED 5 AIS Alarm Indication Signal LED 6 CRC Cyclic Redundancy Check Error LED 7 Call Active LEDs 8 12 Not Used SW2 Position 1 LED Channel Busy Indications are as follows LED 1 Channel 1 LED 2 Channel 2 LED 3 Channel 3 LED 4 Channel 4 LED 5 Channel 5 LED 6 Channel 6 LED 7 Channel 7 LED 8 Channel 8 L...

Page 192: ...s is given below Layer 1 Status LED Lights red when layer 1 is active The LED is off when layer 1 is inactive Controlled Slip indication SLIP When the difference between the timing of a synchronous receiving terminal and the received signal exceeds the buffering ability of the synchronous terminal the LED lights red Remote Alarm Indication RAI Detection When RAI is received the LED lights red Loss...

Page 193: ...ghts red Active Call LED Lights red to indicate an active call 4 8 6 Connectors The PRT 1 U10 20 ETU has two connectors CN1 Connects to the backboard CN3 9 pin RS 232C connector used for maintenance 4 8 7 Connections Figure 5 27PRT 1 U10 20 ETU Connector MDF TA TB RA RB ISDN PRI Provider CSU The CSU may not always be required ISDN PRI ...

Page 194: ...es 4 wire Type I or Type V 10 pps or 20 pps Dial Pulse or DTMF Immediate Start Delay Start Wink Start and second Dial Tone signaling are also provided The TLI 2 U10 ETU has two built in DTMF signal detectors 4 9 2 Installation A maximum of 16 TLI 2 U10 ETUs can be installed in Slots S1 S8 in any system KSU Figure 5 28 TLI 2 U10 ETU LED 3 LED 2 LED 1 TYPE V TYPE V TYPE I TYPE I SW101 SW201 CN1 ...

Page 195: ... idle 4 9 5 Connectors The TLI 2 U10 ETU has one connector CN1 Connects to the backboard Table 5 9 TLI 2 U10 ETU Default Switch Settings Switch Setting Description SW101 When lines provided by this unit are used for back to back connections set to TypeV When connection is to a Central Office set to Type I Default Type V Switch Type I or Type V for Line 1 SW201 When lines provided by this unit are ...

Page 196: ...Issue 6 Electra Elite 5 50 Installing Electronic Telephone Units 4 9 6 Connections Figure 5 29 TLI 2 U10 ETU Connections Side A Telco Side B MDF E M T R T R E M T R T R T R T R ...

Page 197: ... 1 1 Description The Multiline Conference Bridge allows any intercom user and any outside party calling to a port of the CNF 8 U10 ETU to make a multiparty conference call One 8 party conference or two 4 party conferences are supported and regulated by a switch setting 5 1 2 Installation Only two CNF 8 U10 ETUs can be installed in slots S1 S8 in any KSU Figure 5 30 CNF 8 U10 ETU ...

Page 198: ...ly used J3 Nine pin RS 232C connector for maintenance Table 5 10 CNF 8 U10 ETU Reset Switches Switch Setting Description SW2 Press to Reset Host Reset Switch Table 5 11 CNF 8 U10 ETU Maximum Conference Time Switch Switch Setting Max Conference Time CTS SW3 2 SW3 3 ON ON 1 Hour ON OFF 2 Hour OFF ON 3 Hour OFF OFF No Limit Table 5 12 CNF 8 U10 ETU Party Size Switch Switch Setting Description SW3 1 O...

Page 199: ...o required This ETU is a PC platform installed in the Electra Elite 48 system that contains hard disk space for voice recording storage and application software A digital signal processor voice processing section handles the following functions DTMF detection generation General tone detection FAX CNG tone detection PCM compression for audio recording playback Automatic gain control A serial port d...

Page 200: ...kplane of the KSU RJ 45 LAN connection RJ 11 Modem connection VGA connection for monitor support PS2 Keyboard and Mouse connections Hardware One CTI VP 4 8 12 16 U10 ETU Message Notification Uses Message waiting lamps Operator Console 100 default Positive connect Digital signal Telephone One of the following telephones is required to program Electra Elite System data DTP 8D 1 BK WH TEL DTU 8D 2 BK...

Page 201: ...mponents Refer to Table 5 14 System Board Components Figure 5 31 EliteMail CTI System Board Table 5 14 System Board Componen ts Item Description A Backplane connector B Switch SW2 Not used Keep indicated default settings C Switch SW1 Not used Keep indicated default settings ...

Page 202: ...4 are not used and should be left On N Power button It cuts the power to the board from the PC and the hard drive and should not be used O Voice messaging software LED Green when software is active Amber when active with possible application problem Red when inactive or shut down P Shutdown switch Default is On Place Off to shut down the software and system board properly before turning off the te...

Page 203: ...rd Components Refer to Table 5 15 Daughter Board Components Figure 5 32 EliteMail CTI Daughter Board Table 5 15 Daughter Board Components Item Description A F206 LED B CGA LED C Application LED D K VM Channel LEDs 1 8 respectively L M Fax Channel LEDs Channel 1 Channel 2 ...

Page 204: ...able 5 16 Port Expansion Board Components Figure 5 33 EliteMail CTI Port Expansion Board Table 5 16 Port Expansion Board Components Item Description A Backplane connector B MB LED Always on when board is installed C MB switch Do not use leave On D F206 LED E CGA Live LED F M VM Channels 9 16 respectively ...

Page 205: ...d when the hard drive is active Do not reset the ETU when the HD LED is flashing 5 2 3 Installation Precautions System ETUs use CMOS technology that is very susceptible to static electricity Always use the following precautions to Avoid Static Discharge Wear a grounding strap when you handle an ETU Ensure that the KSU is off and that all DIP switch changes are made before it is inserted in the KSU...

Page 206: ...phones and relays are paired together so that a station user talking into a doorphone controls only that Door Lock Release relay when the feature code is dialed The DPH 4 U10 has two audio paths to be shared by four doorphones Two simultaneous doorphone calls are allowed Doorphones 1 3 and 2 4 are paired together 5 3 2 Installation Only one DPH 4 U10 ETU can be installed in any S1 S8 slot in any s...

Page 207: ...w Blinking Red Normal Operation Steady Red Operation Stopped power On Off No Power LED 1 indication are listed below Steady Red A Circuit Is Busy Off All Circuits Are Idle Table 5 17 DPH 4 U10 Default Jumper Settings Jumper Setting Description S101 Shorted Remove short bar to increase DP1 and DP3 volume by 6 dB S201 Shorted Remove short bar to increase DP2 and DP4 volume by 6 dB S102 Shorted Remov...

Page 208: ...ectors CN1 Connects to the Backboard Relay Connections Provided at the MDF Doorphone Connections Provided at the MDF Connection 5 3 6 Specifications Relay contacts are 24 Vdc at 500 mA Figure 5 35 DPH 4 U10 ETU Doorphone Connections T R T R T R T R DPH 1 DPH 2 DPH 3 DPH 4 MDF Doorphone Doorphone Doorphone Doorphone ...

Page 209: ...ETU provides an 8 port interface for Multiline Terminals ElectraMail CTI Attendant Consoles Single Line Telephone Adapter SLT 1 U10 ADP and DBM B U10 Box 5 4 2 Switch Settings SW1 resets the ETU 5 4 3 Installation A maximum of 15 ESI 8 U10 ETUs can be installed in slots S1 S8 in any system KSU Figure 5 36 ESI 8 U10 ETU ...

Page 210: ...y Red Operation Stopped power On Off No Power LED1 indications are listed below Steady Red Some port s busy Off All ports idle 5 4 5 Connectors The ESI 8 U10 ETU has one connector CN1 Connects to the backboard 5 4 6 Connections Figure 5 37 ESI 8 U10 ETU Connection T1 R1 T2 R2 T3 R3 T4 R4 T5 R5 T6 R6 T7 R7 T8 R8 MDF RJ 11 Multiline Telephone YL O RD O BK O GR O ...

Page 211: ... recording playback Automatic gain control AGC A serial port direct connect speeds up to 19 2 Kbps This ETU provides 2 4 or 8 ports for digital voice mail Refer to Table 5 18 Configuration Support Table Table 5 18 Configuration Support Tab le Function Configuration Support Applications Automated Attendant Voice Mail with call forwarding release transfer Automated Attendant Voice Mail without call ...

Page 212: ...following telephones is required to program Electra Elite 192 System Data DTP 8D 1 DTU 8D 2 BK WH TEL DTP 16D 1 DTU 16D 2 BK WH TEL DTU 32D 1 DTU 32D 2 BK WH TEL ETW 16DC 1 2 BK SW TEL ETW 16DD 1 2 BK SW TEL ETW 24DS 1 2 BK SW TEL MDM F 20 Unit Used for remote connection Figure 5 38 FMS 2 4 U10 ETU Table 5 18 Configuration SupportTable Continued Function Configuration Support COM1 ...

Page 213: ...Electra Elite Issue 6 System Hardware Manual 5 67 Figure 5 39 FMS 8 U10 ETU ...

Page 214: ...to enable COM2 for remote RS 232 RJ 11 Off to allow COM1 local connection 4 Not Used Table 5 20 FMS DIP Switch Functions DIP 1 DIP 2 DIP 3 DIP 4 Description ON To enable HostKey and run Manufacturing Test NEC Production only ON ON To enable HostKey with floppy disk redirection and run Manufacturing Test NEC Production only ON To connect to CoSession using modem instead of direct cable connection O...

Page 215: ...MB switch The DOS BIOS LED is red if a BIOS error has occurred The Bicolor BCLR LED indicates application status as follows Red DOS started VM application not ready Green VM application is running Orange Error When BCLR LED is orange check error type on console screen After error is corrected LED automatically changes to green Do not connect link between console and ETU until BCLR turns green duri...

Page 216: ...32 COM1 Local Serial connector on main ETU for direct connection 5 5 6 Installation Precautions The ETUs used in this system make extensive use of CMOS technology that is very susceptible to static electricity Static discharge must be avoided when handling ETUs Always use the following precautions Wear a grounding strap anytime you handle the ETU Make all ETU DIP switch setting changes before inse...

Page 217: ...sistance including about 200Ω for the Single Line Telephone is acceptable between the OPX 2 U10 ETU and a Single Line Telephone This ETU also provides circuitry for loop status detection talk battery sending ringing signals from the RSG unit to the Single Line Telephones and dial pulse detection The PBR circuit in the CPUB U10 ETU or the PBR U10 ETU is required with Single Line Telephone Connectio...

Page 218: ...iring 5 6 3 LED Indications Live LED indications are listed below Blinking Red Normal Operation Steady Red Operation Stopped power On Off No Power LED1 indications are listed below Steady Red Some port s busy Off All ports idle 5 6 4 Connectors The OPX 2 U10 ETU has one connector CN1 Connects to the backboard 5 6 5 Connections Figure 5 41 OPX 2 U10 CN1 Connection T1 R1 T2 R2 Single Line Telephone ...

Page 219: ...uilt in ringing generator RSG and supports Single Line Telephones or analog Voice Mail ports This ETU also provides circuitry for loop status detection talk battery sending ringing signals message waiting and loop disconnect for dial pulse signal detection The PBR circuit in the CPUB U10 ETU or the PBR U10 ETU is required with Voice Mail or DTMF Single Line Telephones Figure 5 42 SLI 8 U10 ETU ...

Page 220: ...teady Red Operation Stopped power On Off No Power BUSY indications are listed below Steady Red Some port s busy Off All ports idle 5 7 4 Connectors The SLI 4 8 U10 ETU has one connector CN1 Connects to the backboard 5 7 5 Connections Figure 5 43 SLI 4 8 U10 ETU Connections T1 R1 T2 R2 T3 R3 T4 R4 T5 R5 T6 R6 T7 R7 T8 R8 Single Line Telephone MDF RJ 11 SLI 8 U10 Card T1 R1 T2 R2 T3 R3 T4 R4 MDF RJ ...

Page 221: ...alling a VDD U Unit on a Multiline Terminal in Chapter 7 Installing Optional Equipment 5 8 2 Specifications Refer to Table 5 21 VDH2 8 U10 ETU Specifications Table 5 21 VDH2 8 U10 ETU Specifications Description Specifications General Specifications Access Method CSMA CD Method IEEE 802 3 Transmission Speed 10 Mbps Transmission Interface 10Base 2 1 port 10Base T Dterm Interface 8 ports Transmission...

Page 222: ...his case be sure to set SW2 on the VDH2 8 U10 to If SW2 is set to X then Port 8 is used as a regular coreline connection Refer to Figure 5 45 10Base T Cable Connections The VDH2 8 U10 ETU can be used with 10Base 2 and 10Base T cables VDH2 8 U10 ETU HUBs can be cascaded using 10Base2 cables The 10Base2 connector can also be used to connect the VDH2 8 U10 ETU to a LAN backbone Refer to Figure 5 46 V...

Page 223: ...Electra Elite Issue 6 System Hardware Manual 5 77 Figure 5 44 VDH2 8 U10 ETU Jumpers Figure 5 45 10Base T Cable Connections ...

Page 224: ...Issue 6 Electra Elite 5 78 Installing Electronic Telephone Units Figure 5 46 VDH2 8 U10 ETU Figure 5 47 VDH2 8 U10 ETU Connections BNC Connector Jacks 1 8 Terminating Plug ...

Page 225: ...lation instructions provided by the cable manufacturer Also consider these precautions Limit the under carpet cable length to 65 feet When using multiple pair cabling to connect the VDH2 8 U10 units to the multiline terminal do not include analog lines in the same cable When connecting a VDH2 8 U10 ETU use the FCE U10 Unit for proper wiring Lead the cable connected to the ETUs out through the clam...

Page 226: ...Base T Cable Connections shows cable connections to the LAN using 10Base T cabling Use an EIA TIA category 3 or higher unshielded twisted pair cable Do not use 10Base T cable for overhead wiring or for outdoor wiring Figure 5 48 Front Cover Extender for VDH2 8 U10 ETUs FC Extender ...

Page 227: ...s Port Jumper Setting 1 JP1 JP2 Both 1 and 2 LAN connection only Both 2 and 3 LAN station integration default 2 JP3 JP4 Both 1 and 2 LAN connection only Both 2 and 3 LAN station integration default 3 JP5 JP6 Both 1 and 2 LAN connection only Both 2 and 3 LAN station integration default 4 JP7 JP8 Both 1 and 2 LAN connection only Both 2 and 3 LAN station integration default 5 JP9 JP10 Both 1 and 2 LA...

Page 228: ...s are listed below Blinking Red Normal Operation Steady Red Operation Stopped power On Off No Power LEDs 1 8 indication are listed below Steady Green LAN connections on channels 1 8 are established Steady Orange LAN terminals 1 8 transmitting data Off LAN terminals 1 8 not active LED 9 indications are listed below Steady Red 10Base 2 sending data Off 10Base 2 not active Figure 5 49 VDH2 8 U10 LED ...

Page 229: ...CN3 Connects 10Base 2 cascade cables from another HUB or mainframe LAN When SW2 is set to X the following table indicates the pin assignments for the RJ 45 pins for CN2 CH8 In the tables below TD indicates Transmit Data and RD indicates Receive Data When SW2 is set to the following table indicates the pin assignments for the RJ 45 pins for CN2 CH8 Cables that connect a terminal to a HUB are straig...

Page 230: ...ing functions DTMF detection DTMF generation General tone detection FAX CNG tone detection PCM compression for audio recording playback Automatic gain control AGC A serial port direct connect speeds up to 19 2 Kbps to connect external modem This ETU provides 2 4 or 8 ports for digital voice mail The 2 and 4 port require the included digital signal processor DSP the 8 port configuration requires a ...

Page 231: ... answer transfer Voice Mail only No transfer Call Forwarding Supported Connections Connects to backplane connector of the KSU Hardware One VMS 2 4 8 U10 ETU Message Notification Through message waiting lamps Operator Console 100 default Positive disconnect Digital Signal Telephone One of the following telephones is required to program Electra Elite System data DTP 8D 1 BK WH TEL DTU 8D 2 BK WH TEL...

Page 232: ...U 8 port VMS 8 U10 ETU shown with 4 port auxiliary DSP installed For VMS 2 4 U10 ETU the auxiliary is not required Modem Port RJ 11 COM 1 Local Connection DIP Switch Up Off Down On 9 pin RS 232 Make Busy Switch COM 2 Ports Option Kit required for remote maintenance is purchased separately ...

Page 233: ... remote RS 232 RJ 11 Off to allow COM1 local connection 4 Not Used Table 5 26 VMS DIP Switch Functions DIP 1 DIP 2 DIP 3 DIP 4 Description ON To enable HostKey and run Manufacturing Test NEC Production only ON ON To enable HostKey with floppy disk redirection and run Manufacturing Test NEC Production only ON To connect to CoSession using modem instead of direct cable connection ON To start BRU Hos...

Page 234: ...s receiving power The MB LED indicates the status of the MB switch The DOS BIOS LED is red when a BIOS error has occurred The Bicolor BCLR LED indicates application status as follows Red DOS started VM application not ready Green VM application is running Orange Error When BCLR LED is orange check error type on console screen After error is corrected LED automatically changes to green Do Not conne...

Page 235: ...e MDM F 20 Unit 9 pin RS 232 COM1 Local Serial connector on main ETU for direct connection 5 9 6 Installation Precautions The ETUs used in this system make extensive use of CMOS technology that is very susceptible to static electricity Static discharge must be avoided when handling ETUs Always use the following precautions Wear a grounding strap anytime you handle the ETU Make all ETU DIP switch s...

Page 236: ...for an Electra Elite system 6 1 ACD 8 U10 ETU 6 1 1 Description The ACD 8 U10 ETU interfaces the Elite ACD Plus Server to the Electra Elite KSU Elite ACD Plus provides Windows based software programs to enhance the ACD features of the Electra Elite Key Telephone System 6 1 2 Installation Only one ACD 8 can be installed in slot S1 S8 in any system KSU Figure 5 52 ACD 8 U10 ETU COM 1 ...

Page 237: ... running The hard disk drive HD LED flashes red when HDD is active Do not reset the ETU while the HD LED is flashing 6 1 4 Connectors The ACD 8 U10 ETU has two connectors J9 Connects to the backboard 9 pin RS 232 COM1 Local Serial connector for direct connection 6 1 5 Installation Precautions The ETUs make extensive use of CMOS technology that is very susceptible to static electricity Static disch...

Page 238: ...ription The BSU 2 U10 ETU provides the connection for Zone Transceivers 6 2 2 Installation Up to eight ETUs can be installed in slots S1 S8 in any system KSU 6 2 3 Switch Settings The default switch settings are shown in Table 5 27 BSU 2 U10 ETU Default Switch Settings Figure 5 53 BSU 2 U10 ETU ...

Page 239: ... S W Slave SW2 2 Description Off Boot by Flash memory Default On Boot from E Prom IC30 SW2 3 Description Off Normal Operation Default On Test Mode SW2 4 Description Off Watch Dog Timer On Default On Watch Dog Timer Off Pressing SW2 interrupts all service and causes a second initialization This switch should not be used in an Pressing SW1 interrupts all Wireless users connected to the BSU 2 U10 ETU...

Page 240: ...yer 1 Up Layer 2 Down Layer 1 Down Layer 2 Down 2 Link Status for ZT2 Layer 1 Up Layer 2 Up Layer 1 Up Layer 2 Down Layer 1 Down Layer 2 Down 3 Not used Always Off 4 5 Status for ZT1 Refer to Table 5 29 ZT Status Table for LEDs 5 and 6 6 Status for ZT2 7 Not used Always Off 8 9 BSU Status Alarm Normal Operation Not Operating 10 LIVE Operation stopped Power still on Normal Operation No Power ...

Page 241: ... Lamp On indications are shown below No Flicker ZT is in standby Lamp Time 0 2s On Off Flash cycle is 0 1 seconds Not Supported On Off Lamp Time 0 2s Flash cycle is 0 2 seconds Remaining indications depend on the number of PS connections 1 PS connection On Off Time 0 2s Lamp 2 PS connections Lamp Time 0 2s Lamp 3 PS Connections ZT is busy On Off ...

Page 242: ...rs The BSU 2 U10 ETU has two connectors CN1 Connects to the backboard CN2 For future use 6 2 6 ZT II Connections Figure 5 54 BSU 2 U10 ETU Connections ZT RJ 45 MDF RJ 45 T1 R1 T2 R2 T3 R3 T4 R4 T5 R5 T6 R6 T7 R7 T8 R8 RJ 45 RJ 45 1 2 3 4 5 6 7 8 ZT 1 2 3 4 5 6 7 8 1 2 3 4 5 6 7 8 ...

Page 243: ...here are two audio jacks One provides the both way audio for paging system The other provides a tone output for ExternalTone Ringing and Night Chime 6 3 2 Installation Only one ECR U10 can be installed in slots S1 S8 in the basic KSU 6 3 3 LED Indications Live LED indications are listed below Blinking Red Normal Operation Steady Red Operation Stopped power On Off No Power Busy LED indications are ...

Page 244: ... Block Diagram External BGM Source External Amplifier CN 2 Connector SPKR OUT Pin 2 Pin 1 Pin 3 Pin 4 RCA Jack External Amplifier External Paging CN 2 Connector SPKR OUT Zone A Zone B Zone C Zone Paging Output from MDF RLY 1 RLY 2 RLY 3 CN 3 Maximum power capacity for RLYs 1 3 is 10 W ...

Page 245: ...CN2 Contacts for Relays CN3 Both way Audio Connection for External Paging CN4 Audio output for Tone Ringer and Night Chime Refer to Table 4 1 MDF Cable Connections for all other ECR U10 cable connections Table 5 30 Connector Descriptions CN2 Pin Number Description 13 16 Not Used 12 General Purpose Relay 1 11 10 General Purpose Relay 0 9 5 8 Not Used 4 Zone Paging Audio Input 3 2 External Paging BG...

Page 246: ...tronic Telephone Units 6 3 5 Specifications Relays All relays are rated 24 Vdc at 500 mA External Tone Output Power 10 dBm Ringer Night Chime Output Impedance 600Ω External Paging Output power 10 dBm Output Impedance 600Ω Figure 5 56 ECR U10 ETU ...

Page 247: ...U detects and translates DTMF tones generated by Single Line Telephones modems or facsimile machines This ETU is required if the four built in CPUB U10 ETU PBR channels are not enough to support all the PBR requirements of the system or the CPUB U10 ETU PBRs are dedicated to the VRS 4 U10 ETU Figure 5 57 PBR U10 ETU ...

Page 248: ...built in on the CPUB U10 for a maximum of eight PBR circuits 6 4 3 LED Indications Live LED indications are listed below Blinking Red Normal Operation Steady Red Operation Stopped power On Off No Power LED 1 indications are listed below On Some circuit s are receiving DTMF signaling Off All PBR s are idle 6 4 4 Connectors The PBR U10 ETU has one connector CN1 Connects to the backboard ...

Page 249: ...features The VRS 4 U10 ETU must use the built in PBR circuits on the CPUB U10 ETU for Automated Attendant or DISA Each VRS 4 U10 ETU has four record playback channels The maximum voice recording time for each channel is 240 seconds The technician can select one of four message lengths The available message lengths and the maximum number of messages that can be recorded are listed in the table belo...

Page 250: ...er of Recorded Messages 15 seconds 16 30 seconds 8 60 seconds 4 120 seconds 2 Table 5 31 VRS 4 U10 ETU Default Switch Setti ngs Switch Setting Description SW1 1 SW1 2 SW1 3 SW1 1 SW1 2 SW1 3 Record decibel adjustment Off Off Off 0 decibels default On Off Off 1 decibel Off On Off 2 decibels On On Off 3 decibels Off Off On 4 decibels On Off On 5 decibels Off On On 6 decibels On On On 7 decibels SW1 ...

Page 251: ...ons are listed below Steady Red Channels 1 4 are busy with replay record or detecting DTMF signals Off Channels 1 4 are idle 6 5 5 Connectors The VRS 4 U10 ETU has one connector CN1 Connects to the backboard 6 5 6 Pins Two pins SP1 and SP2 are located on the top right of the VRS ETU These short pins are for maintenance Do not change the factory default settings on these pins Pins 2 and 3 are short...

Page 252: ...Issue 6 Electra Elite 5 106 Installing Electronic Telephone Units THIS PAGE INTENTIONALLY LEFT BLANK ...

Page 253: ... chapter describes each terminal console and adapter and provides applicable installation instructions SECTION 2 MULTILINE TERMINALS 2 1 DTP 2DT 1 WH TEL This digital nondisplay Multiline Terminal is equipped with two programmable line keys each with a 2 color LED eight function keys a built in speakerphone headset connection and a large LED to indicate incoming calls and messages A maximum of 119...

Page 254: ...ndicate incoming calls and messages and compatibility with ADA U APA U APR U CTA U CTU C CTU S HFU U and VDD U Units The DTP 8 1 BK WH TEL is comparable and can also be used with the Electra Elite system A maximum of 119 DTU DTP 8 1 BK SW TELs can be installed in the Electra Elite 192 system The combined total of all Electra Elite Multiline Terminals that can be installed in an Electra Elite 192 s...

Page 255: ...A U APR U CTA U CTU C CTU S HFU U and VDD U Units This terminal is also equipped with a 3 line 24 character adjustable Liquid Crystal Display LCD The DTP 8D 1 BK WH TEL is comparable and can also be used with the Electra Elite system A maximum of 120 DTU 8D 2 DTP 8D 1 BK WH TELs can be installed in the Electra Elite 192 system The combined total of all Electra Elite Multiline Terminals that can be...

Page 256: ...incoming calls and messages and compatibility with ADA U APA U APR U CTA U CTU C CTU S HFU U and VDD U Units The DTP 16 1 BK WH TEL is comparable and can also be used with the Electra Elite system A maximum of 119 DTU DTP 16 1 BK WH TELs can be installed in an Electra Elite 192 system The combined total of all Electra Elite Multiline Terminals that can be installed in an Electra Elite 192 system i...

Page 257: ... APR U CTA U CTU C CTU S HFU U and VDD U Units The DTP 16D 1 BK WH TEL is comparable and can also be used with the Electra Elite system This terminal is also equipped with a 3 line 24 character adjustable Liquid Crystal Display LCD A maximum of 120 DTU 16D 2 DTP 16D 1 BK WH TELs can be installed in an Electra Elite 192 system The combined total of all Electra Elite Multiline Terminals that can be ...

Page 258: ...lity with ADA U APA U APR U CTA U CTU C CTU S HFU U and VDD U Units The DTP 32 1 BK WH TEL is comparable and can also be used with the Electra Elite system System software can be changed so this Multiline Terminal can have 24 programmable line keys and 8 one touch keys A maximum of 119 DTU DTP 32 1 BK WH TELs can be installed in an Electra Elite 192 system The combined total of all Electra Elite M...

Page 259: ...s terminal is also equipped with a 3 line 24 character adjustable Liquid Crystal Display LCD System software can be changed so this Multiline Terminal can have 24 programmable line keys and eight one touch keys The DTP 32D 1 BK WH TEL is comparable and can also be used with the Electra Elite system A maximum of 120 DTU 32D 2 DTP 32D 1 BK WH TELs can be installed in an Electra Elite 192 system The ...

Page 260: ...e 60 line keys can be programmed as Direct Station Selection keys function keys or as outside line keys An external power supply AC adapter is provided with the Attendant Console A maximum of four DCU 60 1 BK WH CONSOLEs can be installed in an any Electra Elite 48 192 system An Attendant Position can have four associated DCU 60 1 BK WH CONSOLEs Figure 6 8 DCU 60 1 BK WH CONSOLE ...

Page 261: ...ing volume control data jack and message waiting lamp Each terminal requires an SLT 1 U10 ADP or SLI 4 8 U10 ETU The H switch setting for the receive volume control should only be used by hearing impaired individuals otherwise hearing damage may occur This telephone complies with HAC Hearing Aid Compatible volume control defined by section 68 317 of the FCC Rules and Regulations 1996 edition Figur...

Page 262: ...essage waiting lamp and eight programmable Feature Access Speed Dial keys Each terminal requires an SLT 1 U10 ADP or SLI 4 8 U10 ETU The H switch setting for the receive volume control should only be used by hearing impaired individuals otherwise hearing damage may occur This telephone complies with HAC Hearing Aid Compatible volume control defined by section 68 317 of the FCC Rules and Regulation...

Page 263: ...f the Electra Elite Multiline Terminals 1 Plug the telephone cord into the modular jack on the bottom side of the Multiline Terminal The handset is also attached to the bottom side of the Multiline Terminal 2 Lead the telephone and handset cords through the appropriate grooves Figure 6 11 Connecting a Multiline Terminal to the System Figure 6 12 Leading Line Cords on a Multiline Terminal ...

Page 264: ...ining plate provided with the Attendant Console attach the plate to the Multiline Terminal and the Attendant Console 3 Connect the line cord and the AC adapter to the indicated locations on the bottom of the Attendant Console 4 When the Attendant Console and the Multiline Terminal are properly connected they sit side by side as shown in Figure 6 14 Attendant Console and Multiline Terminal Figure 6...

Page 265: ...heck that the supplied voltage matches that specified for the adapter and plug it in an outlet SECTION 6 ADJUSTING THE LCD The adjustable Liquid Crystal Display LCD comes equipped on the display Electra Elite Multiline Terminals The LCD can be adjusted by pushing down or pulling up as desired Figure 6 14 Attendant Console and Multiline Terminal Figure 6 15 Adjusting the LCD ...

Page 266: ...ards can be changed as necessary The Plastic Panel is placed on top of the Line Card to hold it in place 1 Place the Line Card over the keys on the Multiline Terminal 2 Place the tabs on the bottom of the plastic panel into the grooves at the terminal bottom and press top right and left ends to secure plastic panel to the Multiline Terminal Refer to Figure 6 16 Installing Line Card and Plastic Pan...

Page 267: ...ner raise the panel and slide the bottom away from the Multiline Terminal Figure 6 17 Installing Plastic Panel on a Multiline Terminal Figure 6 18 Removing the Plastic Panel from the Multiline Terminal Never pull on the bottom of the plastic panel to remove it the plastic panel could be damaged ...

Page 268: ...EMOVING SOFTKEYS If the softkeys on the MultilineTerminal are not used they can be removed using the following procedure 1 Remove the softkeys by pulling the softkey plate upward as shown in Figure 6 19 Removing Softkeys 2 Install the plastic panel again Figure 6 19 Removing Softkeys ...

Page 269: ...ow adjustment to raise or lower the terminal 1 Turn the Multiline Terminal upside down and locate the tabs as shown in Figure 6 20 Locating the Adjustment Tabs on the Multiline Terminal 2 Push the adjustment tabs and raise the base plate until it locks Figure 6 20 Locating the Adjustment Tabs on the Multiline Terminal Figure 6 21 Raising the Base Plate on the Multiline Terminal ...

Page 270: ...sted by pulling the line cord though the groove in the bottom of the Multiline Terminal 4 To lower the base plate on the Multiline Terminal push on the adjustment tabs and push the base plate downward Figure 6 22 Adjusting the Line Cord Length Figure 6 23 Lowering the Base Plate on the Multiline Terminal Tab ...

Page 271: ...Select a location to avoid excessive heat or humidity The base unit should be placed on a desk or tabletop near a standard 120 Vac outlet and within reach of the telephone line connection on the Electra Elite Multiline Terminal Keep the base unit and the handset away from sources of electrical noise e g fluorescent lighting Figure 6 24 Dterm Cordless Lite Terminal ...

Page 272: ... back of the Base Unit LINE IN and LINE OUT Never install telephone wiring during a lightning storm Never touch uninsulated telephone wires or terminals unless the telephone line has been disconnected at the network interface Use caution when installing or modifying telephone lines 1 Unplug the telephone line cord from the host telephone and connect it to the LINE IN jack Figure 6 25 Dterm Cordles...

Page 273: ...te the power cord where it does not create a trip hazard or where it could become chafed and create a fire or other electrical hazards The AC Adapter furnished with this phone can be equipped with a polarized line plug a plug having one blade wider than the other This plug fits into the power outlet only one way When you cannot insert the plug fully into the outlet reverse the plug When the plug s...

Page 274: ...Terminal Keep the base unit and the handset away from sources of electrical noise e g fluorescent lighting 11 2 Connecting the Telephone Cord The Base Unit of the DTP 16HC 1 BK Tel has two jacks on the back LINE and DC24V Never install telephone wiring during a lightning storm Never touch uninsulated telephone wires or terminals unless the telephone line has been disconnected at the network interf...

Page 275: ...C24V jack on the Base Unit to provide power for the Dterm Handset Cordless terminal 3 Plug the ACA U Unit into a standard 120 Vac wall outlet 4 The power level between the Handset and the Base is 10mW 5 When the ACA U Unit is used route the power cord where it does not create a trip hazard or where it could become chafed and create a fire or electrical hazard Figure 6 27 Dterm Handset Cordless Ter...

Page 276: ...Terminal Keep the base unit and the handset away from sources of electrical noise e g fluorescent lighting 12 2 Connecting the Telephone Cord The DTR 1R 1 Dterm Analog Cordless terminal is connected to an analog port on the KSU using one of the following SLI 4 8 U10 or OPX 2 U10 ETU SLT 1 U10 ADP or APR U Unit connected to the multiline terminal A TEL LINE jack is located on back of the base unit ...

Page 277: ... the DC IN 9V jack 2 Route the power cord where it does not create a trip hazard or where it could become chafed and create a fire or other electrical hazards 3 Plug the AC Adapter in a standard 120 Vac wall outlet The AC Adapter furnished with this phone should be equipped with a polarized line plug a plug having one blade wider than the other This plug fits into the power outlet only one way If ...

Page 278: ...line Terminals SECTION 13 Dterm PS II 13 1 Description This terminal has wireless communication with a Zone Transceiver ZT II that is directly connected to the system Refer to Figure 6 29 Dterm PS II Wireless Terminal Figure 6 29 Dterm PS II Wireless Terminal ...

Page 279: ...1 Hanger Hook 1 Remove the hook from the unit 2 Turn the hook over back to the front with the tab toward the top 3 Slide the hook on its glides back down into position forming the hanger hook for the handset Figure 6 30 Removing the Hook Figure 6 31 Turning the Hook Over Figure 6 32 Sliding the Hook into Position ...

Page 280: ...g Installed Modular Wall Plate 1 Unscrew the three screws on the unit to remove the plate 2 Replace the plate and screw in the two positions One remaining screw can be screwed in at the original third position Figure 6 33 Removing the Screws Figure 6 34 Replacing the Plate and Screw ...

Page 281: ... System Hardware Manual 6 29 3 Loosen the screws on the wall telephone plate to protrude a bit 4 Install the telephone with the plate on the protruding screws Figure 6 35 Protruding Screws Figure 6 36 Mounting the Telephone ...

Page 282: ...Issue 6 Electra Elite 6 30 Installing Electra Elite Multiline Terminals THIS PAGE INTENTIONALLY LEFT BLANK ...

Page 283: ...hing an APR U CTA U CTU C U CTU S U HFU U or VDD U Unit an external power supply is required Only one power supply is needed even when more than one adapter is installed When an adapter is installed for the first time into a telephone the base cover on the Multiline Terminal may have to be modified The base cover has two access panels that are removed before the cover can be closed over the adapte...

Page 284: ...ctra Elite 7 2 Installing Optional Equipment 3 Insert a flat head screwdriver into A in Figure 7 2 Unlocking Tab and press straight down until tab unlocks Figure 7 1 Raising the Base Plate Figure 7 2 Unlocking Tab ...

Page 285: ...n as B in Figure 7 3 Releasing Right Tab insert a flat head screwdriver at C Press straight down until other tab unlocks 5 Open and remove the bottom cover by rotating counterclockwise as shown in Figure 7 4 Removing Bottom Cover Figure 7 3 Releasing Right Tab Figure 7 4 Removing Bottom Cover ...

Page 286: ...g installed press tabs A and B to remove the dummy end from the base plate as shown in Figure 7 5 Removing Base Plate Dummy End 7 Cut the dummy end in half as shown in Figure 7 6 Cutting Dummy End in Half Figure 7 5 Removing Base Plate Dummy End Figure 7 6 Cutting Dummy End in Half ...

Page 287: ...r 1 as shown in Figure 7 7 Installing Adapter in Connector 1 Install the dummy end B as shown in Figure 7 8 Installing Dummy End B 9 When the Adapter is installed in Connector 2 install dummy end A in the other slot Figure 7 7 Installing Adapter in Connector 1 Figure 7 8 Installing Dummy End B ...

Page 288: ...only one ACA U Unit is necessary The power requirements for the ACA U Unit are Input 120V AC 60 Hz 30W Output 24V DC 750 mA Polarity 3 1 1 Connecting the ACA U Unit 1 Unplug the line cord from the Multiline Terminal and unplug the ACA U Unit from the AC outlet Failing to do this can damage the unit and or the Multiline Terminal 2 Prepare Multiline Terminal for adapter installation Refer to Section...

Page 289: ... and then install the ADA U Unit on the Multiline Terminal 3 2 1 Installing an ADA U Unit on a Multiline Terminal 1 Unplug the telephone cord from the Multiline Terminal 2 Prepare Multiline Terminal for adapter installation Refer to Section 2 Preparing Multiline Terminal for Adapter Installation 3 Plug the ADA U Unit connector into the receptacle connector on the back of the Multiline Terminal Sna...

Page 290: ...l Equipment 4 Replace base plate 5 Lead the audio cable out through the groove on the base cover Connect the telephone cord Figure 7 10 Attaching the ADA U Unit to the Multiline Terminal Figure 7 11 Leading the Audio Cable out from the ADA U Unit ...

Page 291: ...e end of the cable 2 Locate the adapter terminals on the right side of the unit as illustrated in Figure 7 12 ADA U Unit 3 Remove the cap on the adapter terminal to expose the metal receptacle Push the cable in the applicable receptacle and replace the cap Line up the slot on the cap with the slot on the metal receptacle to ensure proper contact Refer to Figure 7 13 Attaching Cables to the ADA U U...

Page 292: ...impedance mismatch Input Impedance on T1 and T2 100K Ω Input Level on T1 and T2 15 dB 40 dB T2 T3 T4 Connect recorder device wire pair speech input to T3 T4 When the recorder used supplies a warning tone this tone may also be sent over the T3 T4 wire pair back to the terminal Input Output Terminal Refer to dip switch settings in Table 7 2 ADA U Unit Switch Settings T5 Connect the bare end of the c...

Page 293: ...bles may be required for the warning tone and speech path In this case connect the warning tone cables to input terminals T1 and T2 on the ADA U Unit T3 and T4 are used as the tape recorder input When remote control of the recorder is necessary the record start stop control is provided by connecting to T5 or T7 and T6 on the ADA U Unit Connecting to T5 or T7 is determined by the specifications of ...

Page 294: ...he ADA U provides control to the recorder SW1 1 should be set to On otherwise set it to Off SW1 2 Off Leave Off SW1 3 and SW1 4 SW1 3 ON SW1 4 ON Warning Tone from recording device over same wire pair as speech path SW1 3 OFF SW1 4 OFF Warning Tone from recorder or generator equipment on dedicated wire pair to recorder MIC input SW1 5 and SW1 6 SW1 5 OFF SW1 6 ON Input impedance is 600 Ω SW1 5 ON ...

Page 295: ...n the adapter Setting 1 allows impedance to be set to 600Ω for devices such as modems Setting 2 is used for complex impedance devices such as a Single Line Telephone 3 3 1 Installing APA U Unit on any DTP DTU MultilineTerminal except DTP 2DT 1 WH and DTP 16HC 1 BK 1 Prepare Multiline Terminal for adapter installation Refer to Section 2 Preparing Multiline Terminal for Adapter Installation 2 Plug t...

Page 296: ...y looping line cord through the core between the terminal 1 inch from the terminal and ESI 8 U10 ETU This core is only used with the APA U Unit 4 Plug in the power cord on the AC adapter and the telephone cord in the jack 3 3 2 Switch Settings The APA U Unit has one switch Figure 7 16 Attaching the Unit to the Multiline Terminal Figure 7 17 APA U Unit Switches ...

Page 297: ...he APA U Unit Refer to Figure 7 18 Connecting Cables on the APA U Unit Limit the cable length from the APA U Unit to the Single Line Telephone to a maximum of 50 feet Table 7 3 APA U Unit Switch Settings for SW3 Switch Description SW3 1 Sets impedance to 600Ω for devices such as modems or facsimile machines SW3 2 Used for complex impedance devices such as Single Line Telephones Figure 7 18 Connect...

Page 298: ... allows for 600Ω or a complex impedance interface to devices such as a modem or Single Line Telephone the second switch SW1 is set to position 2 An AC Adapter is required If a CTA U CTU C U CTU S U HFU U or VDD U Unit and an APR U Unit are both installed only one AC Adapter is required 3 4 1 Installing an APR U Unit on any DTP DTU Multiline Terminal except DTP 2DT 1 WH and DTP 16HC 1 BK 1 Prepare ...

Page 299: ... AC adapter into the jack on the APR U Unit Lead the telephone cord out through the groove in the base as shown in Figure 7 21 Leading the Telephone Cord out from the Unit Figure 7 20 Attaching the Unit to the Multiline Terminal Figure 7 21 Leading the Telephone Cord out from the Unit ...

Page 300: ...the cover in place 5 Install a ferrite core provided with the APR U Unit by looping line cord through the core between the terminal 1 inch from the terminal and ESI 8 U10 ETU This core is only used with the APR U Unit 6 Plug in the power cord on the AC adapter and the telephone cord in the jack Figure 7 22 Closing the Base Plate Cover ...

Page 301: ... Switches Table 7 4 APR U Unit Switch Settings for SW1 and SW3 Switch Description SW1 1 Do not use SW1 2 A Single Line Telephone and Multiline Terminal are used alternately The Multiline Terminal and the APR U Unit share the same B1 channel SW3 1 Sets impedance to 600Ω for devices such as modems or facsimile machines SW3 2 Used for complex impedance devices such as Single Line Telephones ...

Page 302: ...ecting Cables on the APR U Unit Plug the telephone cord from the Single Line Telephone in the modular jack on the APR U Unit Limit the cable length from the APR U Unit to the Single Line Telephone to a maximum of 50 feet Figure 7 24 Connecting Cables on the APR U Unit ...

Page 303: ...line Terminal connection to a PC The PC can perform all Multiline Terminal functions using a TAPI compatible application software The CTA U Unit is attached to the bottom of any DTP DTU Multiline Terminal except DTP 2DT 1 WH and DTP 16HC 1 BK Figure 7 25 Attaching an Electra Elite Multiline Terminal to a PC Figure 7 26 CTA U Unit ACA U Unit AC Adapter ...

Page 304: ...he receptacle connector inside the base plate on the Multiline Terminal Refer to Figure 7 27 Attaching the Unit to the Multiline Terminal 3 Close the base plate 3 5 2 Connecting the Cables on the CTA U Unit Connect the RS 232C cable from the computer to the connector on the CTA U Unit as shown in Figure 7 28 Connecting the RS 232C Cable to the CTA U Unit on the Multiline Terminal Figure 7 27 Attac...

Page 305: ...CTU include Telephony Control The application is based on the Microsoft Telephony Application Programming Interface TAPI and provides call handling on the PC e g call answer Hold Transfer Conference or Caller ID User Interface to support Dterm Emulation This function provides the functions of Dterm such as normal telephone indications LCD Line keys or Hookswitch Sound Support Allows voice recordin...

Page 306: ... is a Computer Telephony Application adapter to connect a Universal Serial Bus to a Coreline port on the VDH2 8 U10 ETU and can be connected to any DTP DTU Multiline Terminal except DTP 2DT 1 WH and DTP 16HC 1 BK A required AC Adapter is provided with the unit The following connections are required AC Adapter Multiline Terminal jack labeled LINE PC USB port Coreline interface to VDH2 8 U10 ETU LAN...

Page 307: ...SI 8 U10 ETU and can be connected to any DTP DTU Multiline Terminal except DTP 2DT 1 WH and DTP 16HC 1 BK A required AC Adapter is provided with the unit The following connections are required AC Adapter Multiline Terminal jack labeled LINE PC USB port ESI port to ESI 8 U10 ETU Figure 7 30 CTU S U Unit To DTP or DTU Multiline Terminal DC 24V ADP USB Cable to PC To ESI port ...

Page 308: ...e 192 system to support 64 LEDs The DBM E U10 expansion Message Display Board has eight message waiting LEDs and is connected to the DBM B U10 or another expansion board Each DBM B U10 basic board can support up to five expansion boards and 40 additional LEDs The total number of LEDs is 384 but the Electra Elite 192 System can only support up to 200 mailbox indications Multiple locations of the sa...

Page 309: ...ng DBM E U10 Box to DBM B U10 Box or Another DBM E U10 Box 1 Use wire cutters to remove the cutout on right side of DBM B E cover Refer to Figure 7 33 Removing Cutout Place the provided edge protector on the top of the cutout Figure 7 32 Maximum Display Indications ...

Page 310: ...over sheet on both 3 Insert protruding side of the cable from the DBM E in DBM B CN7 or in CN7 of the previous DBM E 4 Slide the bracket on DBM E being installed into the groves on DBM B E and tighten the nuts and bolts Refer to Figure 7 34 Connecting the Bracket Figure 7 33 Removing Cutout Figure 7 34 Connecting the Bracket ...

Page 311: ...N6 respectively 6 After all expansion boards are connected place the white cover sheets back on the DBM B U10 and all expansion boards and install the display panels 3 7 2 Wall Mounting DBM B U10 and Expansion Boards 1 Refer to the template and thread the included screw into the wall at location for the top hole of the DBM B U10 Box Leave screw extended 1 8 inch Refer to Figure 7 35 Threading Scre...

Page 312: ...Equipment 3 Remove the display panel to access screws and thread the in place bottom screws on the outside boards into the wall Refer to Figure 7 37 Installing Bottom Screws Figure 7 36 Hanging DBM B U10 on Screw Figure 7 37 Installing Bottom Screws ...

Page 313: ...nnecting the DBM B to Power and ESI 1 Refer to Figure 7 38 Connecting DBM B U10 and Connect the provided AC Adapter to the DBM B U10 2 Connect the line cable to the DBM B U10 3 Place the clamp around the cables insert the clamp screw and attach clamp to the DBM B U10 4 Refer to Figure 7 39 Connecting DBM B U10 to ESI Port and connect the display board system to ESI Figure 7 38 Connecting DBM B U10...

Page 314: ...microphone With terminal upside down facing from the bottom of the open cover install this unit in Telephone Slot 1 3 8 1 Installing an HFU U BK WH Unit on any DTP DTU Multiline Terminal except DTP 2DT 1 WH and DTP 16HC 1 BK Refer to 3 4 1 Installing an APR U Unit on any DTP DTU Multiline Terminal except DTP 2DT 1 WH and DTP 16HC 1 BK The instructions for installing these units are the same Figure...

Page 315: ...ed from NEC The microphone is equipped with a mute button 1 Plug the microphone cord into the jack on the HFU U BK WH Unit as shown in Figure 7 42 Attaching a Microphone to a Multiline Terminal The microphone should be between one foot and three feet away from the Multiline Terminal Figure 7 41 Microphone with Mute Figure 7 42 Attaching a Microphone to a Multiline Terminal Minimum 1 Foot from Mult...

Page 316: ... Unit Switch Settings SW1 SW2 Description Position 1 Position 2 Position 1 Position 2 OFF ON OFF ON Full Duplex Default ON OFF OFF ON Half Duplex 6db mix ratio OFF ON ON OFF Half Duplex 12db mix ratio ON OFF ON OFF Half Duplex 18db mix ratio Full Duplex In some large areas or noisy locations half duplex should be used The echo canceling ability of the HFU U is limited Half Duplex When voice clippi...

Page 317: ... the following audio abilities Records audio from the calling or called party of a telephone conversation Records audio from both parties of a telephone conversation Records audio or music from a microphone line level device or CD player Plays live or recorded audio or music through an adjunct telephone handset or stereo speakers The PC Board uses Computer Technology Integration CTI technology thr...

Page 318: ...hone adapter provides an interface for Single Line Telephones and other similar devices from an ESI ETU channel This adapter can be connected to any ESI port 3 10 1 Connecting the SLT 1 U10 ADP to the System 1 Connect one end of the RJ 11 to the ESI port on the KSU and one end to the ESI jack on the SLT Adapter 2 Connect one end of a second RJ 11 to the TEL jack on the SLT Adapter and the other en...

Page 319: ...e 6 System Hardware Manual 7 37 Figure 7 45 Connecting the SLT 1 U10 ADP 3 4 ESI ETU Modular Terminal Connections Single Line Telephone Connections To ESI SLT 1 U10 ADP GN RD Y BL T R ESI Port Base Cord Modular Terminal ...

Page 320: ...o open the SLT Adapter as shown in Figure 7 46 Removing the Screws from the SLT 1 U10 ADP 2 Using the two provided wood screws attach the unit to the wall Close the unit and secure with the two screws that were previously removed Figure 7 46 Removing the Screws from the SLT 1 U10 ADP Figure 7 47 Attaching the SLT 1 U10 ADP to the Wall ...

Page 321: ...pplication The instructions for installing these units are the same 3 11 2 Connecting Cables to the VDD U Unit 1 If the Multiline Terminal is already connected to the ESI 8 U10 ETU unplug the telephone cord 2 Plug the cable from the VDH2 8 U10 ETU and from the PC LAN board into the modular jacks on the VDD U Unit The jacks are labeled Plug the cable from the VDD U Unit into the modular jack on the...

Page 322: ...d on the Multiline Terminal 3 12 1 Removing and Remounting the Handset Hanger 1 Remove the hanger by sliding it out of the slot 2 Install it back in its original position so that the hanger protrudes providing a rest for the handset This procedure applies when using either the base unit or the WMU U Unit Refer to Figure 7 50 Positioning the Handset Hanger for the steps for removing and remounting ...

Page 323: ... Terminal for Adapter Installation and perform Steps 1 5 2 Press both sides of the base cover and turn it left to remove it 3 Rotate base cover 180 and install it again on the Multiline Terminal 4 Remove the shaded base plate knockout shown on Figure 7 51 Removing the Knockout with nippers Figure 7 50 Positioning the Handset Hanger ...

Page 324: ...e Base Plate to the Wall attach the base plate and base cover assembly wide end down to the posts on the locally provided and installed wall plate Place locally provided screws in the nodes on the base plate and secure the assembly to the wall Figure 7 51 Removing the Knockout Figure 7 52 Attaching the Base Plate to the Wall Posts Nodes Nodes ...

Page 325: ...ng using a Modular Jack Use the locally provided screws to attach the base unit directly to the wall Plug the line cord into the jack on the wall plate wrap the extra cord and secure it with a tie wrap and lead the line cord out through the groove in the side of the base unit Figure 7 53 Wall Mounting using a Modular Jack Figure 7 54 Plugging in the Line Cord using a Wall Jack ...

Page 326: ...rd out through the groove in the side of the base unit 7 With the base plate and base cover assembly attached to the wall hook the two bottom tabs on the base cover into the tab slots on the base of the Multiline Terminal Figure 7 55 Plugging in the Line Cord Using a Modular Jack Figure 7 56 Attaching the Bottom Tabs of the Multiline Terminal to the Base Cover Wall Base Unit Tab Slots Multiline Te...

Page 327: ...ing the Top Tabs of the Multiline Terminal to the Base Plate shows how the Multiline Terminal is attached 9 When properly installed the wall mounted Multiline Terminal looks similar to the one shown in Figure 7 58 Installed Wall Mount Unit Do not adjust the tilt panel after the Multiline Terminal is mounted on the wall Figure 7 57 Attaching the Top Tabs of the Multiline Terminal to the Base Plate ...

Page 328: ... Mounting the Multiline Terminal using the WMU U Unit When installing any Adapter unit a separate WMU U Unit must be purchased to accommodate this unit 1 Remove the line cord base plate and base cover from the Multiline Terminal as shown in the previous section Figure 7 58 Installed Wall Mount Unit ...

Page 329: ...emoved depends on the Multiline Terminal type 4 Bundle the cord from the modular jack leaving about eight inches Use a tie wrap to secure the bundled cord Figure 7 59 Removing the Tabs from the Adapter Figure 7 60 Removing the Tabs from the WMU U Unit Cut Cut Cut Cut Cut DTP DTU 32 1 BK WH TEL DTP 32D 1 DTU 32D 2 BK WH TEL DTP DTU 8 1 BK WH TEL DTP 8D 1 DTU 8D 2 BK WH TEL DTP DTU 16 1 BK WH TEL DT...

Page 330: ...slits as shown in Figure 7 61 Leading the Line Cord out of the WMU U Unit 6 Attach the WMU U Unit to the posts on the wall plate locally provided Place locally provided screws in the nodes on the WMU U Unit and secure the WMU U Unit to the wall Figure 7 61 Leading the Line Cord out of the WMU U Unit Figure 7 62 Attaching the Wall Mount Unit to the Wall Posts Nodes Nodes ...

Page 331: ...ltiline Terminal Then push the two top tabs on the WMU U Unit into the tab slots on the Multiline Terminal When the adapter has a power supply lead the AC adapter cord out through the opening at the bottom of the Multiline Terminal Refer to Figure 7 63 Attaching the Multiline Terminal to the WMU U Unit Figure 7 63 Attaching the Multiline Terminal to the WMU U Unit Wall WMU U Unit Tab Slots Multili...

Page 332: ...ine Terminal to disengage top tabs turn it slightly counter clockwise to unlock lower tabs on base cover and remove it 3 12 5 Removing the Multiline Terminal from the WMU U Unit To remove the Multiline Terminal from the WMU U Unit lift the MultilineTerminal to disengage top tabs and lower the terminal from the WMU U Unit Figure 7 64 Removing the Multiline Terminal from the Base Cover ...

Page 333: ...nd into the audio jack on the side of the base KSU 3 14 Station Background Music Station Background Music can be provided using an internal or an external source The same connection method used for Music on Hold is used for Station Background Music 3 15 Paging Connections When connecting background music the ECR U10 ETU is used for the interface with Paging In Out Background Music External Speaker...

Page 334: ... PC to the KSU Using RS 232C straight cable connect the PC to one of the COM ports on the side of the KSU Refer to Figure 7 66 Connecting a PC to the KSU The functions and the communication port connections are Serial port characteristics include Function Port Least Cost Routing LCR COM 1 PC Programming COM 1 Wireless Programming COM 1 Station Message Detail Recording SMDR COM 2 Automatic Call Dis...

Page 335: ...ort on the side of the KSU with an RS 232C straight cable Use the COM 2 port to connect the printer 3 16 3 Remote Programming using the Built in Modem Modem Kit Unit PC programming abilities include Remote Programming Connect the CO line to the modem extension number The following characteristics apply to the built in modem Figure 7 66 Connecting a PC to the KSU Characteristic Value Baud Rate 14 4...

Page 336: ...Issue 6 Electra Elite 7 54 Installing Optional Equipment THIS PAGE INTENTIONALLY LEFT BLANK ...

Page 337: ...ensive migration to the Electra Elite system This chapter provides instructions for connecting these terminals to the Electra Elite 192 system SECTION 2 ELECTRA PROFESSIONAL MULTILINE TERMINALS The following Electra Professional Multiline Terminals can be connected to the Electra Elite system ETW 8 1 2 BK SW TEL ETW 16DC 1 2 BK SW TEL ETW 16DD 1 2 BK SW TEL ETW 24DS 1 2 BK SW TEL EDW 48 1 2 BK SW ...

Page 338: ...d SLT Adapters When connecting Electra Professional Multiline Terminals Attendant Add On Consoles or SLT Adapters to the MDF or IDF individually twisted 1 pair cabling must be used Refer to Figure 8 1 Modular Terminal Connections for Multiline Terminals and Attendant Add On Consoles for an illustration of connections Figure 8 1 Modular Terminal Connections for Multiline Terminals and Attendant Add...

Page 339: ...lite 192 System SECTION 4 INSTALLING AN ANCILLARY DEVICE ADAPTER IN THE MULTILINE TERMINAL 4 1 Ancillary Device Adapter Installation The ADA 1 W BK SW Unit or the ADA 2 W BK SW Unit can be installed in any Electra Professional multiline terminal in the system 1 Unplug the line and headset cords 2 Turn the multiline terminal upside down and place it on a dry surface 3 Remove the knockout shown in F...

Page 340: ... 8 4 Installing Electra Professional Equipment 4 Plug the CN 1 connector on the adapter unit in the CN 4 jack on the main board Refer to Figure 8 4 Unit Installation Figure 8 3 Removing Knockout Figure 8 4 Unit Installation ...

Page 341: ... 8 Test multiline terminal operation and then test external device operation SECTION 5 CONNECTING AN ATTENDANT CONSOLE TO A MULTILINE TERMINAL An Attendant Console can be attached to a Multiline Terminal using the following procedures 1 Turn the Multiline Terminal and the Attendant Console face down 2 Using the joining plate provided with the Attendant Console attach the plate to the Multiline Ter...

Page 342: ...Issue 6 Electra Elite 8 6 Installing Electra Professional Equipment THIS PAGE INTENTIONALLY LEFT BLANK ...

Page 343: ...d the memory restored SECTION 2 OPERATIONAL CURRENT AND VOLTAGE CHECKS The effectiveness of this maintenance section depends on the technician Due to external factors the technician should not make any assumptions For example don t assume that a new power supply used to replace another power supply is working properly Check the output of the power supply with a volt meter The ESI 8 U10 ETU allows ...

Page 344: ...re configuration used This information is stored in the resident system program memory with the system default values This section provides test procedures that are used before during and after the initialization process 3 2 Before Initializing The technician must follow these steps before initializing the system 3 2 1 Cable Connections All wiring for power supplies or flat cable connectors should...

Page 345: ... and option cards can be installed in the basic KSU The technician can then power up the system to perform a First Initialization After the initialization each station display shows default time and date indications For example 12 00 AM WED 1 Table 9 1 Voltage Measurement Voltages Tolerance Measuring Points ESI 8 U10 ETU 5V 24V 5 0 25V 24 0 25V ESI 8 U10 TP1 5V TP2 GND TP3 24V AC Voltage 117 Vac L...

Page 346: ... to system programming After all previous steps are performed and any problems corrected system programming is complete After System Programming is finished the technician should perform a Second Initialization Performing the First Initialization a second time causes all programming memory to be lost Second Initialization refreshes the system RAM without losing any memory This completes the instal...

Page 347: ... considered the technician is guided to a probable solution The problem must be defined as accurately as possible so that the most efficient steps to the solution can be taken Flowcharts in the next section help define the problem 4 2 1 System Down This term describes one of the following situations No access to internal dial tone on any Multiline Terminal or Single Line Telephone is installed No ...

Page 348: ...line Terminal A2 9 8 B Partial Operations 1 Radio Frequency Interference B1 9 9 2 No or Intermittent CO PBX Ring C1 9 10 3 Call Dropping C2 9 11 4 No Outside DialTone Access C3 9 12 5 CO PBX Dialing Problem Cannot Dial Out on CO C4 9 13 C Multiline Terminal Problems 1 Multiline Terminal Function D1 9 14 2 Multiline Terminal Ringing D2 9 15 3 Multiline Terminal Dial Tone Access D3 9 16 D Single Lin...

Page 349: ...ace Corresponding Power Supply PSU Fuses F1 and F2 good Turn system On Dial Tone on Multiline Terminal on 1st ESI 8 U10 Dial Tone No Dial Tone Replace Fuse s Reset ESI 8 U10 If trouble persists replace ESI 8 U10 Yes Done Problem Solved No Build system one card at a time until problem reappears Replace defective card No Dial tone Yes Remove all ETUs but one ESI and retest Replace KSU No Yes Problem...

Page 350: ...DF and test Replace Fuse s Terminal Indications Yes No Check Station Cabling PSU Fuses F1 and F2 G ood Replace Corresponding Power Supply No Indication Terminal Installed Indication Yes Done Problem Solved No Replace KSU No Problem Solved Yes Correct Indication Reset ESI 8 U10 If trouble persists replace ESI 8 U10 Correct Indications None 1 If problem not solved perform First Initialization and te...

Page 351: ...d SLT RFI on CO Lines Yes Yes Yes No No No End End RFI Cleared RFI Cleared Inform Telco Twisted pair More than 1 pair Twisted Ground all unused pairs at MDF Cable with 1 pair twisted pair cable Follow the steps below one at a time and test after each step 1 Place a 0 01 microfarad ceramic capacitor 0 001 microfarad for FM Interference across receiver and transmitter elements in the Multiline Termi...

Page 352: ...cted lines can be isolated to One COI 8 U10 ETU Corrected No Yes Basic KSU Replace Ribbon cable between KSUs Check whether or not affected lines can be isolated to one KSU Return defective Multiline Terminal for repair Reset Replace COI 8 U10 ETU 1 COI 8 U10 ETU Program station for off hook and day night ring deny DND feature and test again Perform the following tests 1 Measure CO ring voltage wit...

Page 353: ...ter call drops CO Line Key LED Status Check COI 8 U10 LED Have Telco check line circuits Increase Automatic Release Signal Detection Time Refer to Memory Block 3 40 COI 8 U10 LED Status Off On Have Telco check Line circuit s Problem Solved Return Defective ETU for repair Perform First Initialization Replace CPUB U10 and test system using default program 1 Perform Second Initialization If trouble p...

Page 354: ...lowchart A1 All Terminals affected Check for Internal Dial tone Internal Dial Tone Go to Flowchart A1 Test for CO dial tone at MDF with test set and check CO wiring Have Telco check lines 1 Check Memory Blocks 4 07 4 08 and 4 19 for Station Restriction 2 Check Memory Block 4 09 for Telephone to Tenant Assignment Check SW 1 8 on COI 8 U10 ETU for proper switch setting Check conduit and frame ground...

Page 355: ...O lines at MDF with test set to see if they are DTMF or DP DP or DTMF DP or DTMF Program lines for DTMF Program lines for DP Program as DP Yes No Digits Sent Monitor Line with test set and verify if system is sending digits Programmed for 1 If lines are DTMF increase the DTMF duration in Memory Block 3 15 2 If lines are DP choose 10 or 20 pps option in Memory Block 3 92 3 Check off hook CO line cu...

Page 356: ... Press each terminal key to test tones LEDs and key contacts 4 Return terminal on line by taking handset off hook and then return to on hook Problem solved End Reset and test Replace defective terminal and test Problem solved Problem solved Problem solved Send terminal in for repair Connect terminal directly to MDF and test Replace station cable Reset and test and replace ESI 8 U10 ETU Send ESI 8 ...

Page 357: ...me control and test again Yes Yes Yes Yes Yes Yes No No No No No No Problem Solved Station in Call Forward or DID Cancel feature Wrong Assignment Program again Program again Done Done Check Memory Blocks 4 01 and 4 02 for ring assignment Wrong Assignment Problem Solved Reset replace station then reset or replace ESI 8 U10 ETU Reset replace station then reset or replace ESI 8 U10 ETU Problem Solved...

Page 358: ...9 16 System Maintenance Multiline Terminal Dial Tone Access Problems D3 Check to see if problem occurs on CO or Internal call Go to Flowchart A1 Go to Flowchart C3 Go to Flowchart A1 CO Internal Both CO or Internal dial tone ...

Page 359: ...e Access on SLT E1 Check Memory Block 7 1 for SLI 4 8 U10 ETU assignments Assignment correct Assign Again End Replace SLT and test Replace SLT and test Both CO Internal Good Go to Flowchart C3 Go to Flowchart C3 No CO or internal dial tone Check CO line dial tone on a Multiline Terminal Bad Repair SLT 1 Reset SLI 4 8 U10 ETU and test 2 Replace SLI 4 8 U10 ETU and test 3 Perform Second Initializati...

Page 360: ...Cancel call Forwarding Check SLI 4 8 U10 ETU for ring voltage output with AC meter Pass Fail Busy Idle Check BLF indication for station Replace SLI 4 8 U10 ETU RSG Test BLF Indication Busy Idle Terminate SLT on MDF Check replace station cable BLF Indication 1 Reset replace SLI 4 8 U10 ETU and test 2 Perform Second Initialization and test then perform First Initialization and test 3 Change CPUB U10...

Page 361: ...No Access dial tone Go to Flowchart E1 Check Memory Block 4 17 for feature assignment Feature allowed Program C O S to allow feature and test Good Bad Done Check Memory Blocks 1 1 46 1 1 47 and 1 1 48 for access assignment Correct Access Code Recheck feature access with correct Access Code Recheck SLT features operation selection to verify procedure for feature ...

Page 362: ...place COI 8 U10 ETU Check line with dB meter and or contact Telco Report Problem to Telco Less than 8 dB Line Port Reset or replace COI 8 U10 and test again All lines Bridge on system CO line Remove it All stations Move suspected bad line to good COI 8 U10 ETU port Move good line to original COI 8 U10 ETU port Run a dB level test at DMARK on lines with 1 kHz test tone No less than 8dB at MDF is re...

Page 363: ...removed External page heard on test set External amplifier or wiring is defective Check Memory Blocks 1 1 46 1 1 47 and 1 1 48 for correct access code external for paging Done Pass Fail Retest using correct access code Access Code correct 1 Reset replace ECR U10 ADP and test 2 Perform Second Initialization and test then perform First Initialization and test 3 Replace CPUB U10 ETU and test using de...

Page 364: ...all MIFM U10 in Option or IF1 4 slot Set correct parameters Parameter match MIFM U10 in correct slot Test for proper operation If On Off switch on M IFM U10 is off turn it on LED On LED Off LED1 on MIFM ON or Off On On Off Off LED1 on MIFM ON or Off Recheck in original slot Replace printer or modify cable High 1 Perform second Initialization if LED is off 2 Replace MIFM U10 if LED is off 3 Replace...

Page 365: ...ncelman Connector for slim coaxial cables This is similar to ones used with Ethernet BPV Bipolar Violation Indicates the presence of two consecutive one bits of the same polarity on a T carrier line BRI Basic Rate Interface ISDN subscriber interface BRI has two bearer B channels at 64 Kbps per second and a D channel at 16 Kbps per second The bearer B channels are provided for PCM voice video confe...

Page 366: ...n Alarm Detection An FT1 trunk looses frame synchronization Frame synchronization occurs when a given digital channel time slot at the receiving end is aligned with the corresponding channel time slot of the transmitting end as it occurs in the received signal Usually extra bits frame synchronization bits are inserted at regular intervals to indicate the beginning of a frame and for use in frame s...

Page 367: ...ng A feature that collects and records information on outgoing calls by station SPID Service Profile Identifier ISDN service is ordered with certain parameters The SPID is an 8 to 12 digit number that uniquely identifies the service ordered The phone company assigns an SPID for every phone number Each ISDN BRI line usually has two phone numbers The SPID is a label identifier that points to a parti...

Page 368: ...Issue 6 Electra Elite A 4 Glossary of Abbreviations THIS PAGE INTENTIONALLY LEFT BLANK ...

Page 369: ...SYSTEM HARDWARE MANUAL NEC America Inc Issue 6 Series 6000 192 ...

Reviews: