2. Setting Up Your Projector
47
2.3
Connecting the Power Cable
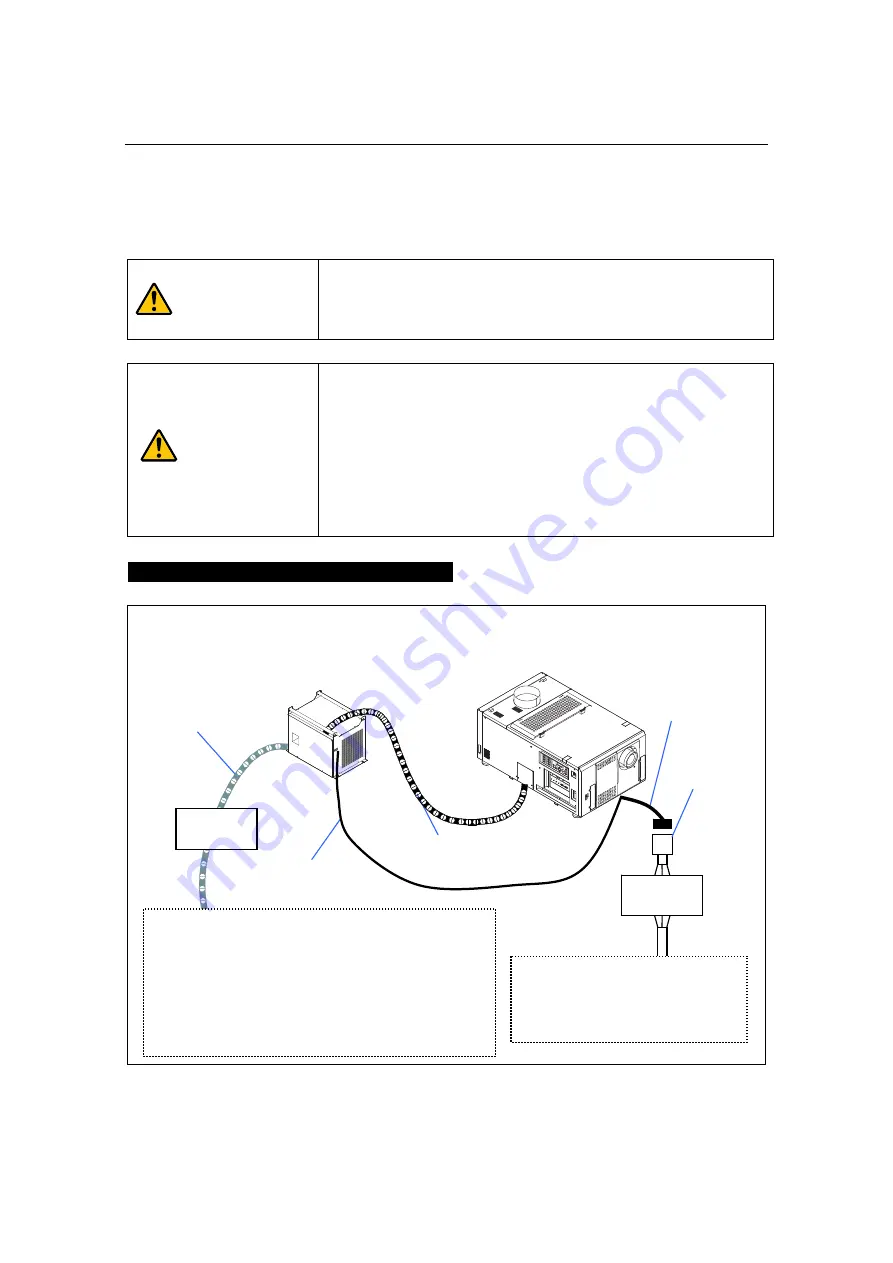
Connect the power cables of the lamp power supply and the projector.
Warning
Carefully read the contents described in this section before connection
and connect the cables according to the proper procedure.
Inappropriate handling may cause fatal, serious or other bodily injuries
due to fire or electric shock.
Caution
Before connecting the power cables, check that the main power
switches of the projector and the lamp power supply are turned off.
Implement the connection with AC power shut off.
Entrust a specialist to carry out the power supply work from the power
supply equipment of the building to the place of projector installation.
Be sure to ground the equipment to ensure safety. To avoid electric
shock, request a professional to carry out the grounding and related
works.
Make sure to ground the equipment before supply of the AC
power.
Schematic diagram of connection
Note1: NC-32PS01 is 3-phase, and NC-32PS02 is single phase.
Note2: The AC power cable is not attached as an accessory.
Consult with your dealer/distributor for the cable.
AC power cable
(single phase)
(Note1)
Lamp power supply
(NC-32PS01/NC-32PS02)
Projector head
(NC3200S/NC3200S-A/NC3240S-A)
Interface cable
(Attachment)
Lamp power cable
(Attachment)
1
2
3
4
5
LAM
P
MEN
U
ENT
ER
DOU
SER
KEY
LOC
K
EXIT
IMB
6
7
8
Breaker
Electric
outlet
Breaker
Connect to the power supply of the
building
AC 100-240 V single phase 50/60 Hz
Connect to the power supply of the building
•
NC-32PS01
AC 200–230 V 3-phase 50/60 Hz (Three-phase three-wire)
OR
AC 380–415 V 3-phase 50/60 Hz (Three-phase three-wire)
- Power voltage switch type
•
NC-32PS02
AC 200 V single phase 50/60 Hz
AC power cable
(Note1, Note2)


