2-60
Hardware Installation
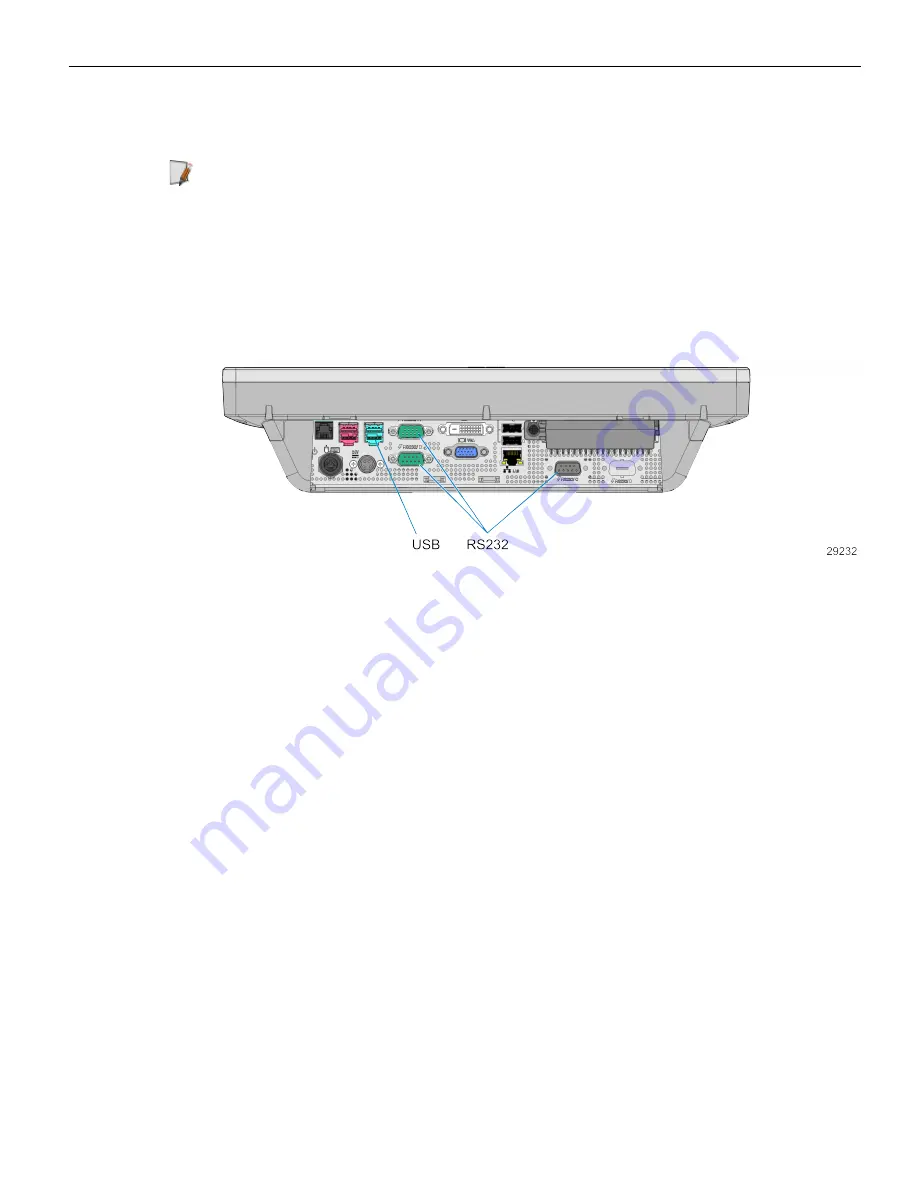
RS-232 Interface (Powered)
Connect the I/F cable to a powered RS-232 connector on the terminal.
Note:
The factory default settings for the COM1 and COM2 ports are
powered
by
default. To change a port to non-powered see the
Powered Serial Port
appendix.
Configure the terminal serial port as follows:
9600 baud, 8 data bits, 1 start bit, 1 stop bit, No parity
USB Interface (Powered)
Connect the I/F cable to a powered 12V Powered USB connector on the terminal.
Summary of Contents for RealPOS 25
Page 1: ...USER GUIDE NCR RealPOS 25 7610 POS Release 2 0 B005 0000 2017 Issue D...
Page 10: ...x...
Page 40: ...1 30...
Page 58: ...2 48 Hardware Installation Cable Connections Using DVI Interface...
Page 60: ...2 50 Hardware Installation Cable Connections Using DVI Interface...
Page 62: ...2 52 Hardware Installation Cable Connections Using DVI Interface...
Page 74: ...2 64 Hardware Installation Dual Display Clone 1 Select Multiple Displays...
Page 82: ...2 72...
Page 94: ...3 84...
Page 102: ...4 92...
Page 112: ...6 102...
Page 116: ...7 106...
Page 121: ...2x20 Customer Display Interface 8 111 CP437...
Page 122: ...8 112 2x20 Customer Display Interface CP852...
Page 123: ...2x20 Customer Display Interface 8 113 CP858...
Page 124: ...8 114 2x20 Customer Display Interface CP866...
Page 125: ...2x20 Customer Display Interface 8 115 CP932...
Page 126: ...8 116...
Page 132: ...9 122...
Page 134: ...A 2 Powered Serial Port Settings Motherboard 1 x...
Page 135: ...Powered Serial Port Settings A 3 Motherboard 2 x...
Page 136: ......
Page 138: ...B 6 Display Color Adjustment Windows 7 Select Color Enhancement on a Windows 7 system...


