


8-122
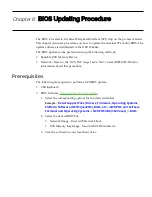
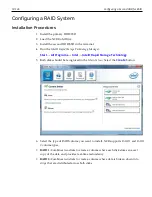
BIOS Updating Procedure
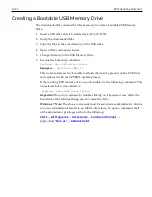
Creating a Bootable USB Memory Drive
The downloaded file contains the files necessary to create a bootable USB Memory
Drive.
1. Insert a USB drive that is formatted as FAT (or FAT32).
2. Unzip the downloaded files.
3. Copy the files to the root directory of the USB drive.
4. Open a DOS command window.
5. Change directory to the USB Memory Drive.
6. Execute the following command:
Syslinux -fma <USB drive letter>
Example:
Syslinux -fma f:
This command erases any bootable methods that may be present on the USB drive
and replaces it with the SPI/BIOS update process.
If the resulting USB memory drive is not bootable, try the following command. This
runs slower but is more effective.
Syslinux -sfma <USB drive letter>
Important:
Do not run syslinux by double-clicking on it because it may affect the
boot drive of the terminal being used to create the drive.
Windows 7 Note:
The above commands must be executed as administrator. Failure
to run as administrator results in an MSR write failure. To open a command shell
with administrator privileges perform the following:
Start
→
All Programs
→
Accessories
→
Command Prompt
→
[right-click]
"Run as"
→
Administrator
Summary of Contents for POS XR8
Page 1: ...User Guide NCR POS XR8 XR8c 7607 B005 0000 2436 Issue C ...
Page 9: ...vii Touch Screen Cleaning Procedures 141 ...
Page 27: ...Chapter 2 External Connectors Motherboard Release 1 x Release 2 x Display Port Connections ...
Page 28: ...2 18 External Connectors Release 3 x XR8c ...
Page 42: ...2 32 ...
Page 59: ...Hardware Installation 3 49 24V Powered USB and RS232 Cables ...
Page 61: ...Hardware Installation 3 51 24V Powered USB and RS232 Cables ...
Page 70: ...3 60 Hardware Installation NCR 5932 5715 Big Ticket USB Keyboard ...
Page 72: ...3 62 Hardware Installation NCR 5932 6674 POS Compact Alphanumeric USB Keyboard ...
Page 77: ...Hardware Installation 3 67 3 Disconnect the SATA Power connector from the Drive ...
Page 78: ...3 68 Hardware Installation 4 Unscrew the Drive from the Hard Drive chassis Retain the screws ...
Page 79: ...Hardware Installation 3 69 5 Slide the drive out of the chassis bracket ...
Page 80: ...3 70 Hardware Installation 6 Slide in the new drive and secure with the retained screws ...
Page 81: ...Hardware Installation 3 71 7 Connect the SATA Power connector to the Drive ...
Page 82: ...3 72 Hardware Installation 8 Replace the Sled Cover and reconnect power to the terminal ...
Page 92: ...5 82 ...
Page 130: ...7 120 ...
Page 147: ...Configuring a Second HDD for RAID 10 137 7 Select Next ...
Page 152: ...11 142 ...


