background image

12

Handheld Scanner Holster

Installing the Wireless Antenna Module

To install the Wireless Antenna Module, follow these steps:

Note:

For more information about the wireless card and antenna, refer to the

RealPOS

XR7 (7702) POS User Documentation

.

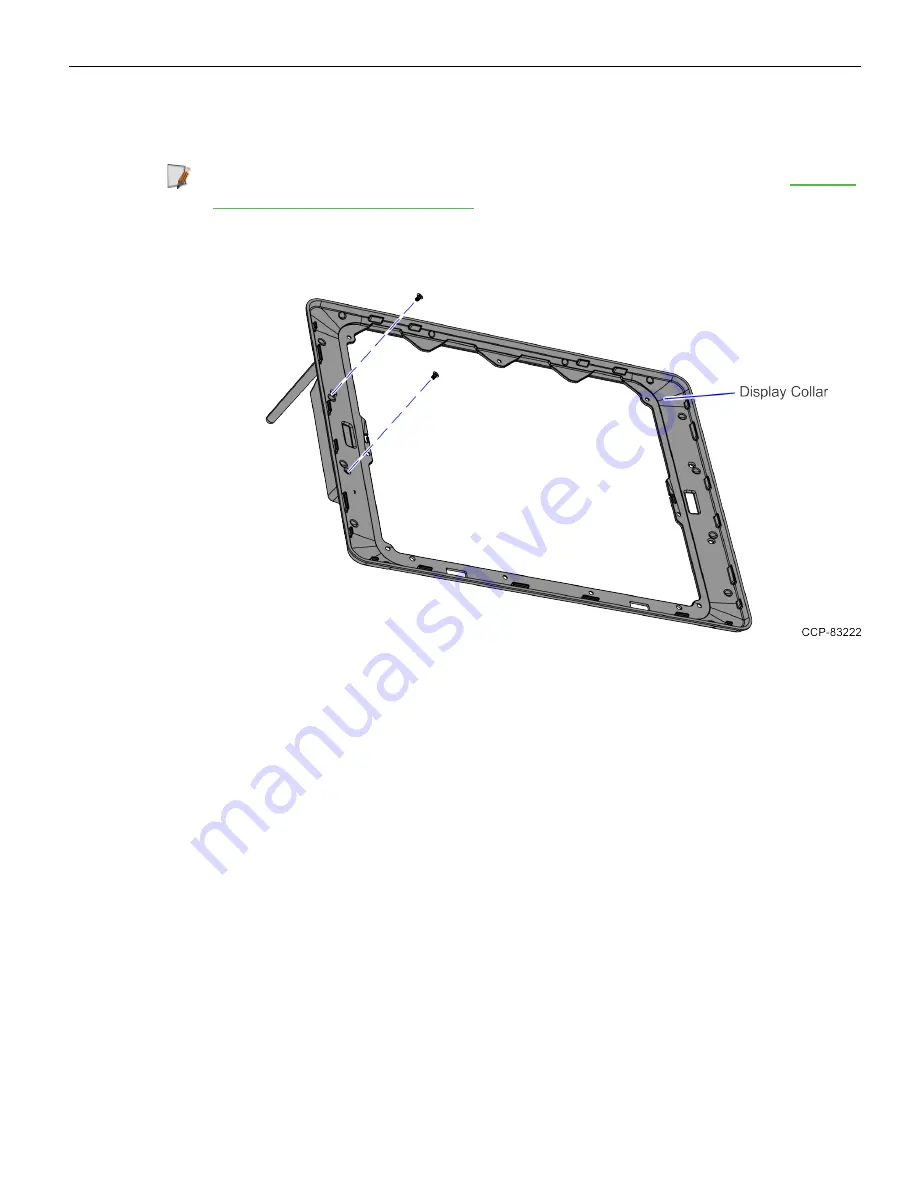
1. Secure the Wireless Antenna Module to the Display Collar using two (2) screws, as

shown in the image below.

Summary of Contents for 7707-K261

Page 1: ...Kit Instructions Handheld Scanner Holster 7707 K261 Issue A...

Page 2: ...rms and conditions of an agreement you have with NCR NCR s copyright notice must be included It is the policy of NCR Corporation NCR to improve products as new technology components software and firmw...

Page 3: ...iii Revision Record Issue Date Remarks A Apr 2022 First Issue...

Page 4: ...iv...

Page 5: ...canner Holster on an NCR SelfServ Checkout 7707 unit Kit Contents Part Number Description 497 0532993 7707 K261 Handheld Scanner Holster Kit 006 8611658 Screw M3 x 5 SEMS PHIL PAN STL Z 2 pcs 006 8624...

Page 6: ...llowing if necessary Remove the Wireless Antenna Module For more information refer to Removing the Wireless Antenna Module on page 8 Note Both Semi Self and Self Checkout configurations of NCR SelfSer...

Page 7: ...eld Scanner units remove the Blanking Plate using a pry tool Note Remove all adhesive residues from the Blanking Plate 4 Install the Handheld Scanner Bracket by doing the following a Install the Holst...

Page 8: ...y the image below shows a Right hand RH orientation 5 Install the Wireless Antenna Module on the other side of the Terminal Display if necessary For more information refer to Installing the Wireless A...

Page 9: ...l Display follow these steps Note For the purpose of illustration only this procedure shows images using a 7702 Terminal Display 1 Shut down the NCR Terminal Display software and hardware systems 2 Un...

Page 10: ...erminal 6 Remove six 6 screws to detach the Terminal Display from the Display Hinged Bracket as shown in the image below 7 Do the following a Slide the Terminal Display to the back to disengage it fro...

Page 11: ...Rear Cover of the Terminal Display follow these steps 1 Remove the cable cover Note Place the Terminal Display on a flat surface with the back facing up 2 Remove the two 2 screws to detach the rear co...

Page 12: ...to the RealPOS XR7 7702 POS User Documentation 1 Remove the Terminal Display Rear Cover if necessary For more information refer to Removing the Terminal Display Rear Cover on the previous page 2 Disco...

Page 13: ...the back of the Display Collar unhook the cable from the hook feature on the Display Collar as shown in the image below 5 Remove two 2 screws to detach the Wireless Antenna Module from the Display Col...

Page 14: ...following a Remove the handheld scanner from the bracket b Remove the Terminal Display For more information refer to Removing the Terminal Display on page 5 2 Place the Terminal Display on a flat surf...

Page 15: ...ter 11 c Remove the nine 9 screws to detach the Display Collar from the Terminal Display as shown in the image below 4 Remove two 2 screws to detach the scanner bracket from the Display Collar as show...

Page 16: ...tall the Wireless Antenna Module follow these steps Note For more information about the wireless card and antenna refer to the RealPOS XR7 7702 POS User Documentation 1 Secure the Wireless Antenna Mod...

Page 17: ...Holster 13 2 Route the cables through the cable management feature on the Display Collar as shown in the image below 3 Secure the Display Collar on the Terminal Display using nine 9 screws as shown in...

Page 18: ...nnect the Ground and Wireless Antenna cables to the board as shown in the image below 5 Install the Terminal Display Rear Cover if necessary For more information refer to Installing the Terminal Displ...

Page 19: ...Terminal Display Rear Cover To install the Rear Cover of the Terminal Display follow these steps 1 Attach and secure the rear cover on the back of the Terminal Display using two 2 screws as shown in...

Page 20: ...s images using a 7702 Terminal Display 1 Remove the existing NCR Terminal Display if necessary For more information refer to Removing the Terminal Display on page 5 2 Install the Adaptor Plate to the...

Page 21: ...Handheld Scanner Holster 17 5 Close the the cable cover 6 Turn on the NCR SelfServ Checkout hardware system 7 Close the Terminal Display...

Page 22: ...Display Adaptor Plate To install the adaptor plate to the Terminal Display follow these steps 1 Do the following a Place the Adaptor Plate on a flat surface b Align the hinge to the Adaptor Plate and...

Page 23: ...lace the NCR Terminal Display on a flat surface with the back facing up 3 Attach the Adaptor Plate to the Display as shown in the image below 4 Install the Anti tilt Bracket using two 2 M4 machine scr...

Page 24: ...20...

Reviews: