background image


26 

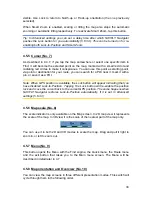
Streets and roads have names or numbers for identification. Of course, this 
information can be displayed on the map. NAVFLY Navigator uses two different ways 
to show street labels. The conventional way is the same as a roadmap – it displays 
the name of the street aligned with the street. The alternative is a kind of virtual 
signpost stuck into the street itself. 

You need not choose between the two modes. NAVFLY Navigator will use the one 
best for the current tilt and zoom level. Zoom in to have only a few streets on the map, 
and start tilting up and down to see how NAVFLY Navigator switches between the 
two modes in an instant. 

Note: The automatic switching is on even when using Smart Zoom. At first you may 
find it odd, but later you will discover how it adjusts the displayed information to the 
current view of the map. It is important, as the driver must be able to read the map at 
a glance. 

Tip: If you do not want to be bothered by street names during navigation, turn them 
off on the Map Settings screen (5.2.4). 

Tip: Major roads usually have alternative names (numbering) besides the primary 
name. You can choose whether to display these alternative names or not. You can 
set this in Map settings (5.2.3). 

4.4.5 Other objects 

To help orientate you, the map also contains objects that have no other navigating 
function than to help you recognize your location on the map. These are surface-
waters, large buildings, forests, etc. 

Tip: These objects are normally displayed using textured polygons that look natural 
to the eye. Should you have a slow PND, you may wish to switch the textured display 
off (5.2.5) to free some of the resources of your PND by replacing textures with plain 
Colored surfaces. 

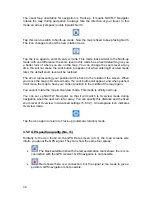
4.4.6  Current position and Lock-on-Road 

When your GPS position is available, a blue arrow (yellow when using night Colors) 
shows your location on the map. The direction of the arrow represents your heading. 
The arrow is sized and vertically rotated with the zoom and tilt levels to always look 
realistic. 

NAVFLY Navigator has a built-in Lock-on-Road feature that always puts the position 
arrow on the road, on the axis of the street in case of one-way streets, or on the side 
of the road where you drive (e.g. on the right in Germany and on the left in the U.K.) 
on two-way roads. 

Summary of Contents for N29050-V1

Page 1: ...User Manual NAVFLY Navigation System English User Manual N29050 V1...

Page 2: ...may be changed at any time without prior notification This manual or any parts of it may not be reproduced transmitted in any form either electronically or mechanically including photocopying without...

Page 3: ...Read the Quick Start Guide first and start using NAVFLY Navigator right away This document is the detailed description of the software Although NAVFLY Navigator can easily be discovered by experience...

Page 4: ...witches 16 3 2 6 Switches in the Quick menu 16 3 2 7 Virtual keyboards 16 3 2 7 1 ABC type keyboards 17 3 2 7 2 QWERTY type keyboards 17 3 2 7 3 The numeric keyboard 18 4 Discovering the program throu...

Page 5: ...12 35 4 5 11 Sound muting No 13 35 4 5 12 Track Log recording playback indicator No 14 36 4 5 13 Cursor menu No 15 36 4 5 14 Current street No 16 38 4 5 15 Travel and Route data No 17 38 4 5 16 Distan...

Page 6: ...it Map mode map details 60 5 2 3 Alternative Road Names 60 5 2 4 Show Street Labels 60 5 2 5 Textured Polygons 61 5 3 Sound settings 61 5 3 1 Master sound volume switch 61 5 3 2 Voice guidance volume...

Page 7: ...72 5 6 4 3 Cross border planning 72 5 6 4 4 Keep position on road Lock on Road 72 5 6 5 User data management 73 5 6 5 1 Backup Data 73 5 6 5 2 Restore Data 73 5 6 5 3 Remove Pins 73 5 6 5 4 Clear Dat...

Page 8: ...u need to change route parameters NAVFLY Navigator has a built in optional Safety Mode that will prevent you from using the screen functions if your car is in motion Unless a passenger will be the onl...

Page 9: ......

Page 10: ...insert the memory card and go You do not need a stylus to use NAVFLY Navigator All screen buttons and controls are designed so that you can operate them with your fingertips When using NAVFLY Navigat...

Page 11: ......

Page 12: ...r possible pushbuttons and lists are provided to make accessing functions or changing settings as easy as possible 3 1 Hardware buttons Hardware buttons are mostly used on map screens to zoom tilt and...

Page 13: ...om will change the scale of the map If you zoom out you will see a larger part of the map while zooming in shows a smaller part of the map in more detail The automatic Smart Zoom function will do the...

Page 14: ...channel of NAVFLY Navigator is the touch screen If you read on you will realize that most parts of the screen are not only used to display information but also to initiate functions by tapping Below...

Page 15: ...hile the rightmost position represents the maximum value This control can be operated in two ways Either drag the handle to move the slider to its new position or tap the slider where you want the han...

Page 16: ...d disabled states 3 2 7 Virtual keyboards NAVFLY Navigator is designed in a way that you only need to enter letters or numbers when it is inevitable In these cases a full screen keyboard pops up that...

Page 17: ...omputer keyboards you may consider trying one of the QWERTY type keypads 3 2 7 2 QWERTY type keyboards QWERTY type keyboards have both letters and numbers on them Their layout is the same as of the st...

Page 18: ...ers on huge buttons The special keys you find on the other keyboards except Space are available here as well English Spanish French Although QWERTY type keyboards also contain number keys when enterin...

Page 19: ......

Page 20: ...from each other to reduce the number of actions needed to initiate a function or change a setting 4 1 Main menu The Main menu is the first screen of NAVFLY Navigator Most parts of the program are dir...

Page 21: ...layed The virtual sky on the left represents the currently visible part of the sky above you with your position as the centre The satellites are shown at their current positions The GPS receives data...

Page 22: ...stablished yet so you need to set it up by using the Detect or Config buttons a slowly blinking yellow lamp means that there is no connection to the GPS receiver but NAVFLY Navigator is trying to conn...

Page 23: ...t the time with or without a valid GPS time It also gives you the chance to correct the time after synchronization if your PND does not support time zones or daylight saving time You can also use thes...

Page 24: ...lity vector maps that let you see the map at various zoom levels always with optimized content the density of the map details can be independently set for Map and Cockpit screens in Map settings 5 2 2...

Page 25: ...ew minutes before sunrise when the sky has already turned bright and a few minutes after sunset before it gets dark Tip There are several daytime and night Color schemes included with NAVFLY Navigator...

Page 26: ...usually have alternative names numbering besides the primary name You can choose whether to display these alternative names or not You can set this in Map settings 5 2 3 4 4 5 Other objects To help o...

Page 27: ...or save it as a POI The cursor when visible is also the reference point for map scaling Note When your GPS position is available and Lock to Position is active the cursor is always the current GPS po...

Page 28: ...ame icon this icon will be displayed instead of the multi POI icon Note When navigating POI icons can be disabled together with street names 5 2 4 If you still need this information during your journe...

Page 29: ...egs of the route Future sections of a route are inactive They are also shown on the map with the same Color but a darker tint than the active one An inactive route section becomes active as soon as yo...

Page 30: ...ack up mode you can make NAVFLY Navigator always open the Cockpit screen like that see 5 6 1 2 There are several controls that function in a similar fashion on the two screens They are described on th...

Page 31: ...active Only appears when a route is active and the next turn is near 4 5 1 Turn preview No 1 On the Cockpit screen this field shows a graphic illustration of the next maneuver For example when you app...

Page 32: ...necessary tilting for you when navigating gives a flat view if the next turn is at a distance to let you see far ahead and raises the angle when approaching a turn to give you a better view of the upc...

Page 33: ...e it as a POI Note When GPS position is available the Lock button will appear indicating that you have disabled Lock to Position Tapping the Lock button will re enable the position lock and move the c...

Page 34: ...een When you move the map in Overview mode the Lock button will appear and when pushed it will move the map to have your current position in the middle of the map again You cannot rotate the map in Ov...

Page 35: ...t full but there is sufficient reserve capacity When the inside of the battery turns red the battery needs recharging 4 5 11 Sound muting No 13 By tapping this button you can quickly mute all sounds o...

Page 36: ...tap the screen to place the Cursor the Cursor menu pops up automatically to give you the list of possible functions you can use the Cursor for At the same time Popup Info street name house number and...

Page 37: ...s menu point works only if a route is already active Remove Via removes the via point near or at the Cursor The route will be recalculated immediately excluding the deleted point This menu point repla...

Page 38: ...ithout an active route or navigating following an active route While cruising the fields show the present speed the current speed limit and the time of day You can choose what to display in these thre...

Page 39: ...field is displayed only when navigating a route 4 6 Route Information screen The Route Information screen has all the data and some of the functions you need while you navigate Some additional functi...

Page 40: ...only up to that via point The rest of the line remains grey 4 6 1 2 Distance Left This value can also be displayed in one of the Route data fields on the Cockpit screen as Distance to destination This...

Page 41: ...f the fields to see the address or coordinates of the first second etc via point 4 6 2 Warning icons The following 5 squares are normally grey Some of them turn red and show a graphical symbol in case...

Page 42: ...equire a permit or permission to enter Information any other piece of relevant but not categorised information Tap the icon to see the content Next page displayed when more than 5 warnings apply for t...

Page 43: ...the map is displayed in a conventional top down view This 2D view is also the end of the tilt range so it can also be accessed by tilting the map up Conversely 3D mode can be switched on by tilting do...

Page 44: ...levels below that will be shown or hidden according to their respective category i e you can set the visibility of Petrol Stations in the Services category but all brands listed under that will either...

Page 45: ...l be ordered by their distance from the Cursor When the My POI Groups are displayed you have the following options Show Hide similarly to built in POIs you have the possibility to show or hide all POI...

Page 46: ...e When the number of matching items can fit in one page NAVFLY Navigator will automatically display the list If you tap Done any time before this happens you receive the list of matches on multiple pa...

Page 47: ...s Using NAVFLY Navigator it is also possible to save the track logs of your journeys This screen lets you manage all your track logs When it comes up it shows a list of all track logs already saved Th...

Page 48: ...g if recording is in progress this buttons stops it Info this button opens a screen that shows the track log details and lets you o change the name of the track log Rename button o change the Color of...

Page 49: ...e where the automatically saved track logs are kept o Maximum track database size here you can set the maximum database size if the track database size limit is enabled using the previous switch o Cre...

Page 50: ...omatically provided that the manual route recalculation is set in 5 1 5 2 Drop Next Via Point Delete Route You can modify the route to skip the next via point if you decide it is no longer needed For...

Page 51: ...you have used the Avoid feature during your journey When you arrive at your destination the route line disappears on the map and navigation stops The route is now practically deleted but if you plan...

Page 52: ...ted event and sometimes also some of the subsequent ones Maneuver this option avoids the highlighted action For example if you find a turn too difficult during rush hour traffic NAVFLY Navigator will...

Page 53: ...list is the departure point of the route without a valid GPS position the last reached via point if you open the list during navigation or the point where NAVFLY Navigator most recently recalculated t...

Page 54: ...ng point and destination remain in their positions of course Up and Down using these buttons you can reorder the list by moving the highlighted item up or down in the list 4 7 3 6 Info This button ope...

Page 55: ......

Page 56: ...ns by using the battery icon 4 5 10 while some of its sub screens are accessible from other parts of the program 5 1 General settings These are the basic settings of NAVFLY Navigator 5 1 1 Safety Mode...

Page 57: ...Using the automatic night mode NAVFLY Navigator will change between the daylight and night Color schemes a few minutes before sunrise and a few minutes after sunset based on the time and location info...

Page 58: ...f the previous one Move the slider to its rightmost position to turn off the alternative speed warning Then the settings of the upper slider will determine the warning for all roads 5 1 4 3 Alternativ...

Page 59: ...f Automatic recalculation was selected Drop Next Via Point Delete Route NAVFLY Navigator will remove the next via point from the list and recalculate the route without it If you have only one target l...

Page 60: ...three values More detailed Normal Less detailed fast They influence when NAVFLY Navigator hides and shows certain map features when zooming in or out Setting a higher detail level will result in objec...

Page 61: ...way NAVFLY Navigator sounds 5 3 1 Master sound volume switch The loudness of NAVFLY Navigator is independent of your PND settings When you run NAVFLY Navigator the position of this fader determines t...

Page 62: ...too loud to clearly understand the voice guidance messages and to perceive the key sounds Using Dynamic Volume you can instruct NAVFLY Navigator to increase the volume when your speed exceeds a certai...

Page 63: ...he optimal result independent of the slider 5 4 2 Route Here you can choose from three different route types 5 4 2 1 Shortest Choosing Shortest will result in a route that has the smallest total dista...

Page 64: ...te is a preference It does not necessarily mean total prohibition If your destination can only be accessed using some of the excluded road types NAVFLY Navigator will use them but only as much as nece...

Page 65: ...route if possible but when reaching a via point the following part of the route may be planned starting in the opposite direction 5 4 4 5 Permit needed To use some roads or enter some areas you may ne...

Page 66: ...ce prompt Just tap OK when you have selected the new spoken language 5 5 3 Units You can set the distance units to be used by the program NAVFLY Navigator may not support all of the listed units in so...

Page 67: ...rth up orientation for map browsing purposes Note You will still have the possibility to rotate and tilt the map but the map will return to 2D mode whenever Map mode is started 5 6 1 2 3D in Cockpit m...

Page 68: ...th their coordinates This setting lets you choose between displaying coordinates in degrees dd dddddd degrees and minutes dd mm mmm or degrees minutes and seconds dd mm ss s Note the coordinate displa...

Page 69: ...e when approaching a turn it will zoom in and raise the view angle to let you easily recognize your maneuver at the next junction If the next turn is at a distance it will zoom out and lower the view...

Page 70: ...tion In these cases a Lock icon 4 5 4 appears on the screen When you rotate tilt or zoom the map that part of Smart Zoom is automatically deactivated the map will still follow your position but will n...

Page 71: ...olutely safe to do so Note If you push the Lock button before the automatic Lock comes into effect Smart Zoom and Lock to Position will be re enabled instantly 5 6 4 Route options You can set the basi...

Page 72: ...AVFLY Navigator takes u turns into account when planning a route You can tell NAVFLY Navigator how much extra distance you would travel to avoid a u turn Note This value is taken into account only if...

Page 73: ...PC Tip If you move to another PND before removing the card from the old one make a backup remove the card insert it into the other PND let the automatic setup run then return to this Settings page an...

Page 74: ...ns you lose all your saved data and customised settings NAVFLY Navigator will warn you about this 5 6 5 5 Reset Advanced Settings There are a multitude of Advanced settings in NAVFLY Navigator Some ch...

Page 75: ......

Page 76: ...start navigation 6 1 NAVFLY Navigator Main menu As just mentioned the fastest way to find your destination and start navigating is to tap Find GO in the Main Menu 4 1 This will put you on the Find sc...

Page 77: ...done in the Find Address module If you know at least a part of the address this is the quickest way to find the location The following illustration shows the structure of the address search module The...

Page 78: ...contains settlements you will not visit in the near future you can choose to empty the list by the Clear button in the bottom left corner Selecting a new settlement to search in If you are looking fo...

Page 79: ...60 pages exist for the entered pattern s NAVFLY Navigator stops searching and displays 300 at the right end of the input line Enter more letters to narrow the list Note When the name of the settlemen...

Page 80: ...eed to select a settlement by entering a part of its name or postcode then selecting from the list of available matching items as described before Note In Australia you can skip this part by tapping D...

Page 81: ...e you need to first enter the street name you are looking for Tip If you are looking for an intersection choose the street that has a rare or unusual name first This way you need to enter fewer letter...

Page 82: ...local dealer for details Tip If you do not know the house number just press Done and the midpoint of the street will be used as the selected location 6 3 1 4 How to select an intersection instead of a...

Page 83: ...by most GPS devices When you enter this page the coordinates of the current GPS position or the selected map point Cursor if Lock to Position is inactive are shown at the top of the display The coordi...

Page 84: ...u can select your destination from the thousands of POIs included with NAVFLY Navigator or from the ones you have previously created This screen helps you find the one you are looking for POI items ar...

Page 85: ...OI subgroups highlight one of the POI groups by tapping or using the direction buttons then press Enter or tap it again to see the list of subgroups Using the same action you can move deeper into subg...

Page 86: ...the Next button in the bottom right corner to turn the page if you cannot see the desired place on the first page of the list 6 3 5 Find one of the Favorites Home Work If you have already set up your...

Reviews: