JR, BM
09/03/15
NTV-DOC 144
rB5
3 |
P a g e
Agreement
:
End user agrees to use this product in compliance with all State and Federal laws. NAV-TV Corp. would not be held liable for
misuse of its product. If you do not agree, please discontinue use immediately and return product to place of purchase. This product is
intended for off-road use and passenger entertainment only.
1.
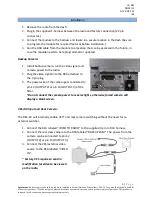
Remove the radio from the dash.
2.
Plug in the supplied T-harness between the radio and factory connection (22 pin
connector.)
3.
Connect the module to the harness and locate in a secure location in the dash (be sure
to program the module for required features before installation.)
4.
Run the USB cable from the module to a location that can be accessed in the future, in
case the module needs to be reprogrammed or updated.
Backup Camera:
1.
Install backup camera, run the video signal and
camera power to the radio.
2.
Plug the video signal into the RCA attached to
the 3 pin plug.
3.
The power wire of the camera gets connected to
pin 12 (OUTPUT 2) or pin 13 (OUTPUT 3) of the
filter.
*Do not connect the camera power to reverse lights, otherwise forced camera will
display a blank screen.
VES/AV Input and Rear Camera:
The REC-AV will internally enable VES* and rear camera switching without the need for an
external switcher.
1.
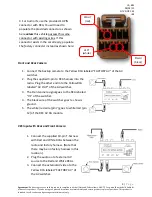
Connect the RCA labeled “VIDEO TO RADIO” to the supplied 3-pin to RCA harness.
2.
Connect the rear view camera to the RCA labeled “BACKUP CAM”. The power from the
camera can be connected to pin 12
(OUTPUT 2) or pin 13 (OUTPUT 3).
3.
Connect the VES/external video
source to the RCA labeled “VIDEO
IN”.
* Factory VES requires a send in
modification for video to be viewed
on the radio
.
Installation


