XR12 Installation Manual
Other considerations
Page 10-2
Issue 3.0 2009-07-15
Installing an external RF drive source
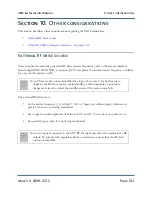
1. If the RF drive for one or both exciters is to be applied from an external source, connect its
wiring as follows:
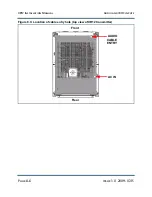
– Route RF drive coaxial cable through a cable entry hole in the cabinet and through the
ferrite toroid, to the vicinity of the remote interface PWB.
– Cut the RF drive coaxial cable to length, terminate it with a coaxial BNC connector and
connect it to the remote interface PWB’s EXT RF connector (J6).
2. Configure either (or both) exciter RF synthesizer(s) to operate on Ext RF drive by setting the
E4 jumper(s) to 1-2.
External 10 MHz frequency reference
You can apply an externally generated 10 MHz signal (such as a GPS clock signal) for use as the
reference frequency for the RF drive (carrier frequency) to the 10 MHz REFERENCE INPUT BNC
connector J2 on each RF synthesizer PWB.
1. The external 10 MHz frequency reference (one for each RF synthesizer PWB) must:
– remain stable at 10 MHz within ± 20 Hz
– have a peak-to-peak amplitude of between 2.2 V and 8.0 V (sine wave or square wave)
– be spectrally pure, since spurs may pass through to the transmitter output.
2. Configure each RF synthesizer PWB by setting E2 to 1-2 and E1 to 1-2.
Summary of Contents for XR12
Page 2: ......
Page 4: ......
Page 16: ...XR12 Installation Manual Page xvi Issue 3 0 2009 07 15...
Page 22: ...XR12 Installation Manual Unpacking and positioning Page 2 4 Issue 3 0 2009 07 15...
Page 26: ...XR12 Installation Manual Installing the power transformer Page 3 4 Issue 3 0 2009 07 15...
Page 36: ...XR12 Installation Manual Installing the RF connector Page 6 6 Issue 3 0 2009 07 15...
Page 48: ...XR12 Installation Manual Adjusting the spark gap Page 7 12 Issue 3 0 2009 07 15...
Page 78: ...XR12 Installation Manual Parts and tools Page 12 4 Issue 3 0 2009 07 15...
Page 91: ......

