NI PXIe-1086 Getting Started Guide
|
© National Instruments
|
9
Step 3: Install Modules
Note
Refer to your module user manual for specific instructions and warnings.
1.
Power off the chassis.
2.
Inspect the slot pins on the chassis backplane for any bending or damage prior to
installation. Do not install a module if the backplane is damaged.
3.
To prevent damage to the chassis, ensure that you are installing the module in the correct
type of slot. Refer to the
section for the slot descriptions.
4.
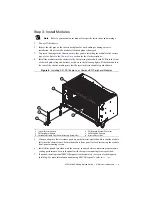
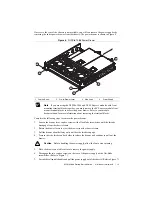
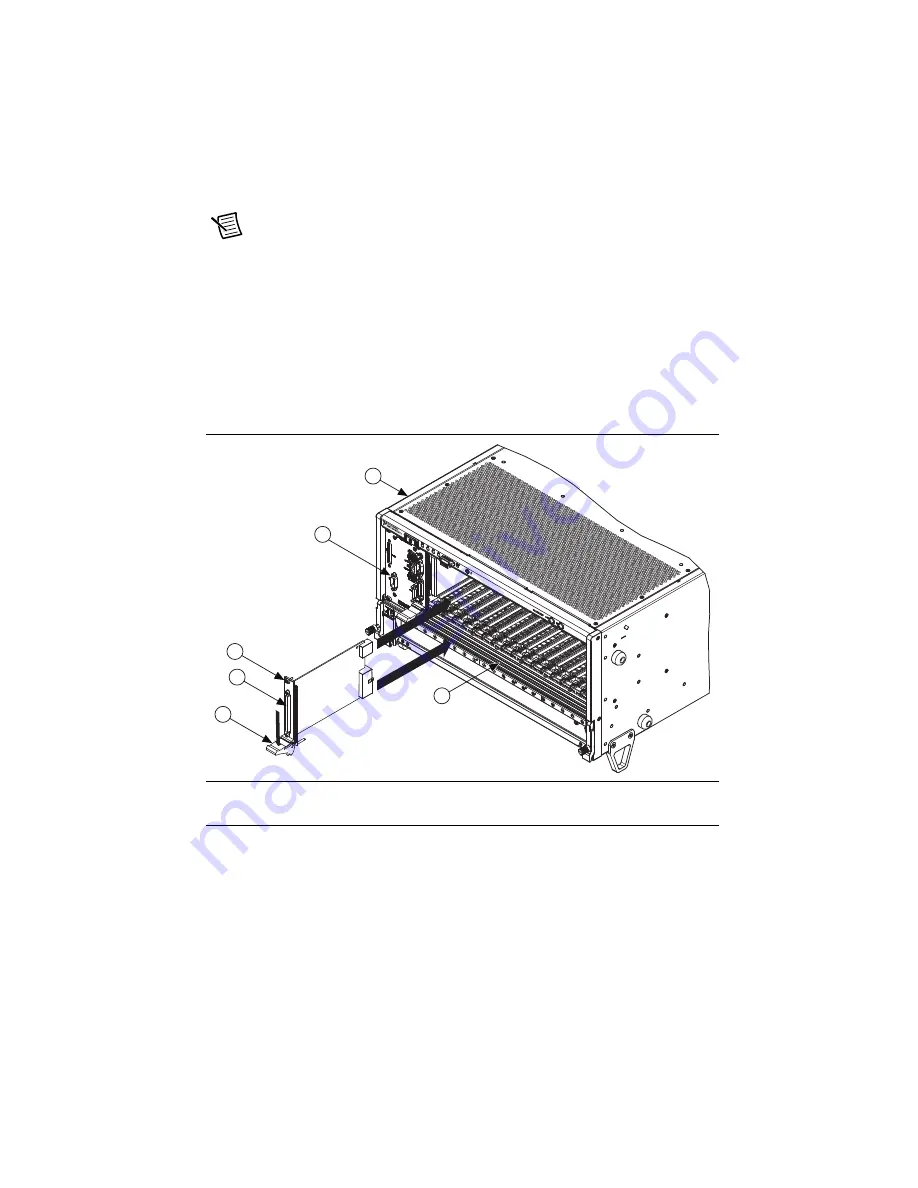
Install the module into the chassis slot by first placing the module card PCB into the front
of the card guides (top and bottom), as shown in the following figure. Slide the module to
the rear of the chassis, making sure that the injector/ejector handle is pushed down.
Figure 6.
Installing PXI, PXI Express, or CompactPCI Peripheral Modules
5.
When you begin to feel resistance, push up on the injector/ejector handle to seat the module
fully into the chassis frame. Secure the module front panel to the chassis using the module
front-panel mounting screws.
6.
Install filler panels (provided with the chassis) in unused slots to maintain proper module
cooling performance. Secure the panels with the captive mounting screws provided.
7.
If needed, install optional EMC filler panels (sold separately) for extra electromagnetic
shielding. For more information about using EMC filler panels, refer to
ni.com
.
1
Injector/Ejector Handle
2
PXI Peripheral Module
3
Peripheral Module Front Panel Mounting Screws (2x)
4
PXI Express System Controller
5
NI PXIe-1086 Chassis
6
Injector/Ejector Rail
3
2
1
5
4
6
NI
PX
Ie-
108
6


