5.1 Manual setup of a napp-it storage appliance with DHCP
Download the OmniOS or Solaris installer (ISO dvd or USB installer), boot the installer and install the OS.
Select UTC timezone, with bloody versions keep all defaults incl keyboard
After OS setup, your need to configure your network either with DHCP (5.1) or manually (5.2).
5.1.1 Initial setup of the napp-it appliance with DHCP
- boot OmniOS and login as root (no password)
- list available network adapters with their linkname (ex e1000g0):
dladm show-link
- create an ip interface based on the linkname
ipadm create-if e1000g0
- enable DHCP (requires a DHCP server)
ipadm create-addr -T dhcp e1000g0/dhcp
- add nameserver
echo ‘nameserver 8.8.8.8‘ >> /etc/resolv.conf
- use DNS name resolution (copy over DNS template)
cp /etc/nsswitch.dns /etc/nsswitch.conf
- install napp-it online (default/ free version)
wget -O - www.napp-it.org/nappit | perl
- reboot (or set current bootenvironment as default)
reboot
- set a root password (this password is valid for Unix shell logins and SMB connects)
passwd root
optional: check current network settings
ifconfig -a
optional: If something happens (typo error), delete interface and retry
ipadm delete-if e1000g0
optional for ESXi: pkg install open-vm-tools, pkg install vmxnet3s
export template with dhcp, without pass-through devices or cd isos
optional with newest OmniOS: svcadm disable sendmail and sendmail-client
(https://blogs.oracle.com/souvik/entry/my_unqualified_host_name_sleeping)
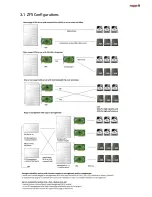
Summary of Contents for ZFS Storage
Page 8: ...3 1 ZFS Configurations...


