background image

3

Usage

1. Please install the fixture on the light stand, then adjust the fixture to the desired position.

2. Please switch off the power then connect to AC 100-240V power.

3. Press the power switch to turn on the fixture.

4. Rotate the "Dimmer knob" to adjust the brightness.

5. Please turn off the fixture and unplug the power cord when stop using the light.

Security Warning Info

1. Please open the package to check if it is damaged from transportation after receiving the light. In case of damage 

    caused by transportation, please do not use this light and contact the dealer as soon as possible.

2. Do not use a power cord if damaged insulation. Do not unplug hard or drag the power cord directly.

3. Make sure that the power supply voltage used matches the voltage specified by the light before installation.

4. When not using or cleaning the light, please turn it off.

5. Keep the light safely stored and away from children.

Notice

1. Before using, please read the instruction sheet carefully and then install the product according to the instruction sheet.

2. The product should be operated within the normal voltage.

3. Pull insert plug, please do not use too much force to pull connection. And do not touch the connection by wet hand.                                                   

4. Please keep this product in dry and ventilated place, to avoid the circuit get wet, and cause short circuit.

5. When stop using, please turn off the power to preserve the life of the LEDs.

Summary of Contents for Compac 40

Page 1: ...Guangdong NanGuang Photo Video Systems Co Ltd USER MANUAL Compac 40 LED Studio Light ...

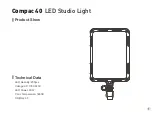
Page 2: ...1 Compac 40 LED Studio Light Technical Data LED Quantity 200pcs Voltage AC 100V 240V LED Power 40W Color Temperature 5600K CRI Ra 95 Product Show ...

Page 3: ...the light stand 3 Dimmer knob For adjusting the brightness 4 Fuse base For placing the fuse 5 AC power socket AC power input port 6 Angle fixing knob For adjusting the illumination direction of fixture Product Details 1 Power switch 2 Bracket fixing knob 3 Dimmer knob 5 AC power socket 6 Angle fixing knob 4 Fuse base ...

Page 4: ... a power cord if damaged insulation Do not unplug hard or drag the power cord directly 3 Make sure that the power supply voltage used matches the voltage specified by the light before installation 4 When not using or cleaning the light please turn it off 5 Keep the light safely stored and away from children Notice 1 Before using please read the instruction sheet carefully and then install the prod...

Page 5: ...ion 2 Please check whether the connection between power cord plug and fixture is loose 3 Pull out the fuse base to check whether the fuse has disconnected 1 Please check whether the voltage value is within specified parameters 2 Check if there is any high temperature object near the light that could cause the operating environment temperature too high Diagnosis Troubleshooting List If the failure ...

Page 6: ...www nanlite com 86 754 85751187 service nanlite com 86 754 85300887 Zhanglin 324 Dongli Chenghai Shantou Guangdong China Version V1 2019 10 22 ...

Reviews: