background image

1. Rackmounting the Receiver

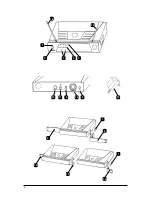
There are two options available for rackmounting the Encore II receiver: 

singly or side‑by‑side with another Encore Series receiver. 

a. 

Single mounting:

 Remove the receiver 

SIDE MOUNT CLIP (1)

 from each side of 

the receiver (as shown) and slide in the optional 

ERM-12 RACK EARS (9)

b. 

Side-by-side double mounting:

 After removing the 

SIDE MOUNT CLIPS (1)

 from 

both Encore receivers, join the two receivers with the 

EJC-2 JOINING CLIP (10) 

and attach the 

ERM-22 RACK EARS (12)

 as shown.


(Note: Do not mount the receiver in a rack directly above an amplifier or 

other source of high heat — this could degrade the performance of the 

Encore I. Always ensure adequate airflow and heat dissipation in any rack 

configuration.) 

2. Powering the Receiver

Plug the 

12V AC/DC ADAPTER (15)

 provided into the 

DC INPUT JACK (11)

 on 

the back of the receiver. Then plug the power supply into an AC outlet. 

(Note: Any 12V DC source with 400mA capability can also be used.) 

Press the 

POWER SWITCH (8)

 once to turn on the receiver. The 

POWER ON LED (7)


will now light and the receiver is operational.

3. Antennas

The Encore II receiver is supplied with 

TELESCOPIC ANTENNAS (16). 

These should  be 

extended fully to obtain maximum range.  Optimal antenna position is 45 degrees 

from the receiver (at 90 degrees from each other). For maximum range, it is always 

best to maintain a line of sight (no obstructions) between the receiver antennas and 

the transmitter at all times whenever possible.

4. Mute (Squelch) Adjustment

In normal operation, the 

MUTE CONTROL (2)

 should be set fully counterclockwise to 

the factory preset minimum RF level.  However, in areas of high RF activity, the mute 

(or squelch, as it is sometimes called) may need to be adjusted to compensate for the 

adverse conditions in a particular location.  If, with the transmitter off, the receiver’s 

A and/or B 

DIVERSITY LED INDICATORS (3) 

and/or one or more LEDs of the 

5 LED RF 

LEVEL DISPLAY (4) 

 flicker or stay on, the squelch control should be turned clockwise 

until the LEDs extinguish.  When the squelch is properly adjusted, the A and/or B 

LEDs or the 

RF LEVEL LED

 displays will only light when the system transmitter is turned 

on.  Turning the squelch control too far clockwise will reduce the range, but yield a 

quieter mute (squelch) function. During operation, especially at ranges greater than 

75 feet, one or the other of the A or B LEDs may extinguish briefly. This is normal—

the unit’s DigiTRU Diversity

 reception ensures that the received audio will not be 

interrupted. When both the A/B DIVERSITY LEDs and the 5 LED RF LEVEL display 

extinguish, the transmitter is out of range for that given location, and the user should 

move closer to the receiver to re‑establish the radio link.

4

ENCORE II RECEIVER

Summary of Contents for DigiTRU Diversity ENCORE II

Page 1: ...VHF Wireless Microphone System DigiTRU Diversity...

Page 2: ...crophone system we know you will be very pleased with its performance and features The Encore II is loaded with top professional operating features and is the best performance and price value availabl...

Page 3: ...rnally powered by AC DC power adapter Unique snap out panel locking tabs for single receiver or dual receiver side by side optional rack mounting WHT HANDHELD MIC TRANSMITTER Features the Nady DM 10D...

Page 4: ...r at 90 degrees from each other For maximum range it is always best to maintain a line of sight no obstructions between the receiver antennas and the transmitter at all times whenever possible 4 Mute...

Page 5: ...ting is roughly equivalent to a direct instrument cord connection Turning the volume up to maximum will provide 4dB gain over a cord b Microphone Connection using the WLT transmitter with either a hea...

Page 6: ...AF RF A B POWER 12 15V DC INPUT VOLUME BALANCED OUT UNBALANCED OUT MUTE 6 4 5 16 16 8 3 9 12 12 10 9 1 1 14 2 15 13 11 6 7...

Page 7: ...TY LED INDICATORS 3 and most or all of the RF LEVEL DISPLAY LEDs 4 on the Encore II receiver should now be lit indicating a received signal from the transmitter When ready to speak slide the transmitt...

Page 8: ...8 21 20 18 19 17...

Page 9: ...e lit indicating a received signal from the transmitter When ready to speak slide the transmitter switch to the ON position and adjust the volume of the receiver as per the Audio Output Microphone Con...

Page 10: ...10 OFF STANDBY ON BAT LOW HI MIC Opening Battery Compartment 27 22 23 26 28 29 24 22 25...

Page 11: ...nel of the WGT Adjust the gain by turning the control with a small slot head screwdriver It is recommended that this control be turned to maximum gain However for ultra high gain instrument sources su...

Page 12: ...12 Opening Battery Compartment 32 30 31 33 34 30 35...

Page 13: ...1 4 4 x 19 x 20 7 cm Weight 1 6 lbs 73 kg Power Requirements 12V 400mA nominal AC DC adapter supplied Antenna 11 2 28 5 cm single telescopic TRANSMITTERS Audio Inputs WHT Nady DM 10D neodymium dynamic...

Page 14: ...out of warranty please enclose a cashier s check or money order or pay by credit card per instructions by the Nady Service Department Ship your unit prepaid to Nady Systems Service Department 6701 Sh...

Page 15: ...med by Nady will automatically void this warranty 2 Items not covered physical damage resulting from improper handling of the unit in transit from the factory by the shipper Nady Systems is not respon...

Page 16: ...Science Canada Operation is subject to the following two conditions 1 this device may not cause harmful interference and 2 this device must accept any interference received including interference that...

Reviews: