background image

As from: 02.05.2006

Murrplastik Systemtechnik - ACS Werner Tubach

26

8902864602

MP Engraving unit

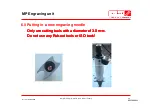
6.0 Putting in a new engraving needle

Only

Only

Only

Only use

use

use

use cutting

cutting

cutting

cutting tools

tools

tools

tools with

with

with

with a 

a diameter

diameter

diameter

diameter of 3.0 mm.

of 3.0 mm.

of 3.0 mm.

of 3.0 mm.

Do 

Do 

Do 

Do not

not

not

not use

use

use

use any

any

any

any Rub

Rub

Rub

Rub----out

out

out

out tools

tools

tools

tools or

or

or

or ISO 

ISO 

ISO 

ISO tools

tools

tools

tools!!!!

Summary of Contents for MVPS G3 G

Page 1: ...8902864602 Murrplastik Engraving unit MVPS G3 G Installation Adjustment Operation...

Page 2: ...ng the plotter s penholder unit Attaching the engraving head Securing the engraving head Attaching the counter bearing to the engraving head Arranging the controller VEC and vacuum cleaner VC Connecti...

Page 3: ...ting on other plotter types is not possible The engraving unit is primarily designed for the engraving of Duomatt and scoring of aluminium Plotter pens must not be in the pen depots if the new base pl...

Page 4: ...ter bearing for engraving head Engraving spindle connecting cable Vacuum hose Engraving head cover Controller VEC Cable VEC to plotter VEC power supply cable 2 0 Parts list Vacuum cleaner VC cable Hol...

Page 5: ...Engraving unit 2 1 Scope of delivery Engraving spindle with needle and engraving head Counter bearing engraving head Securing device engraving head Cover Connecting cable VEC spindle Connecting cable...

Page 6: ...stemtechnik ACS Werner Tubach 6 8902864602 MP Engraving unit 2 1 Scope of delivery Calibration block Holder support arm Clamping piece Support arm Vacuum Engraver Controller VEC Vacuum Cleaner VC Moun...

Page 7: ...ower input 120 W Tongs Stern diameter 3 mm Gripping mechanism Top Concentricity 0 03 mm Motor type Brushless three phase asynchronous motor Case Aluminium Mounting diameter 25 mm Ball bearing type Ste...

Page 8: ...el Version of November 2005 MVPS G3 T mvps g3 t 107a cas MVPS G3 mvps g3 107a cas MVPS G3 XXL mvps g3 xxl 107a cas Using Using Using Using the the the the engraving engraving engraving engraving unit...

Page 9: ...graving unit 3 0 Assembly and connection Steps to mount the engraving unit 3 1 Demounting of the plotter s penholder unit Remove the red cover cap and pull out the red locking pin Carefully draw off t...

Page 10: ...0 8902864602 MP Engraving unit 3 0 Assembly and connection 3 2 Mounting the support arm holder and support arm Push the holder underneath the baseplate and into the side plate as shown below Put the s...

Page 11: ...erner Tubach 11 8902864602 MP Engraving unit 3 0 Assembly and connection 3 3 Attaching the engraving head including spindle Apply the engraving head in both bearings of the holder Carefully push down...

Page 12: ...emtechnik ACS Werner Tubach 12 8902864602 MP Engraving unit 3 0 Assembly and connection 3 4 Securing the engraving head The small red locking bar must be applied as shown to make sure the engraving he...

Page 13: ...ach 13 8902864602 MP Engraving unit 3 0 Assembly and connection 3 5 Mounting the counter bearing of the engraving head At first the counter bearing is screwed on loosely Later when the horizontal alig...

Page 14: ...n 3 6 Aligning the engraving unit Place the calibration block on the black pins on the plotter Pic 1 Slide the plotter arm with the engraving head towards the block until it stops firmly Pic 2 Align t...

Page 15: ...2006 Murrplastik Systemtechnik ACS Werner Tubach 15 8902864602 MP Graviereinheit 3 0 Assembly and connection 3 7 Positioning the controller and vacuum cleaner Place the devices sideways or behind the...

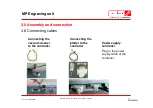
Page 16: ...er Tubach 16 8902864602 MP Engraving unit 3 0 Assembly and connection 3 8 Connecting cables Connecting the vacuum cleaner to the controller Connecting the plotter to the controller Power supply contro...

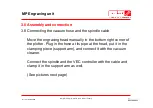
Page 17: ...um hose and the spindle cable Move the engraving head manually in the bottom right corner of the plotter Plug in the hose at its pipe at the head put it in the clamping piece support arm and connect i...

Page 18: ...As from 02 05 2006 Murrplastik Systemtechnik ACS Werner Tubach 18 8902864602 MP Engraving unit 3 0 Assembly and connection 3 8 Connecting the vacuum hose and the spindle cable...

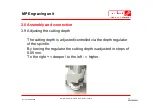
Page 19: ...02 MP Engraving unit 3 0 Assembly and connection 3 9 Adjusting the cutting depth The cutting depth is adjusted controlled via the depth regulator of the spindle By turning the regulator the cutting de...

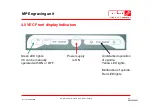
Page 20: ...Werner Tubach 20 8902864602 MP Engraving unit 4 0 VEC Front display indicators Power supply is ON Green LED lights VC can be manually operated with ON or OFF Undisturbed operation of spindle Yellow L...

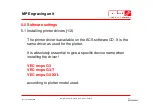
Page 21: ...e settings 5 1 Installing printer drivers 1 2 The printer driver is available on the ACS software CD It is the same driver as used for the plotter It is absolutely essential to give a specific device...

Page 22: ...are settings 5 1 Installing printer drivers 2 2 Use the same media sizes as with the respective plotters 5 2 Calibration values x y Calibration values for x y are the same as specified for the respect...

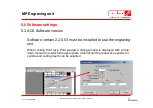
Page 23: ...re settings 5 3 ACS Software version Software version 2 2 0 53 must be installed to use the engraving unit When clicking Print resp Print preview a dialog window is displayed with a drop down menue fr...

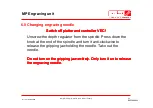
Page 24: ...Do Do Do Do not not not not turn on the turn on the turn on the turn on the gripping gripping gripping gripping jaw jaw jaw jaw entirely entirely entirely entirely Only Only Only Only turn turn turn...

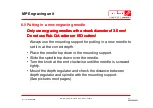
Page 25: ...mm Do Do Do Do not not not not use use use use Rub Rub Rub Rub Out Out Out Out cutters cutters cutters cutters or or or or ISO ISO ISO ISO cutters cutters cutters cutters Always use the mounting supp...

Page 26: ...Only use use use use cutting cutting cutting cutting tools tools tools tools with with with with a a a a diameter diameter diameter diameter of 3 0 mm of 3 0 mm of 3 0 mm of 3 0 mm Do Do Do Do not not...

Page 27: ...k ACS Werner Tubach 27 8902864602 MP Engraving unit 8 0 Setting zero position The depth regulator is set to zero position when there is a distance of 3 0 mm between depth regulator and spindle This ca...

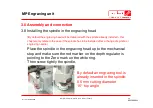
Page 28: ...e already installed this chapter only refers to the case if the spindle has to be installed after a change of spindle or engraving needle Place the spindle in the engraving head up to the mechanical s...

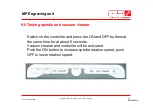
Page 29: ...raving unit 9 0 Testing spindle and vacuum cleaner Switch on the controller and press the ON and OFF buttons at the same time for at about 5 seconds Vacuum cleaner and controller will be activated Pus...

Page 30: ...Changing engraving head to plotter head plotter penstation does not react to data transferred from PC Serial connection cable from controller to plotter MUST be disconnected from plotter Cables not c...

Reviews: