Multi
Conne
ct
®
Con
duit™ S
tarter
Kit
For Lo
Ra
®
Tech
nolo
gy Get
ting
Started Gu
ide
MultiConnect Conduit Starter Kit for LoRa Technology
Part Number: 82102251L
Copyright
This publication may not be reproduced, in whole or in part, without the specific and express prior written permission signed by an executive officer of
Multi-Tech Systems, Inc. All rights reserved.
Copyright © 2016 by Multi-Tech Systems, Inc.
Multi-Tech Systems, Inc. makes no representations or warranties, whether express, implied or by estoppels, with respect to the content, information,
material and recommendations herein and specifically disclaims any implied warranties of merchantability, fitness for any particular purpose and nonin-
fringement. Multi-Tech Systems, Inc. reserves the right to revise this publication and to make changes from time to time in the content hereof without
obligation of Multi-Tech Systems, Inc. to notify any person or organization of such revisions or changes.
Trademarks and Registered Trademarks
MultiTech, and the MultiTech logo, and MultiConnect are registered trademarks and mDot and Conduit are a trademark of Multi-Tech Systems, Inc. All
other products and technologies are the trademarks or registered trademarks of their respective holders.
World Headquarters
Multi-Tech Systems, Inc.
2205 Woodale Drive, Mounds View, MN 55112
Phone: (800) 328-9717 or (763) 785-3500
Fax (763) 785-9874
MultiConnect
®
Conduit™ Starter Kit for LoRa Technology
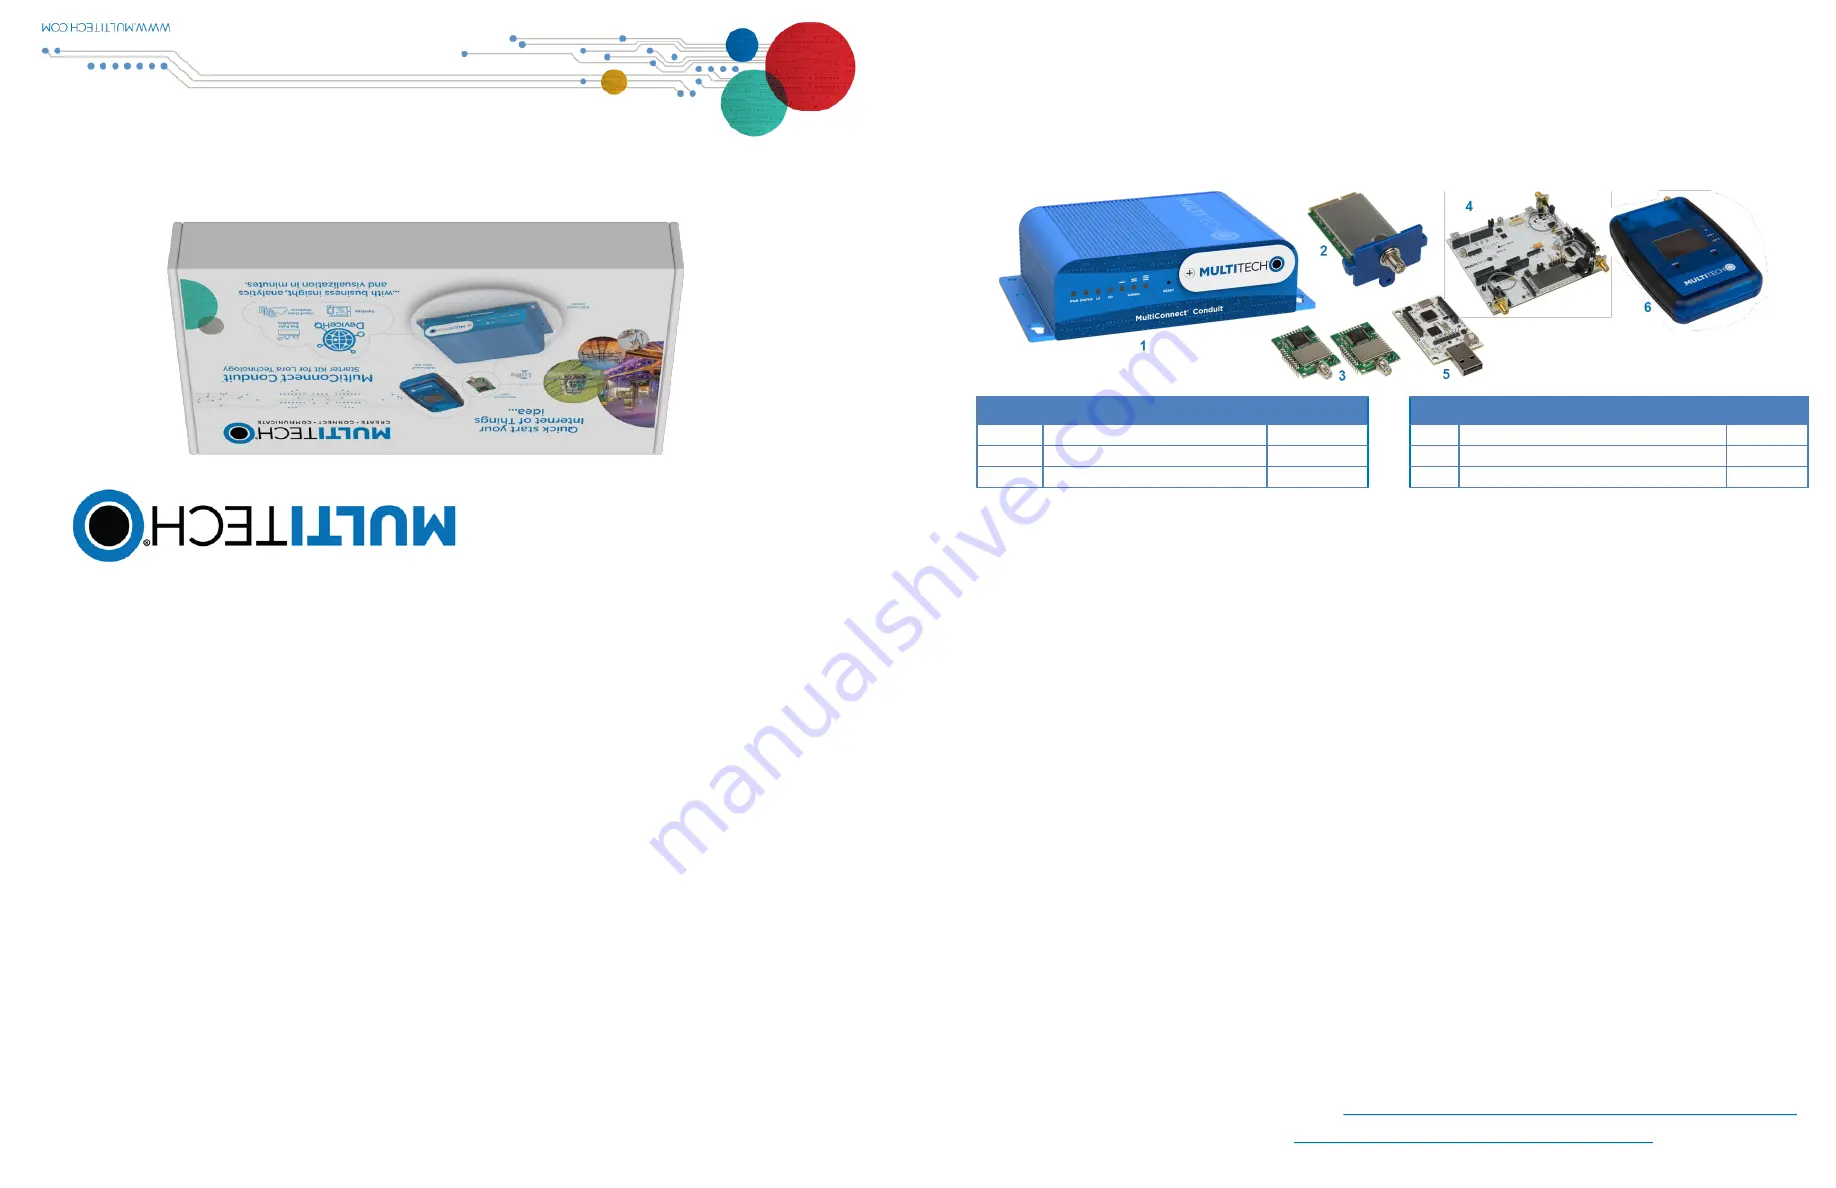
The MultiConnect Conduit Starter Kit for LoRa Technology provides everything needed to rapidly get your LoRa proof of
concept up, running and connected to the cloud – all in one box. The Starter Kit is designed to enable you to obtain sensor
information and display it in the cloud within minutes of opening the box.
Starter Kit Products
Notes:
The LoRa Accessory mCard is pre-installed in your Conduit.
Package contents for each device are listed in that device’s Quick Start.
Preparing the Conduit
The Conduit comes pre-configured with Node-RED flow to send data from the mDot Box to the IBM Bluemix site.
To get started with Conduit:
1.
Attach the power blades for your country to the power supply and connect the power supply to Conduit.
2.
Attach a LoRa antenna to the LoRa Accessory mCard installed in the Conduit.
3.
Plug in the Conduit to power it up.
4.
Use the Ethernet connector to connect the Conduit to the device with Internet access you will use to administer the
Conduit.
5.
Go to the AEP interface and log into the Conduit. To do this:
Item
Device
Quantity
Item
Device
Quantity
1
Conduit
1
4
mDot Universal Developer Kit
1
2
LoRa Accessory mCard
1
5
mDot Micro Developer Kit
1
3
mDot
2
6
mDot Box
1
6.
Use the Wizard to configure the following settings:
a.
Open an Internet browser and enter the device’s default address:
http://192.168.2.1
.
b.
Enter the default user name:
admin
.
c.
Enter the default password:
admin
.
d.
Click
Login
to start the First Time Setup Wizard. Allow up to 30 seconds for the wizard to load.
7.
Select
Save & Reboot
and wait for the status LED to begin blinking:
For more information on configuring the Conduit, go to:
http://www.multitech.net/developer/software/aep/getting-started-aep/
For help using DeviceHQ and Node-RED, go to
http://www.multitech.net/developer/software/devicehq/
Password
Date and time
PPP (Cellular models only)
IP Address and Network information (For non-cellular models, select WAN mode to set up Internet access.
)
WAN mode (Select static, if using a static IP, or DHCP Client, if your network has DHCP server functionality. If using
a static IP, enter the IP address, mask, and gateway.)


