


Recording
33
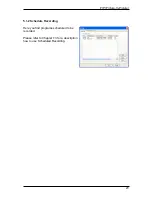
7.3 Schedule Recording
You can access Schedule Recording from
the Settings Menu as described in Chapter
5.1.2 and Chapter 5.2.4.
Here you can see a list of items scheduled
to record.
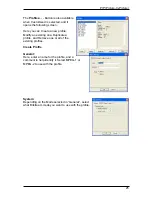
By clicking on the
Add
Button, you are able
to add a new scheduled recording, the
Delete
button cancels the highlighted
scheduled recording and the
Edit
button
lets you change the settings of a scheduled
recording.
The
Add
and
Edit
buttons open a second menu:
First, select the
Schedule Type
from the right side of the screen. Click “One time” if
this is a one-time only recording. To make a weekly recording, click on the days you
want the program to record on. Select the
Source
you want to record from, then the
Channel
. Select the
Date
if this is a one time recording. Enter the
Start Time
and
Duration
of the program you want to record. Finally, enter a
File Name
for the
recorded file – if this is a weekly recording, a number will be added to this name for
each recording. (Example: FileName01.mpg, FileName02.mpg, etc.)
Click on the
Add
button to finish scheduling the recording.
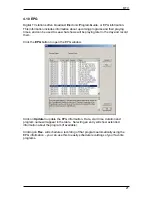
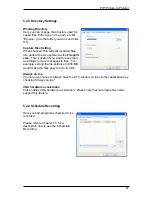
You can also schedule recordings on digital TV using EPG information. For more
details, refer to section 4.9.
Summary of Contents for TV@nywhere A/D
Page 1: ...TV nywhere A D User Manual ...
Page 2: ......
Page 6: ......
Page 43: ......
Page 44: ......