20
2
Installation
1.
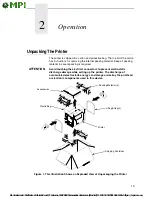
Place the shipping container upright on a flat, level surface.
2.
Open the box and remove the first layer of packing material along with
any lose items.
3.
Remove the accessories box and set it aside.
4.
Pull the printer out of the shipping container by using the two plastic
straps as handles.
5.
Remove the bands and plastic bag.
6.
Check that all components on the packing list are included.
Installation
The following sections will guide you through the printer installation process.
1.
Place the printer on a flat level surface that allows easy access to all sides
of the printer.
ATTENTION
Never operate the printer on its side or upside down.
2.
Set the printer power switch to O (Off).
IMPORTANT
In compliance with international safety standards, this printer has been
equipped with a three-pronged power cord. When inserted in a correctly
wired power outlet, the ground conductor will ensure that the printer
chassis is at ground (earth) potential. Do not use adapter plugs or
remove the grounding prong from the cable plug. If an extension cord is
required, ensure that a three-wire cable with a properly grounded plug is
used.
3.
Attach the AC power cord to the AC power receptacle in the back of the
printer.
4.
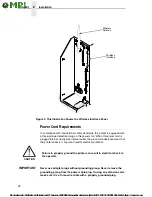
Attach the AC power cord to a grounded (three prong) electrical outlet of
the proper voltage. See “Power Cord Requirements” on page 22.
5.
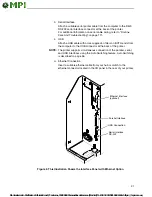
Attach Communication Interface:
a.
Parallel Interface
Attach a suitable parallel printer cable from the computer to the
Centronics/IEEE 1284 interface connector at the back of the printer.
Snap the bail locks to the Centronics connector to secure the
interface cable to the printer.
Failure to properly ground the printer may result in electric shock to
the operator.
CAUTION

