


ASTRO
®
XTS
™
4000
Digital Portable Radio,
Quick Reference Card
Product Safety and RF Exposure Compliance
ATTENTION!
This radio is restricted to occupational use only to satisfy FCC RF
energy exposure requirements. Before using this product, read the
RF energy awareness information and operating instructions in the
Product Safety and RF Exposure booklet enclosed with your radio
(Motorola Publication part number 68P81095C98) to ensure
compliance with RF energy exposure limits.
Radio On/Off
Zones/Channels
Receive/Transmit
Send Emergency Alarm
Send Emergency Call
Send Silent Emergency Alarm
Before using this product, read the operating instructions
for safe usage contained in the Product Safety and RF
Exposure booklet enclosed with your radio.
!
C a u t i o n
DEL
a/A/1
. , ?
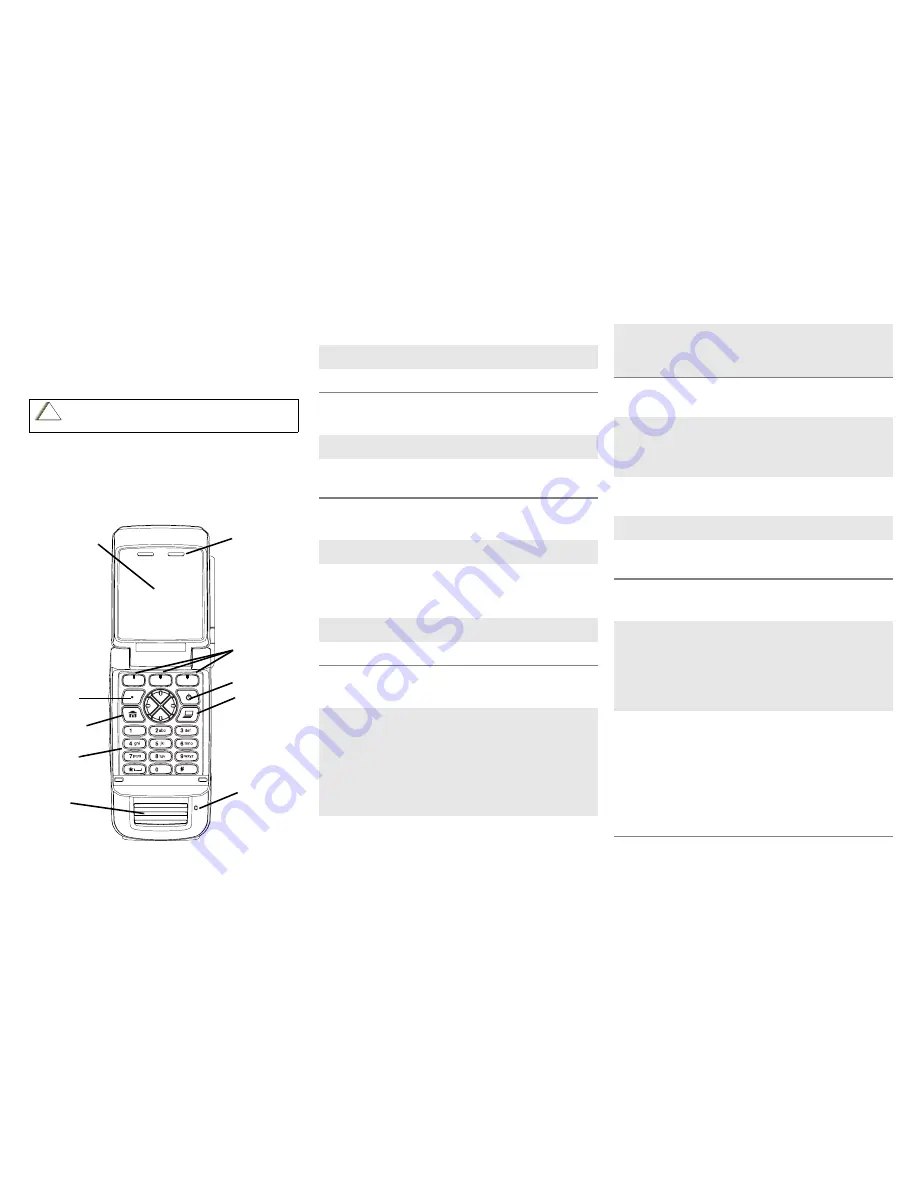
Internal Audio
Speaker
Power Button
Internal
Display
Data Button
Menu Select
Buttons
Keypad
Programmable
Button
Home
Button
Keypad
External
Audio
Speaker
Microphone
1
On -
Power
On/Off
button
2
Off -
Power
On/Off
button
1
Zone -
Menu entry
to select desired zone.
2
Channel -
Menu entry
to select desired
channel.
1
Radio on and select zone/channel.
2
Listen for a transmission.
- or, if preprogrammed -
Press
Monitor
button and listen for activity.
3
Adjust volume, if necessary.
4
Press
PTT
to transmit; release to receive.
Radio on and press
Emergency
button.
Display shows current zone/channel, and
Emergency
. You hear short, medium-pitched
tone.
Note:
To exit emergency at any time, press
and hold
Emergency
button.
When acknowledgment is received, you hear
four beeps; alarm ends; radio exits
emergency.
1
Radio on and press
Emergency
button.
Note:
To exit emergency at any time, press
and hold
Emergency
button.
2
Press and hold
PTT
. Announce your
emergency into the microphone.
3
Release
PTT
to end call.
4
Press and hold
Emergency
button to exit
emergency.
1
Radio on and press
Emergency
button.
Display does not change and you hear no
tone.
Note:
To exit emergency at any time, press
and hold
Emergency
button.
2
Silent emergency continues until you:
•
Press and hold
Emergency
button to exit
emergency state.
- or -
•
Press and release
PTT
to exit silent
emergency and enter regular emergency
(alarm, call, or alarm with call).


