background image

CONTENTS

SAFETY INSTRUCTIONS

Safety Instructions ..................................................

INSTALLATION

Product Description ................................................

Installation  ...........................................................

OPERATION

Quick Start .............................................................

Before each Drying ..................................................

Control Panel .........................................................

Option....................................................................

Drying Programmes Table ........................................

MAINTENANCE

Cleaning and Care

 .................................................

Trouble Shooting ....................................................

Technical


Specification .........................................

..........

Product Fiche.........................................................

...........

2

9
9

12
13
15
16
20

22
25
27
28

1

Summary of Contents for MPD-1039

Page 1: ...TUMBLE DRYER USER MANUAL ...

Page 2: ...INSTALLATION Product Description Installation OPERATION Quick Start Before each Drying Control Panel Option Drying Programmes Table MAINTENANCE Cleaning and Care Trouble Shooting Technical Specification Product Fiche 2 9 9 12 13 15 16 20 22 25 27 28 1 ...

Page 3: ...e this appliance only as described in this user manual This appliance is for indoor use only Any other use is deemed improper and may result in damage to property or even personal injury The manufacturer accepts no liability for damage caused by improper use Safety Instructions only be connected to a plug with a protective conductor that has been installed properly When connecting the appliance to...

Page 4: ...ied electrician The electrical safety of this tumble dryer can only be guaranteed when correctly earthed It is essential that this standard safety requirement is met If in any doubt please have the household wiring system tested by a qualified electrician The manufacturer cannot be held liable for the consequences of an inadequate earthing system e g electric shock Do not pull the power cord force...

Page 5: ... side to that of the tumble dryer in such a way that a full opening of the tumble dryer door is restricted Do not disassemble or install the dryer without any instruction or supervision Do not stack this dryer on washing machine without stacking kits If you want to stack this dryer on a washing machine please purchase the independent parts Installation shall be done by the manufacturer its service...

Page 6: ...losion Fire danger substances such as kerosene or alcohol Otherwise there may be explosion The appliance contains an environmentally friendly but flammable R290 refrigerant Keep away from open flame and other sources of ignition The tumble dryer is not to be used if industrial chemicals have been used for cleaning Do not dry unwashed items in the tumble dryer Items that have been soiled with subst...

Page 7: ...ecome hot enough to catch fire Piling stacking or storing oil affected items can prevent heat from escaping and so create a fire hazard Remove all objects from pockets such as lighters and matches If it is unavoidable that fabrics that contain vegetable or cooking oil or have been contaminated by hair care products be placed in a tumble dryer they should first be washed in hot water with extra det...

Page 8: ...y and understand the hazards involved Children shall not play with the appliance Cleaning and user maintenance shall not be done by children without supervision Children should be supervised to ensure that they do not play with the appliance Children of less than 3 years should be kept away unless continuously supervised Always close the door after use In this way you will avoid the danger of 1 Ch...

Page 9: ...ial Correct Disposal of this product This marking indicates that this product should not be disposed with other household wastes throughout the EU To prevent possible harm to the environment or human health from uncontrolled waste disposal recycle it responsibly to promote the sustainable reuse of material resources To return your used device please use the return and collection systems or contact...

Page 10: ...lter Water container Door Control panel Air inlet Base filter Maintenance cover Drum Top board Note The actual model you purchased might differ Please see the product you purchased in kind prevail Remove the drain hose from the housing drawer Put the hose holder in the washing basin or any other sink Installation Insert the drain hose and the external drainage hose into the connector Max 120cm 2 0...

Page 11: ...e condensed water is allowed to freeze in the pump and hoses Warning Children can become entangled in the packaging film or swallow small parts and s uffocate Do not allow children to play with the packaging The appliance must not be installed behind a lockable door a sliding door or a door with a hinge on the opposite side to that of the tumble dryer in such a way that a full opening of the tumbl...

Page 12: ...r Supply Connection 4 To keep vibration and noise within minimum level when the dryer is in use it must be placed on a firm and level surface 5 The feet must never be removed 1 Make sure that the voltage of the power supply is the same as the electric specification 2 Do not connect the dryer with the power connection board a universal plug or socket do not use multi plug adapters and extension cab...

Page 13: ...ner pour out condensate water clean the filter power off Quick Start Before using make sure the tumble dryer is installed correctly Note 1 plug in 2 load 3 close the door start on select program select function or default If the socket with a switch is used please press the switch to turn off the power directly Note Before Drying ...

Page 14: ...efore drying please close zips hooks and eyelets button tie fabric belts etc 4 Remove all objects from pockets such as lighters and matches 5 Sew in or remove underwiring from bras 6 Close duvet covers and pillow cases to prevent small items from being rolled up inside them 7 Leave jackets open and undo any long zips so that textiles dry evenly 8 Do not over dry the clothes because over dried clot...

Page 15: ...80g cotton Work clothes 1120g Underwear 70g cotton Pyjamas 200g Socks 50g mixed weave Shirt 300g cotton Only dry laundry suitable for tumble drying Regard the laundry care labels Suitable for tumble drying Normal drying process Drying in the tumbler is possible under normal load and temperature 80 Mild drying process Caution is appropriate when tumble drying Select mild process with reduced therma...

Page 16: ...e Press 1 2 Option These buttons are used for setting additional functions 3 Display The display shows the setting estimated program time remaining and status messages of your dryer 4 Programmes Different drying cycles can be selected according to the users need and the type of laundry to be dried 5 1 Dry Level Lamp 2 3 5 4 ...

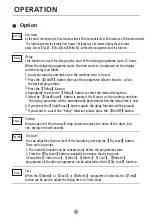
Page 17: ...utton Delay Dry Level You can adjust the dryness level of the laundry by pressing the Dry Level button There are four grades 1 The intensity function can be activated only before the programme starts 2 Press the Dry Level button repeatedly to increase the drying grade 3 Except the Cotton Iron Wool Warm Cool Refresh programme all the other programmes can be adjusted with the Dry Level function Dry ...

Page 18: ...w Child lock icon and all button are deactivated except On Off button 4 To deactivate the child lock function the Silence and Dry Level buttons shall be pressed at the same time for 3 seconds Child Lock After selecting the program you can choose the Hygiene function according to your needs Press Hygiene to select this function Press it again to cancel After selecting the Hygiene function the cloth...

Page 19: ...d that the products are dried according to the instructions on the garment label and those issued by the manufacturer of this tumble dryer M1716 by Display Delay Child lock Remaining Time indicator Error message Cycle phase status Clean filters warning Empty water container warning Dry Level Lamp Signal Anti Crease My Cycle Silence Hygiene Time ...

Page 20: ... in the display will light up and the remaining programme time will be displayed Programmes 1 The drum will stop rotating after the programme ends The display will show 0 00 2 Deal with the problems according to Trouble Shooting section if there is an unexpected stop during the drying procedure or the dryer shows an Error Code Refer to page 27 also the cycle phase LED showing End and related LED w...

Page 21: ...n the washing machine To dry bed linen bed sheets or other large items For Place clothes loosely in the dryer Once dried remove quickly and hang it on a clothes hanger easy care laundry such as shirts and blouses equipped with anti crease functionality to minimize the ironing effort Define and save your favourite programme To dry individual items or complete the drying process of multi layer fabri...

Page 22: ...the clothes are still damp after programme finishes All data are measured in accordance with EN 61121 The actual consumption may differ from the values given in the table depending on the amount of the laundry type of fabric residual moisture and any additional functions selected 1 1 1 1 Model Program capacity Spin Speed Residual Humidity Drying Time Energy Consumption MPD 1039 Cotton Standard Cot...

Page 23: ...ycle The base filter need to be cleaned after each fifth drying programme 1 Open the door 2 Take out the filter 3 Open the filter and remove the fluff on the filter You can clean it in water 4 Dry the filter thoroughly before installing it back door running door Take notice of the correct orientation before to insert the door filter Note Door Filter Empty the water container after each use Once th...

Page 24: ...n the filter clean it in water Dry the filter thoroughly before installing it back 4 Clean the rubber sealing both at the filter and handle 5 Re insert the filter 6 Lock three locking levers and make sure that the levers are in correct lock position 7 Close the cover until there is a click sound As necessary approx once every 6 months remove the fluff from the heat exchanger using a vacuum cleaner...

Page 25: ...rs or all purpose cleaners These could damage plastic surfaces and other parts Please wear gloves when cleaning Prepare a wet cloth damped by clean water Clean the door especially the inside window Clean the sealing around the door opening Clean the humidity sensor inside the drum Take out all the filters clean the sealing and air flow openings Before starting the dryer dry all parts with a soft c...

Page 26: ...l won t be needed The following guide may help you to find the reason for a malfunction and correct it Note Before you call the service please check if you have dealt with the problems yourself consulting the user instructions E32 E33 Display Reason Solutions Humidity sensor error Temperature sensor error Please contact your local problem occurs service center if the E64 BLDC motor communication e...

Page 27: ... lint filter Dryer does not start Turn on the tumble dryer Check the the door is closed Check the programme is set Press the Start Pause button Connect the tumble dryer to the mains Degree of dryness was reached or drying time too long not There are humming noises The compressor is operating These noises are quite normal and do not indicate a fault The dryer switches off at the end of the programm...

Page 28: ...e able to operate properly There is a risk of damage if the condensate water is allowed to freeze in the pump hoses and or condensate water container Technical Specifications Note Contains fluorinated greenhouse gases covered by the Kyoto Protocol Hermetically sealed Rated capacity Rated frequency Dimension L W H Rated input power Rated voltage Weight of product Model Parameter Ambient temperature...

Page 29: ...gy consumption of the standard cotton programme Weighted energy consumption of the standard cotton programme at full and partial load Energy consumption of the standard cotton programme at full load Energy consumption of the standard cotton programme at partial load Power consumption of the off mode Po Power consumption of the left on mode Pl Duration of the left on mode Programme time of the stan...

Page 30: ...NOTES ...

Page 31: ...NOTES ...

Page 32: ......

Reviews: